In January of 2021, I published a page showing the benefits of DxO's DeepPRIME technology that combines raw conversion and noise reduction into a single step. The feature was incorporated into DxO's flagship product PhotoLab 4. In the fall of 2022, DxO released PhotoLab 6 with an updated version of DeepPRIME called DeepPRIME XD (which stands for eXtra Detail). It seemed only natural to take a look and see how DeepPRIME had evolved.
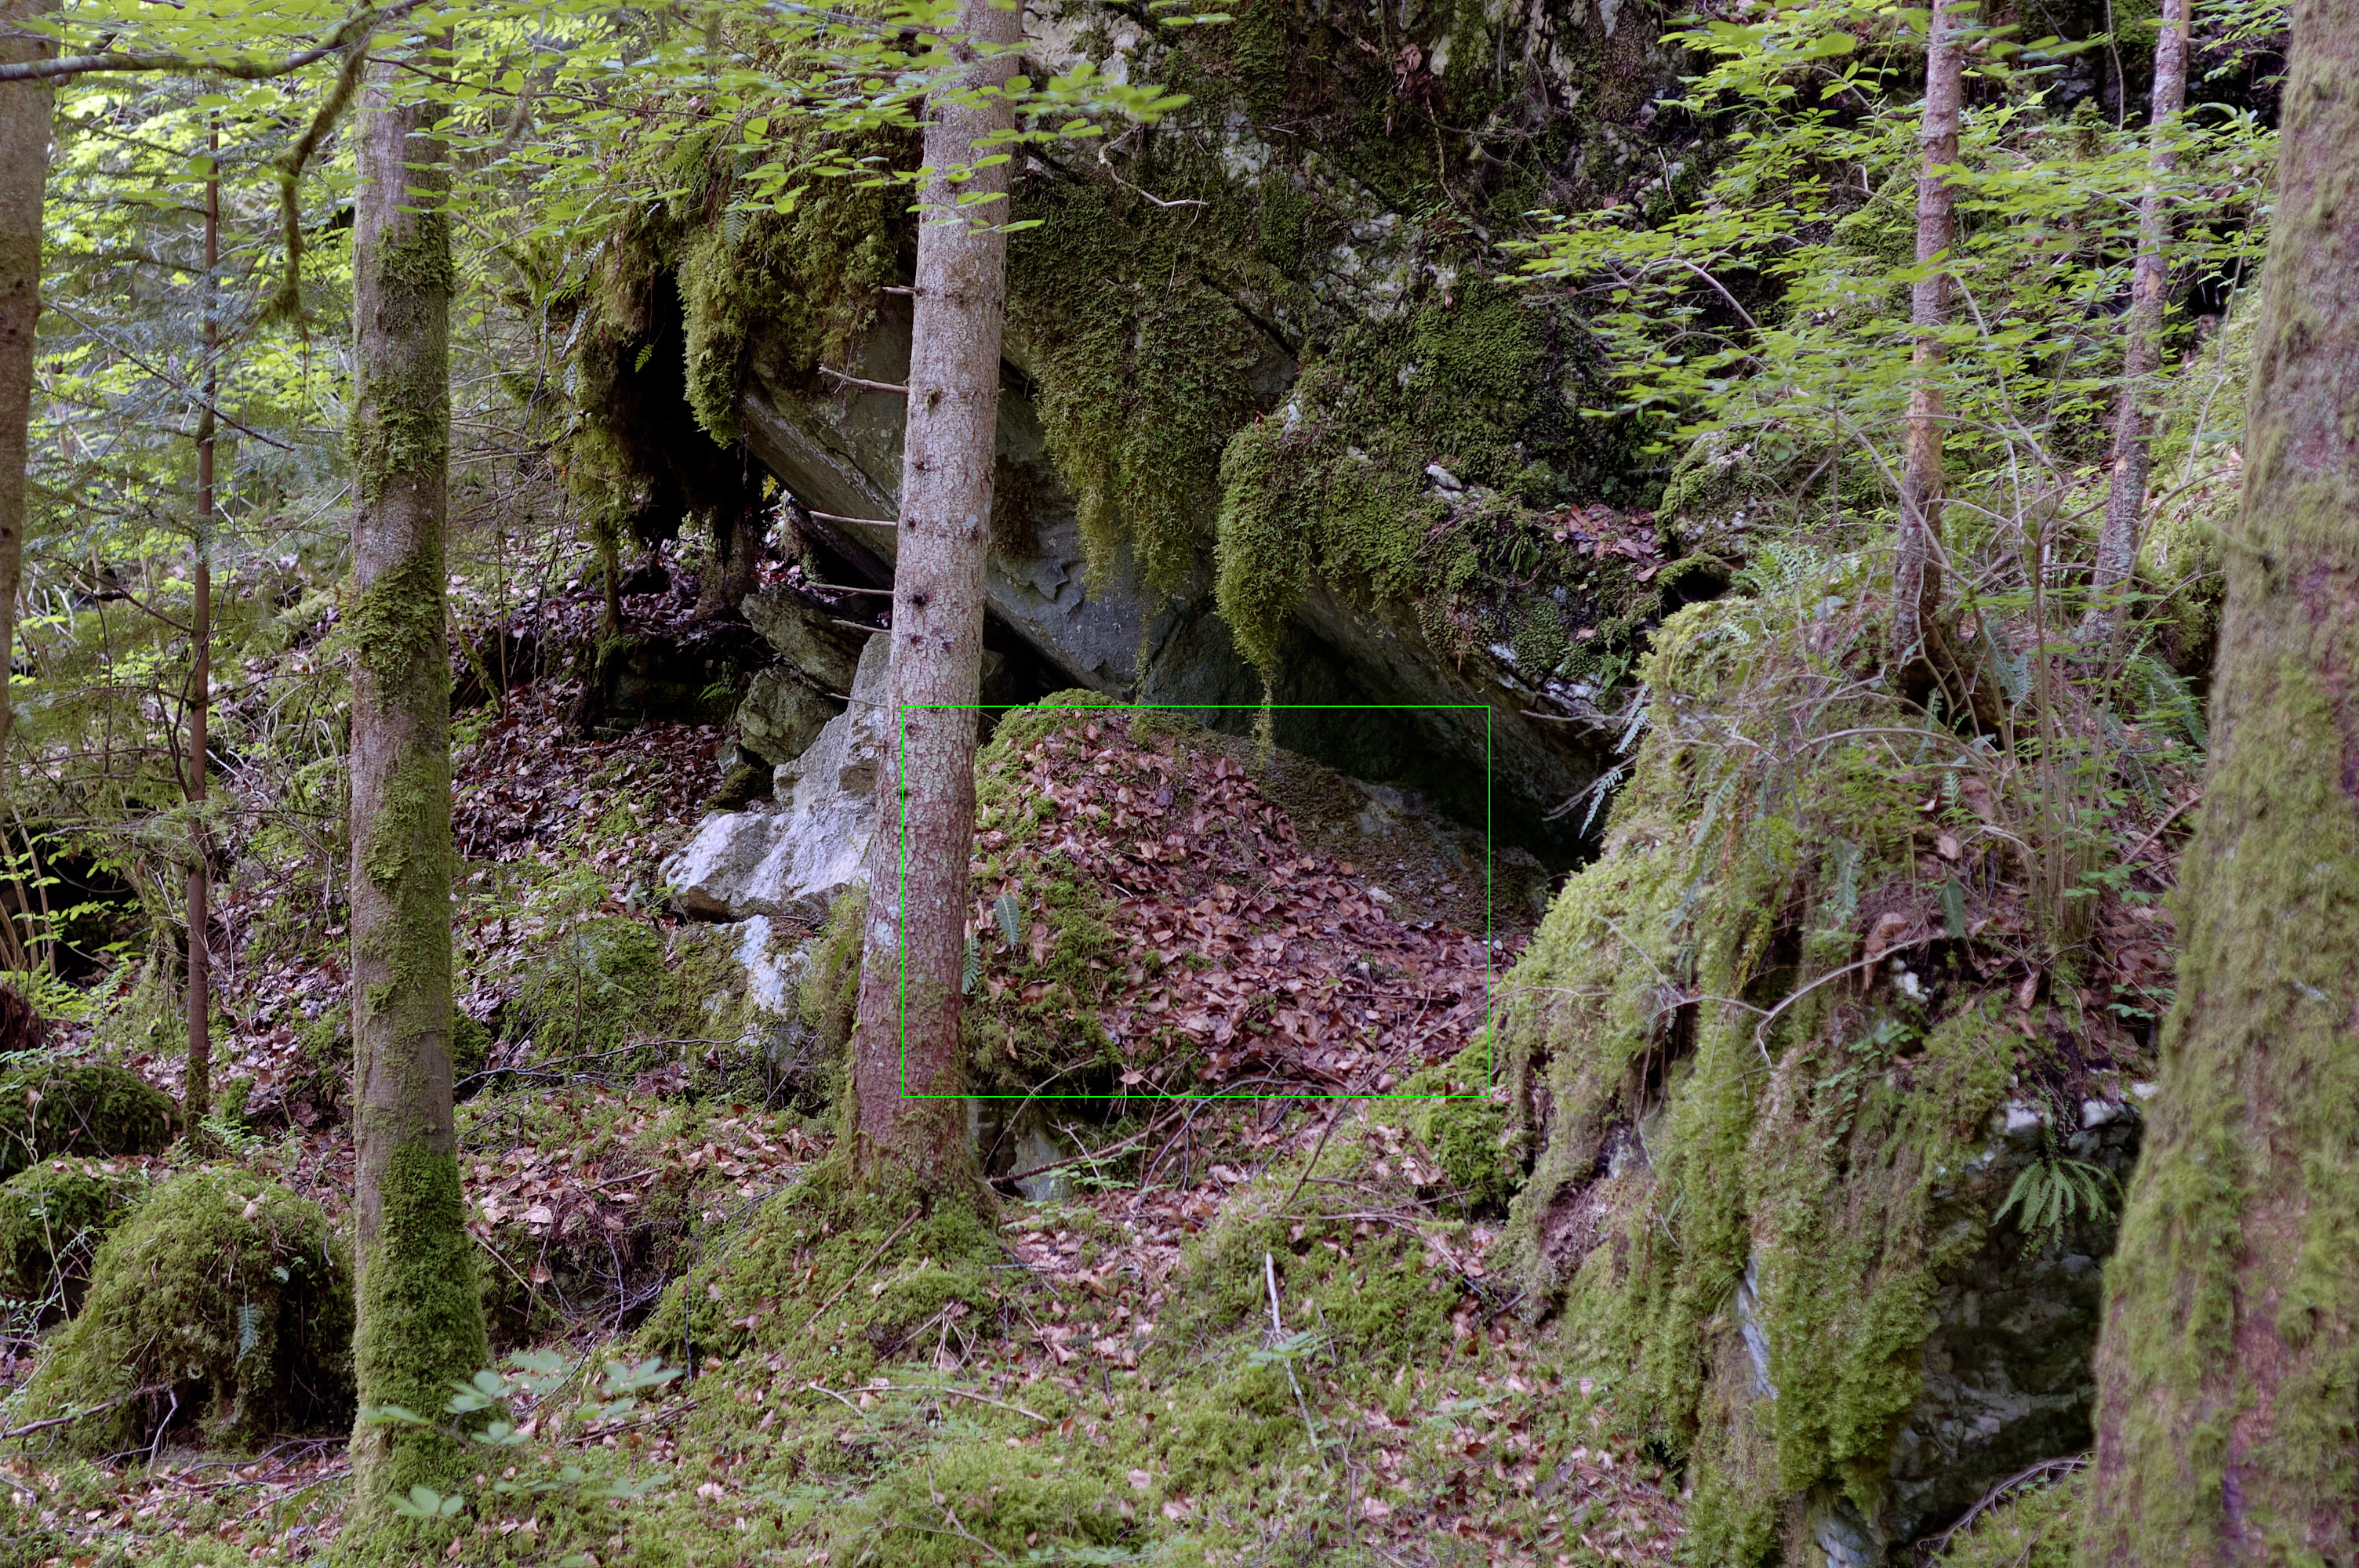
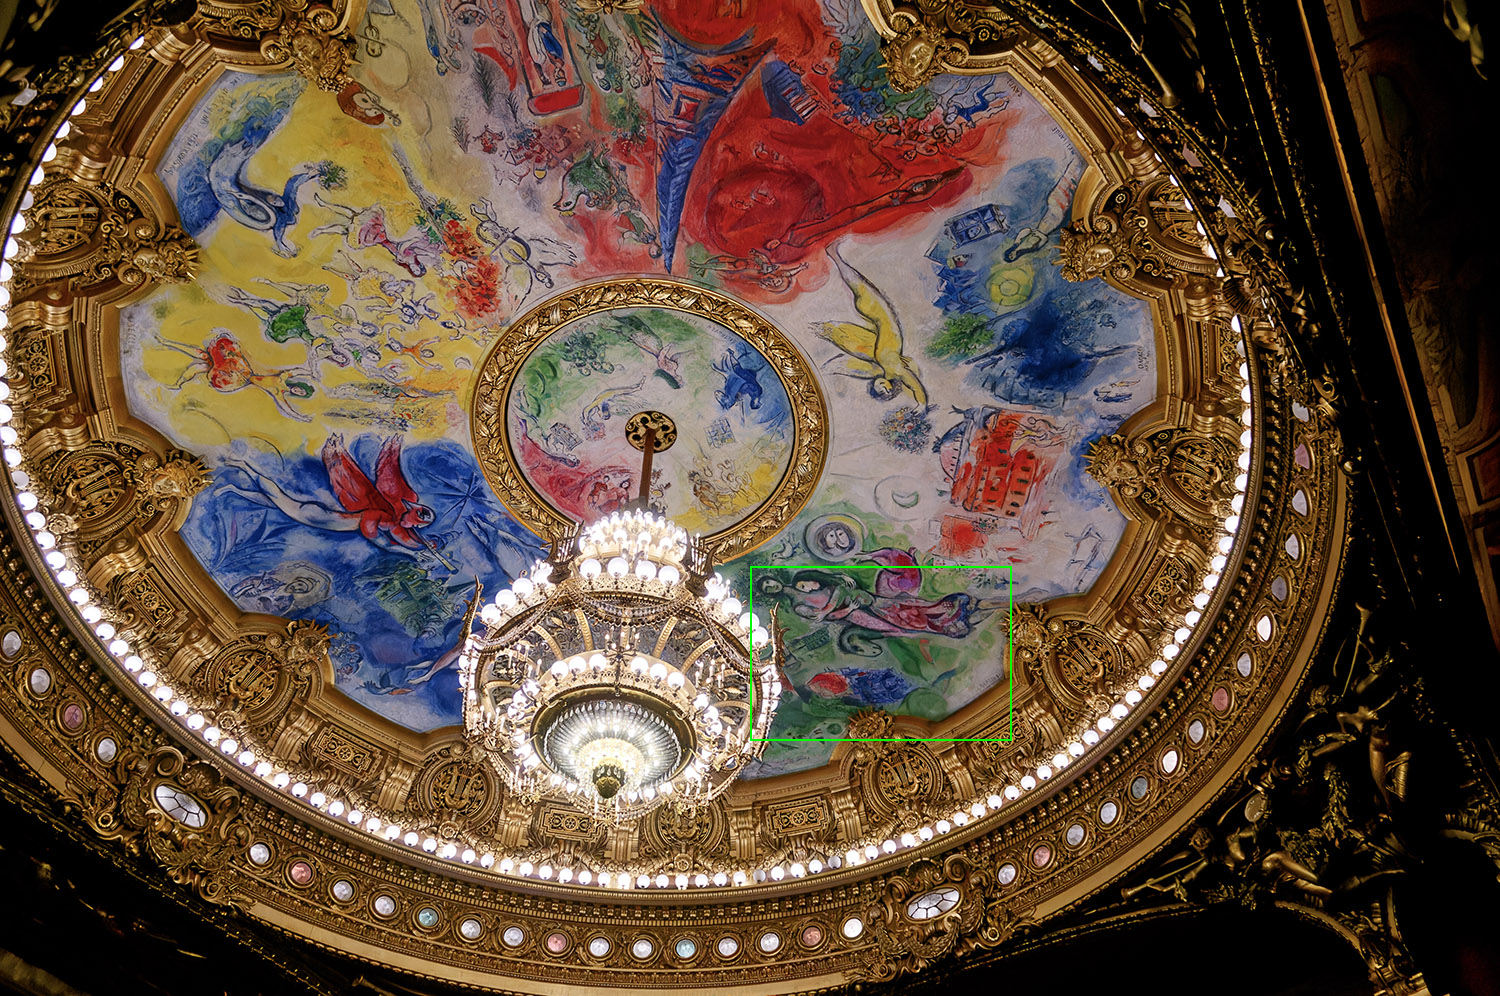
I proceeded a little differently this time: I opened each raw file in PhotoLab 6, and rather than turning off all corrections, I used the DxO standard preset. This enables several image correction parameters, such as lighting, lens sharpness, HQ -level noise reduction, and others. The resulting image was then exported as a 16-bit TIFF file. Three additional exports were made after changing the noise reduction to Prime, DeepPRIME, and finally DeepPRIME XD. The resulting images were then imported into Photoshop from where the 100% crop areas were taken and exported as JPG files. The overall image shows a color rectangle that identifies the area used for 100% crop comparisons. These areas all have the same pixel dimensions (750x500), but since the sensor sizes of the cameras used are not the same, the rectangle occupies a different percentage of the image.
You can easily make your own comparisons; if you do not have DxO PhotoLab 6, you can download a fully functional 30-day trial version from DxO's web site. You may download the raw files used on this page by clicking on the overall view of each photo (the one with the color rectangle). Note that the first two examples were taken with a sensor that has a crop factor of 1.5; in the technical details, all focal lengths are given in 35mm (full frame) equivalents.
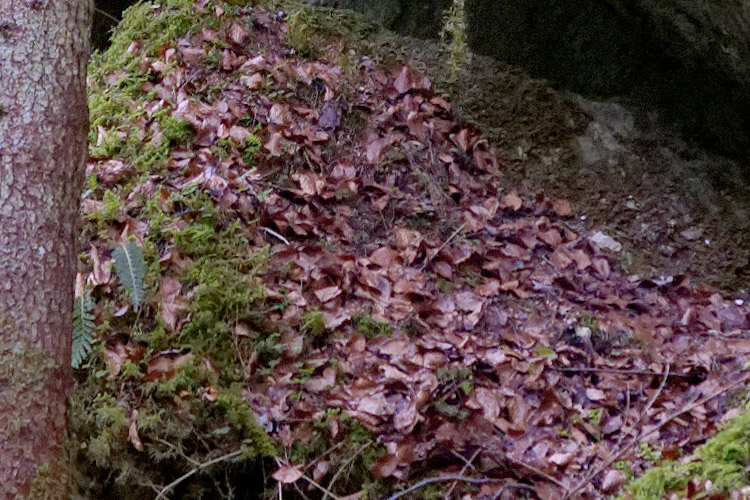
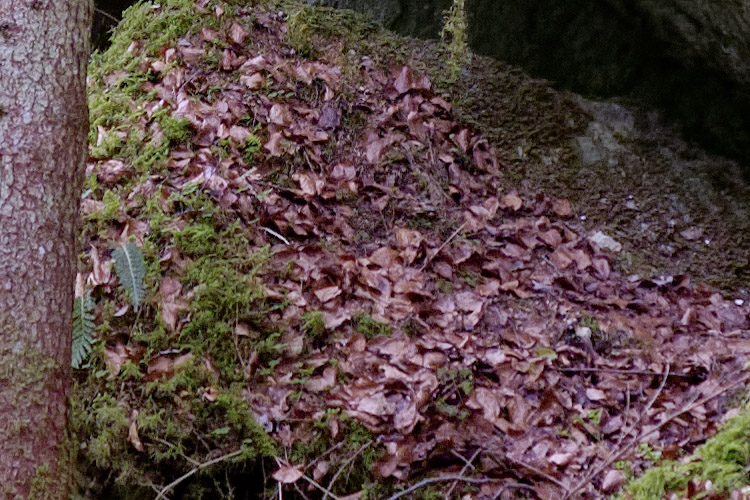
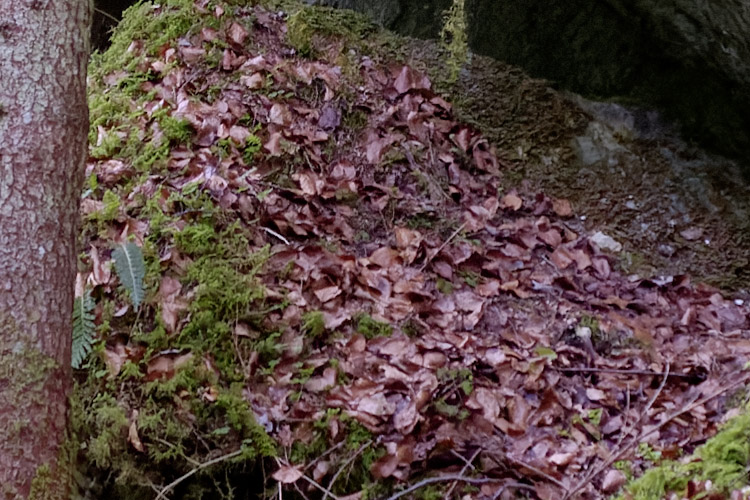
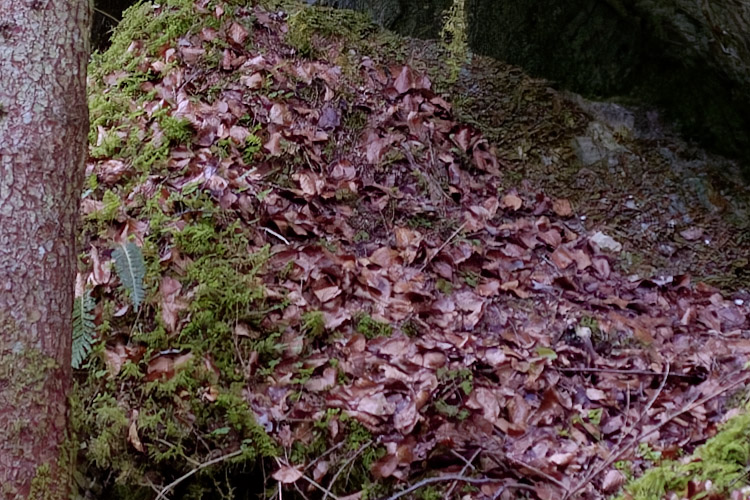
The first example is a photo taken over 16 years ago with my first DSLR, the Nikon D70. I shot in raw at ISO 1600 (about as high as I dared go with that camera), underexposing the image by a third of a stop. The scene is close to the Doubs river and very dark and damp (I used a vertical crop of this photo as the title page of my translation of Alexandra Lavizzari's novel Und Harry? because a description of a woods in her book reminded me of this place). Of all the images shown on this page, this is the one where the advantage of DeepPRIME XD, and indeed, the original DeepPRIME, are the least apparent. Probably, this is because the quality of the 6.1 megapixel sensor and the 18-50mm ƒ/3.5-5.6 Sigma lens used were not up to today's standards.

|
Woods near La Goule, Switzerland, May 2006 |
Nikon D70 ● ISO 1600 ● 1/60 ● ƒ/2.8 ● 75mm ● Exp. -⅓ |
|
100% crop of the HQ noise reduction TIFF image opened in Photoshop CC |
|
100% crop of the Prime noise reduction TIFF image opened in Photoshop CC |
|
100% crop of the DeepPRIME noise reduction TIFF image opened in Photoshop CC |
|
100% crop of the DeepPRIME XD noise reduction TIFF image opened in Photoshop CC |
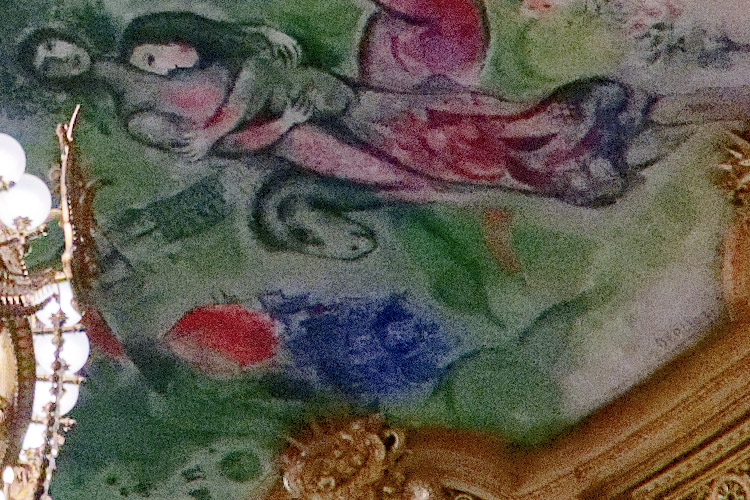
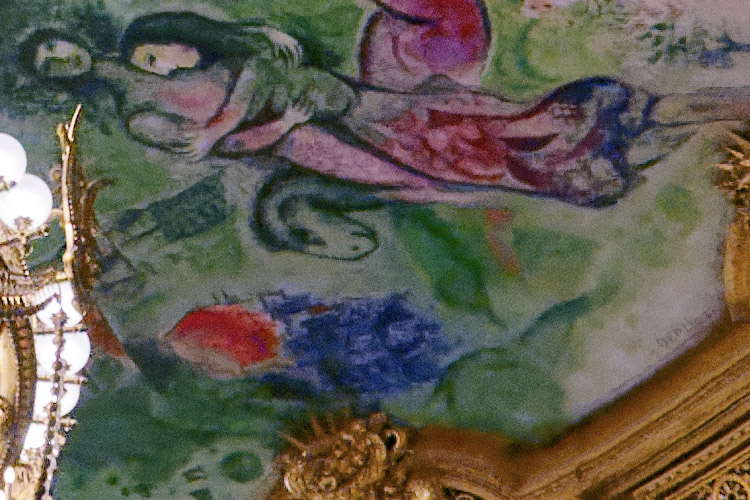
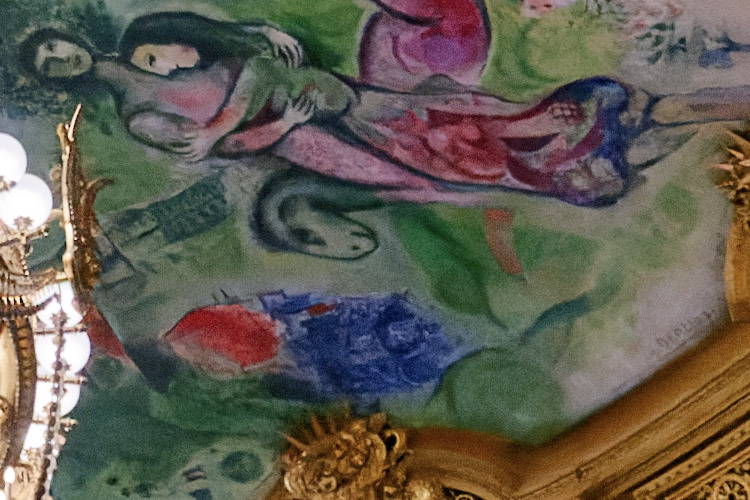
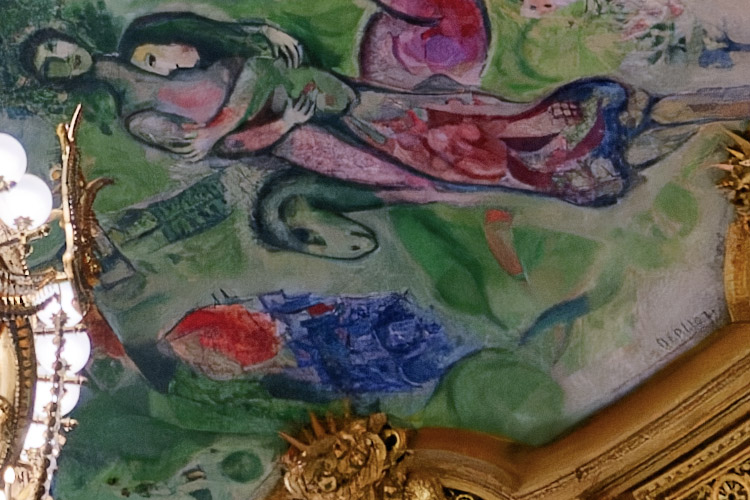
I took this photograph during a Christmas trip to Paris on December 24, 2011 at the Palais Garnier with my Nikon D300. This camera had a much improved 12.3 megapixel sensor, and the difference is obvious. The subject is Marc Chagall's ceiling of the national opera. In 1963, it took the then 77-year-old Chagall a year to complete it; the work covered nearly 2,400 square feet and required 440 pounds of paint. In the photo, the change between the various noise reduction settings is evident; one can even even see a difference between DeepPRIME and DeepPRIME XD when one looks closely.
|
Paris Opera ceiling, December 2011 |
Nikon D300 ● ISO 3200 ● 1/500 ● ƒ/3.5 ● 27mm ● Exp. -⅓ |
|
100% crop of the HQ noise reduction TIFF image opened in Photoshop CC |
|
100% crop of the Prime noise reduction TIFF image opened in Photoshop CC |
|
100% crop of the DeepPRIME noise reduction TIFF image opened in Photoshop CC |
|
100% crop of the DeepPRIME XD noise reduction TIFF image opened in Photoshop CC |
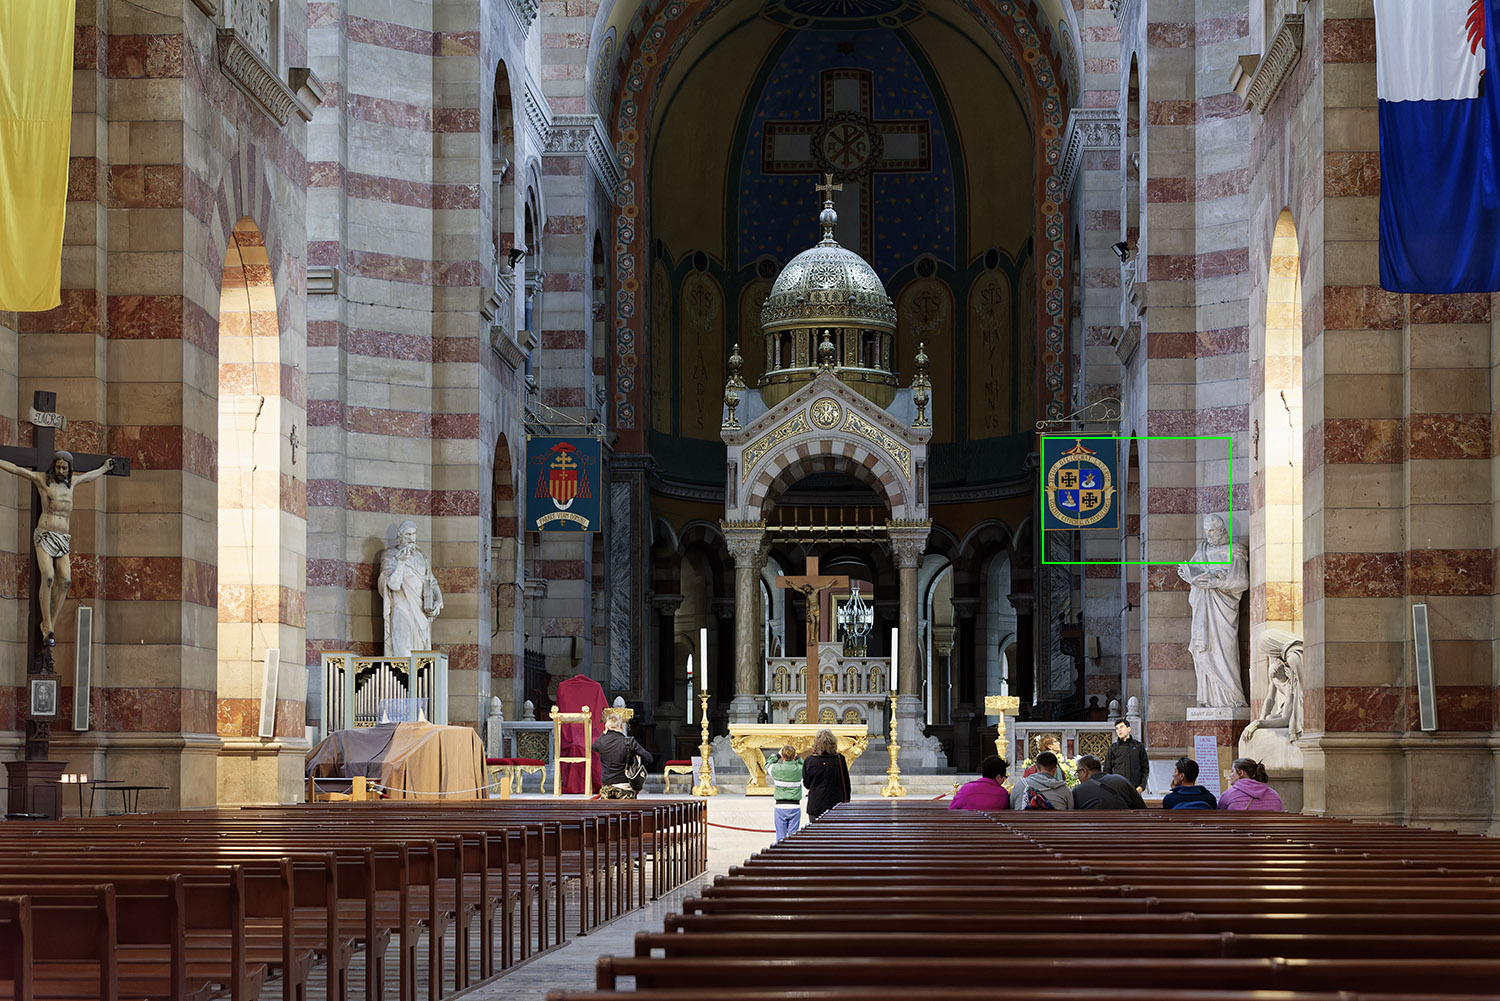
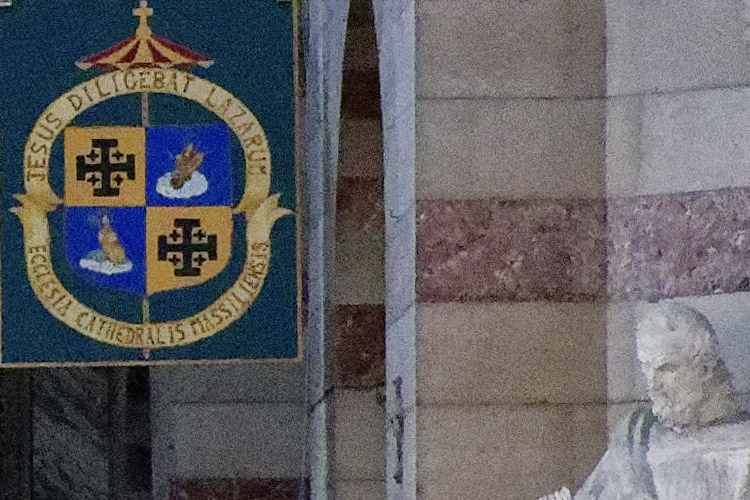
The next three examples were shot with my Nikon D750, without a doubt the best Nikon camera I have ever owned. Among other things, its low light capabilities were exceptional. This is obvious in the following example that was taken in Marseille's cathedral, a wonderful building that is definitely worth a visit, but it is very dark inside, far darker than the photo makes it appear. As I didn't want too shallow a depth of field I couldn't open the aperture further, nor did I wish to use a slower shutter speed. I therefore let the ISO go up to 10,000 and underexposed the image by two thirds of a stop. We can clearly see that Prime already substantially improves the HQ noise reduction; the improvement continues with DeeppRIME, and even more so with DeepPRIME XD, especially when we look at the clarity of the text and the head of the statue.
|
Cathédral de La Major, Marseille, April 2016 |
Nikon D750 ● ISO 10000 ● 1/40 ● ƒ/6.3 ● 70mm ● Exp. -⅔ |
|
100% crop of the HQ noise reduction TIFF image opened in Photoshop CC |
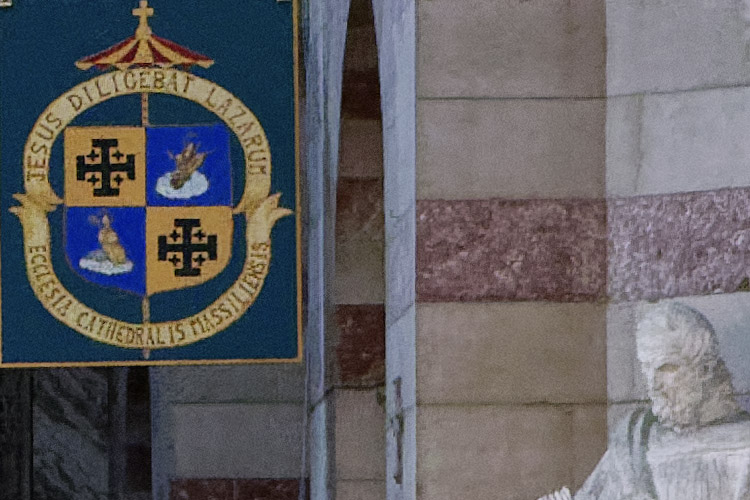
|
100% crop of the Prime noise reduction TIFF image opened in Photoshop CC |
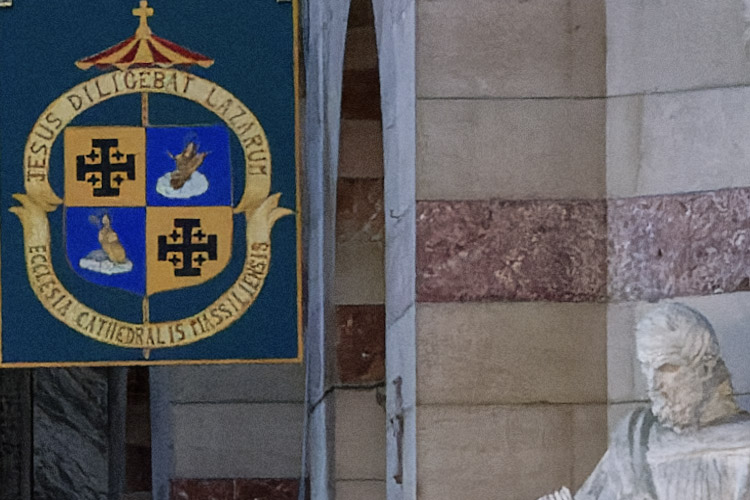
|
100% crop of the DeepPRIME noise reduction TIFF image opened in Photoshop CC |
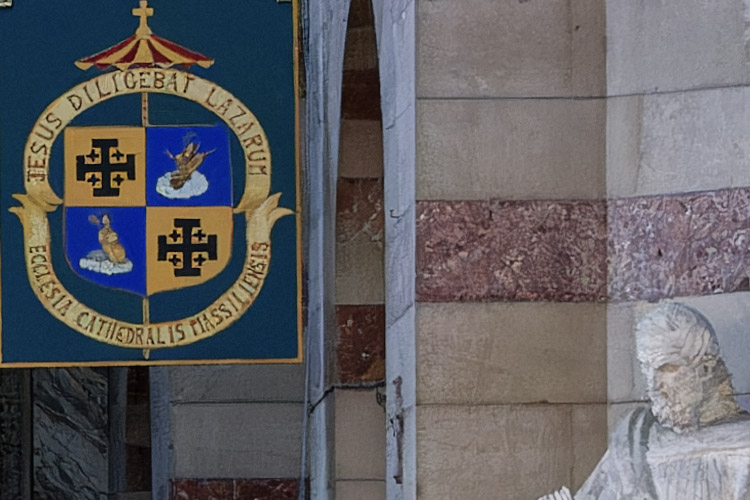
|
100% crop of the DeepPRIME XD noise reduction TIFF image opened in Photoshop CC |
This photo was taken during a March 2018 visit to the National Air and Space Museum in Chantilly, Virginia. It shows a part of the famous Blériot XI, the same model Louis Blériot flew across the English Channel on July 25, 1909. Once again, I had to allow the ISO value to go to 10,000 as the museum hall was very dark. In this photo, the differences between the Prime. DeepPRIME, and DeepPRIME XD are as obvious as in the previous photograph; as is usually the case, the most significant improvement comes with the DeepPRIME version.
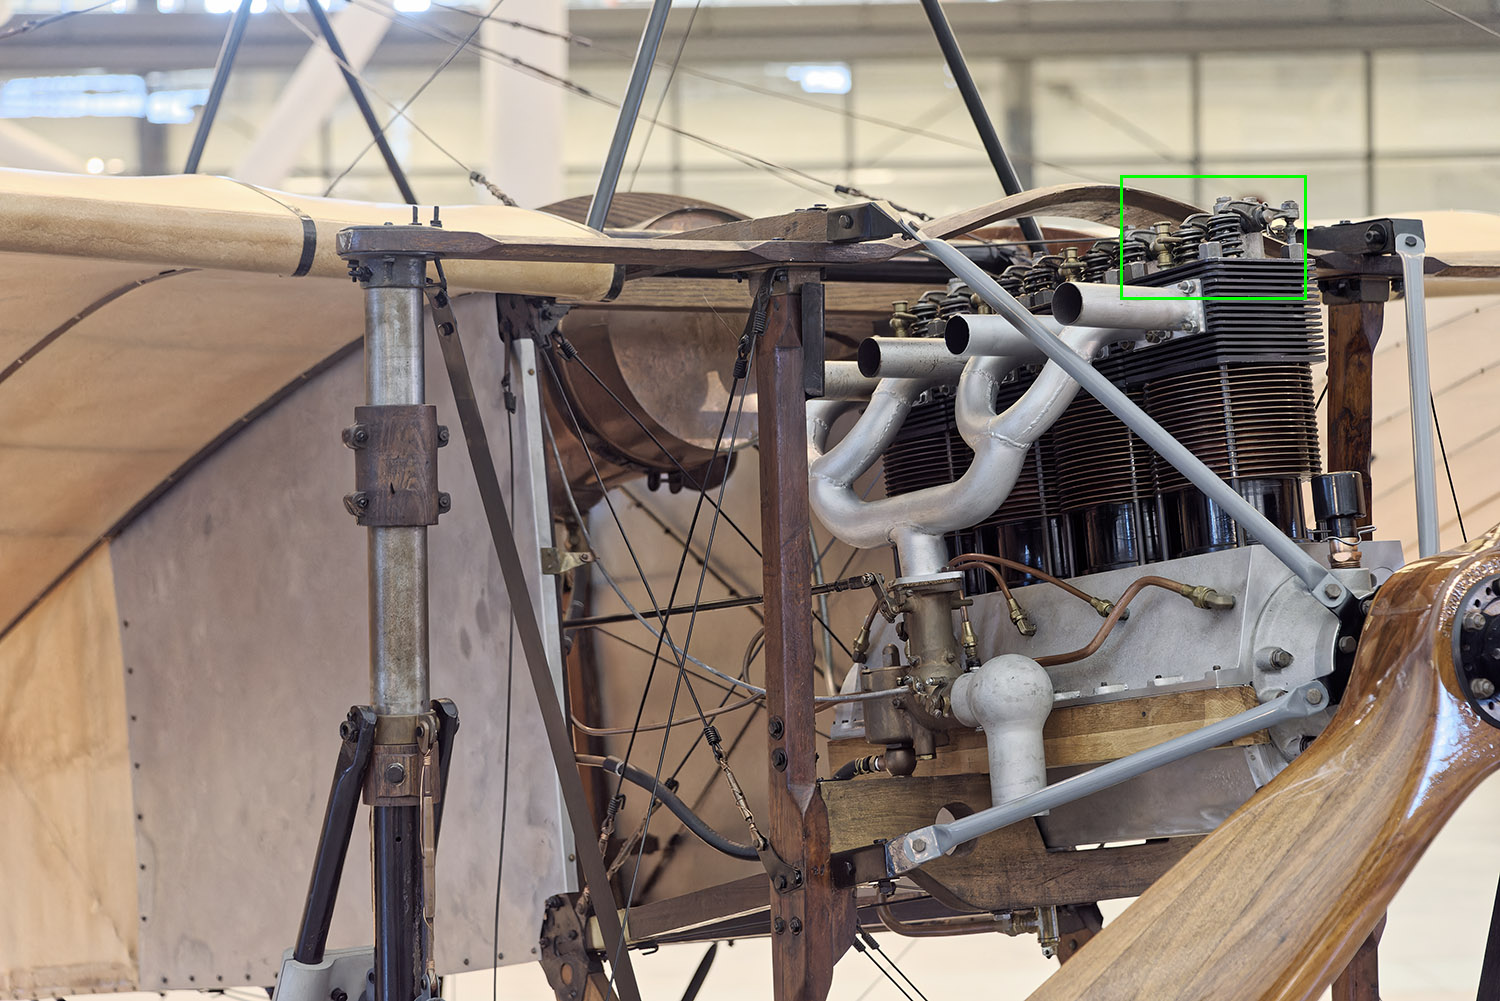
|
Blériot XI monoplane, NASM, Chantilly, Virginia, March 2018 |
Nikon D750 ● ISO 10000 ● 1/60 ● ƒ/5.0 ● 85mm |
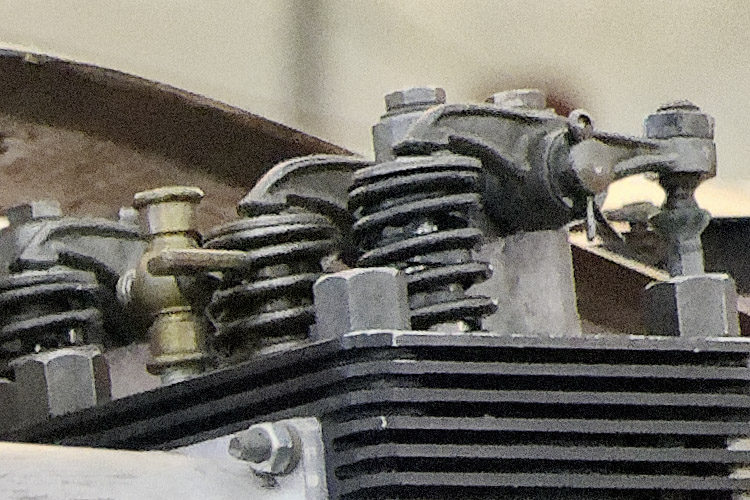
|
100% crop of the HQ noise reduction TIFF image opened in Photoshop CC |
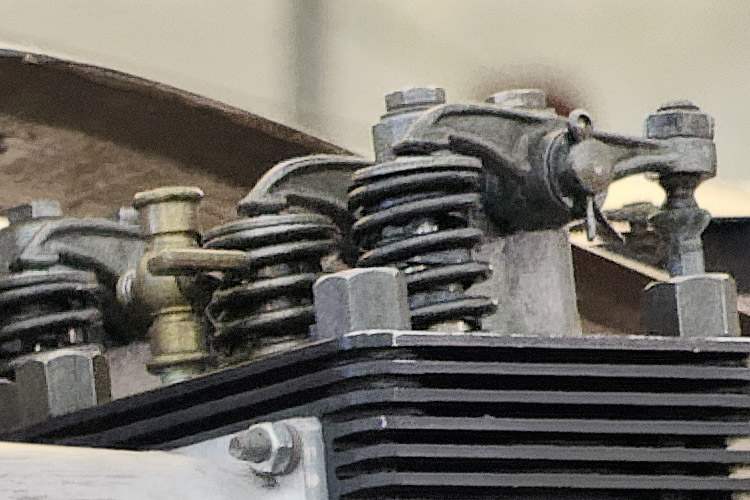
|
100% crop of the Prime noise reduction TIFF image opened in Photoshop CC |
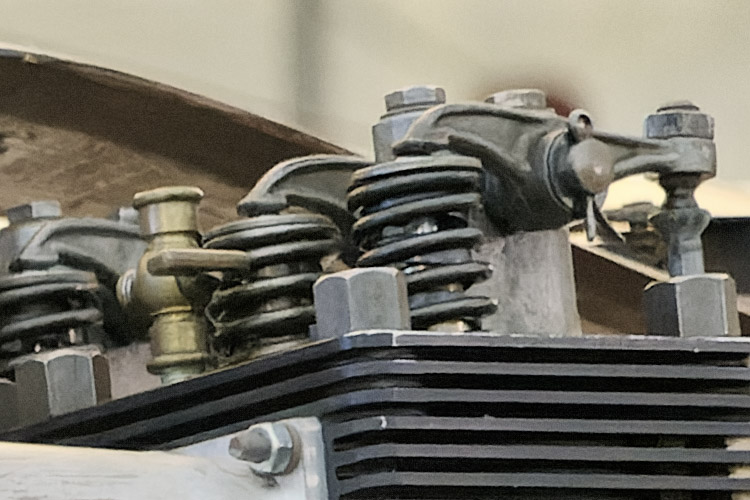
|
100% crop of the DeepPRIME noise reduction TIFF image opened in Photoshop CC |
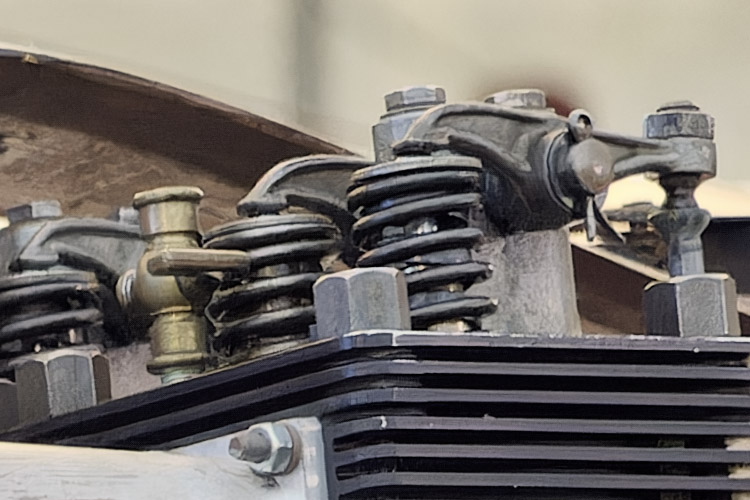
|
100% crop of the DeepPRIME XD noise reduction TIFF image opened in Photoshop CC |
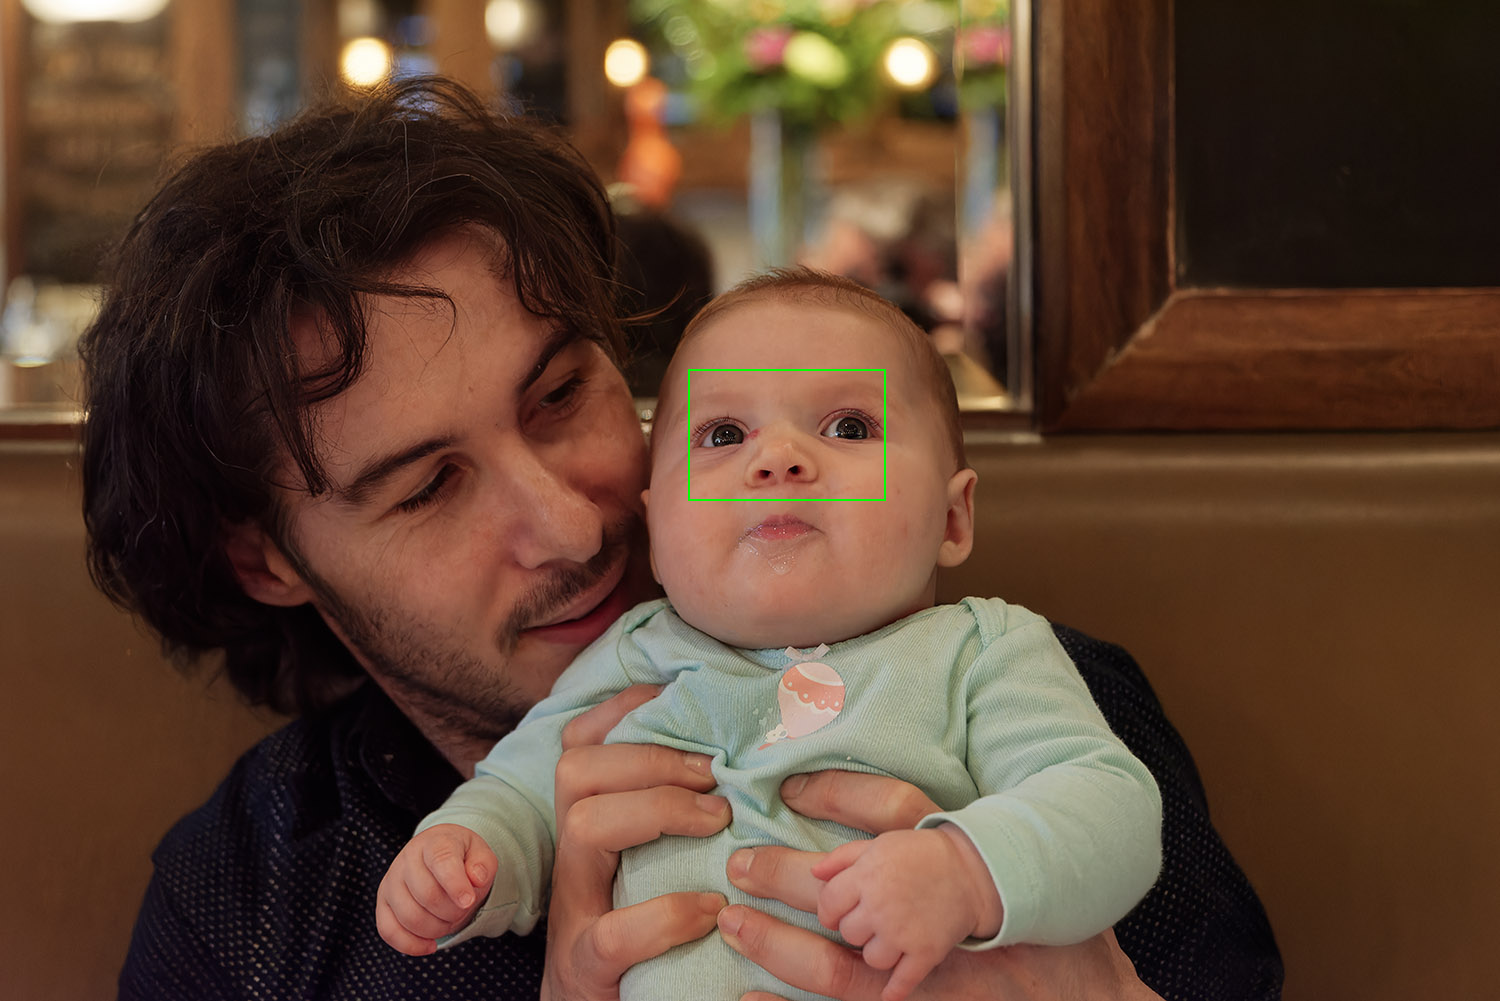
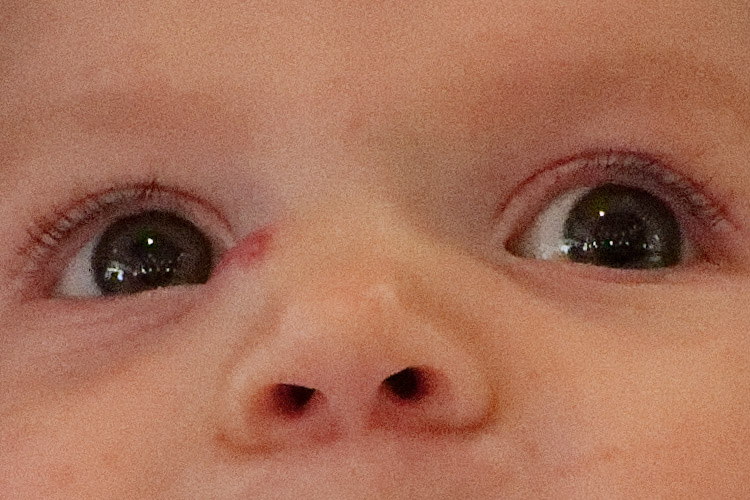
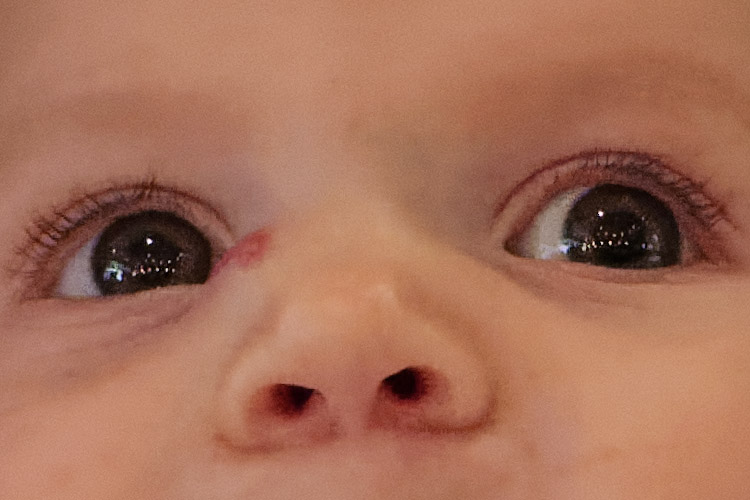
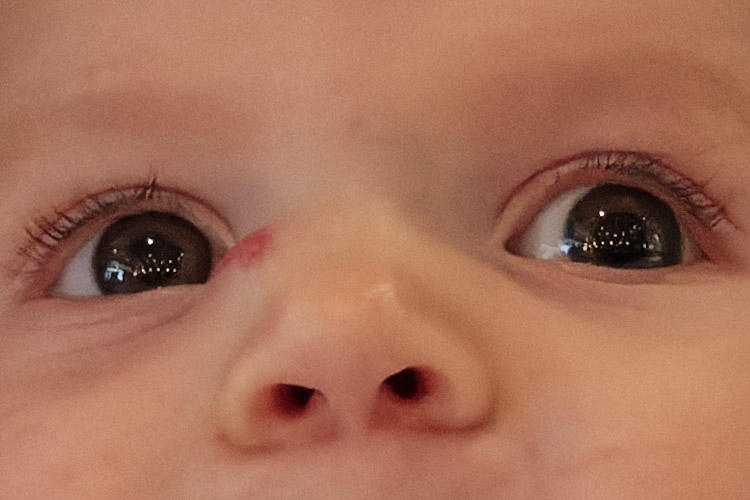
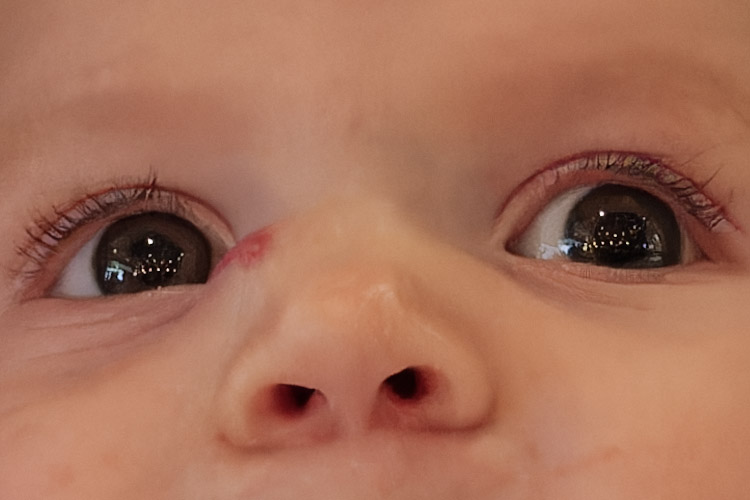
While visiting Montreal in October of 2018, we met a friend of the family with his wife and daughter for lunch; I shot this photo of him with his little girl a short time before we left the restaurant. Once again, the dark surroundings required an ISO of 10,000, not really a problem with the D750. As you can see, the HQ version still shows a considerable amount of noise. The easiest way to look for quality differences is to focus on the lights reflected in the baby's eyes. DeepPRIME is great, and if one really looks closely, DeepPRIME XD manages to slightly improve on it.
|
Father and daughter, Montreal, October 2018 |
Nikon D750 ● ISO 10000 ● 1/160 ● ƒ/5.0 ● 72mm |
|
100% crop of the HQ noise reduction TIFF image opened in Photoshop CC |
|
100% crop of the Prime noise reduction TIFF image opened in Photoshop CC |
|
100% crop of the DeepPRIME noise reduction TIFF image opened in Photoshop CC |
|
100% crop of the DeepPRIME XD noise reduction TIFF image opened in Photoshop CC |
So what's the verdict? For me, the most exciting new feature of DxO PhotoLab 6 is without a doubt DeepPRIME XD, especially since the original DeepPRIME was such a game changer. Yes, DeepPRIME XD does slightly improve image quality, but to my eyes only marginally so, and certainly not in a way that would be obvious in printed or on-screen photos not shown at 100%. I would have liked to test the software at higher ISO values, but I never went above ISO 10,000 with my Nikons, and while I have shot at ISO 51,200 with my Fujifilm X-T30, that camera's X-Trans sensor is not yet supported by DxO's DeepPRINME XD. DxO have stated that it will be available in a free upgrade.
As I am using PhotoLab mostly for converting raw files and maybe make minor adjustments (I do most of the real work in Adobe Photoshop CC) I will most likely not upgrade to PhotoLab 6 once my trial version runs out in early November. If DxO allow new trial versions once X-Trans sensors are supported, I might give the software another try, but from the way it looks now, I'll sit this one out and wait for PhotoLab 7. But you don't have to! As stated above, you can get a free trial version of PhotoLab 6 and use it with your own raw files, or download mine by clicking on any of the overall views of the five examples shown above.
Happy shooting!
Home | Site Info | Family | The Area | Trips | France | Work | Rants | Photography | Odds & Ends
This page was last modified on November 1, 2022
Send feedback about this page to feedback@kiechle.com
https://www.kiechle.com/photography/deepprimeXD/index.htm
(optimized for Retina display)
All contents © 1999-2026 The Kiechles