The original version of this page was published on March 1, 2018. This new version implements the slider mechanism first presented in Restoring Photographs last month, adds six new example photos, and updates the text. Instead of showing two versions of each photo, only the unprocessed one is shown. On the right side of each image, there is a small tab that can be pulled towards the left across the image, gradually revealing the processed version. To show a larger version of either, click on the unprocessed or processed part. Note that in the captions below each photo, the focal length is always given in 35 mm equivalents. The older page has been retired and is no longer available.
Post processing is a term used to describe the manipulation of photographs on a personal computer by means of software developed for that purpose. On this page, we will focus on why one may want to do this; we shall investigate five use cases and focus mainly on working with photos captured in raw as opposed to JPEG. In the analog photography days, most people would send in their exposed film to a lab that would process it and, more often than not, produce prints. During exposure, the only parameter taken into account was the light level, measured either by averaging the light intensities across the frame, by spot metering, or by some other algorithm developed by the camera manufacturer. No matter what the method was, a single exposure was obviously used for both the lightest and darkest parts of the image.
1. Adjusting Image Parameters
Here, we are concerned with luminosity, color balance, contrast, sharpening, and things of that nature. Those who made their own black and white prints in a darkroom, as I did, had some control. They could affect contrast by using harder or softer paper, and they could dodge and burn to mitigate the underexposure of the darkest parts of the image and the overexposure of the brightest areas. In a lab that produced prints by machine, though, it was software that attempted to adjust contrast, luminosity, saturation, and white balance. In effect, this was a form of post processing, albeit not performed by the photographer. With the advent of digital photography, this changed. Suddenly, labs were no longer needed: people could take pictures, transfer them to their computer, print them, display them on screen, or publish them on the Internet.
A digital camera captures a scene by separating the colors red, green, and blue and storing the intensity of each value in a particular part of the sensor as a binary number. This enormous collection of ones and zeros, called raw sensor data, must then be converted to something that makes sense when viewed by humans. This is the job of the raw converter, usually part of the software inside the camera. It interprets the raw data and produces an 8-bit JPEG image, sometimes by taking user-defined criteria into account. That too, constitutes a type of post processing, done in-camera before the picture is stored on whatever media is being used. Once such processing has taken place and the JPEG file has been created, one is stuck with the adjustments that have been made. Of course, one could still adjust parameters by using photo-processing software, but only up to a point and not without incurring a loss of image quality.
As time went by, more sophisticated cameras began to offer the possibility of storing the raw sensor data. The drawbacks are that it takes a great deal more space and that one needs a raw converter other than the one built into the camera, but the advantage is that the photographer can now experiment with many different parameters in a non-destructive way and see which are most suitable for the image. In a way, a raw file is like having a negative from which many prints with different settings can be produced. Raw formats are typically 12-bit or 14-bit, and this tremendously increases the number of colors that can be represented compared with the 8-bit JPEG format. Post processing is even more important for photographs captured in a raw format because these don't even benefit from the often rudimentary processing of JPEG files. Consider the following example:
Click on any image to see a larger (2400x1600 pixel) version!
|
|
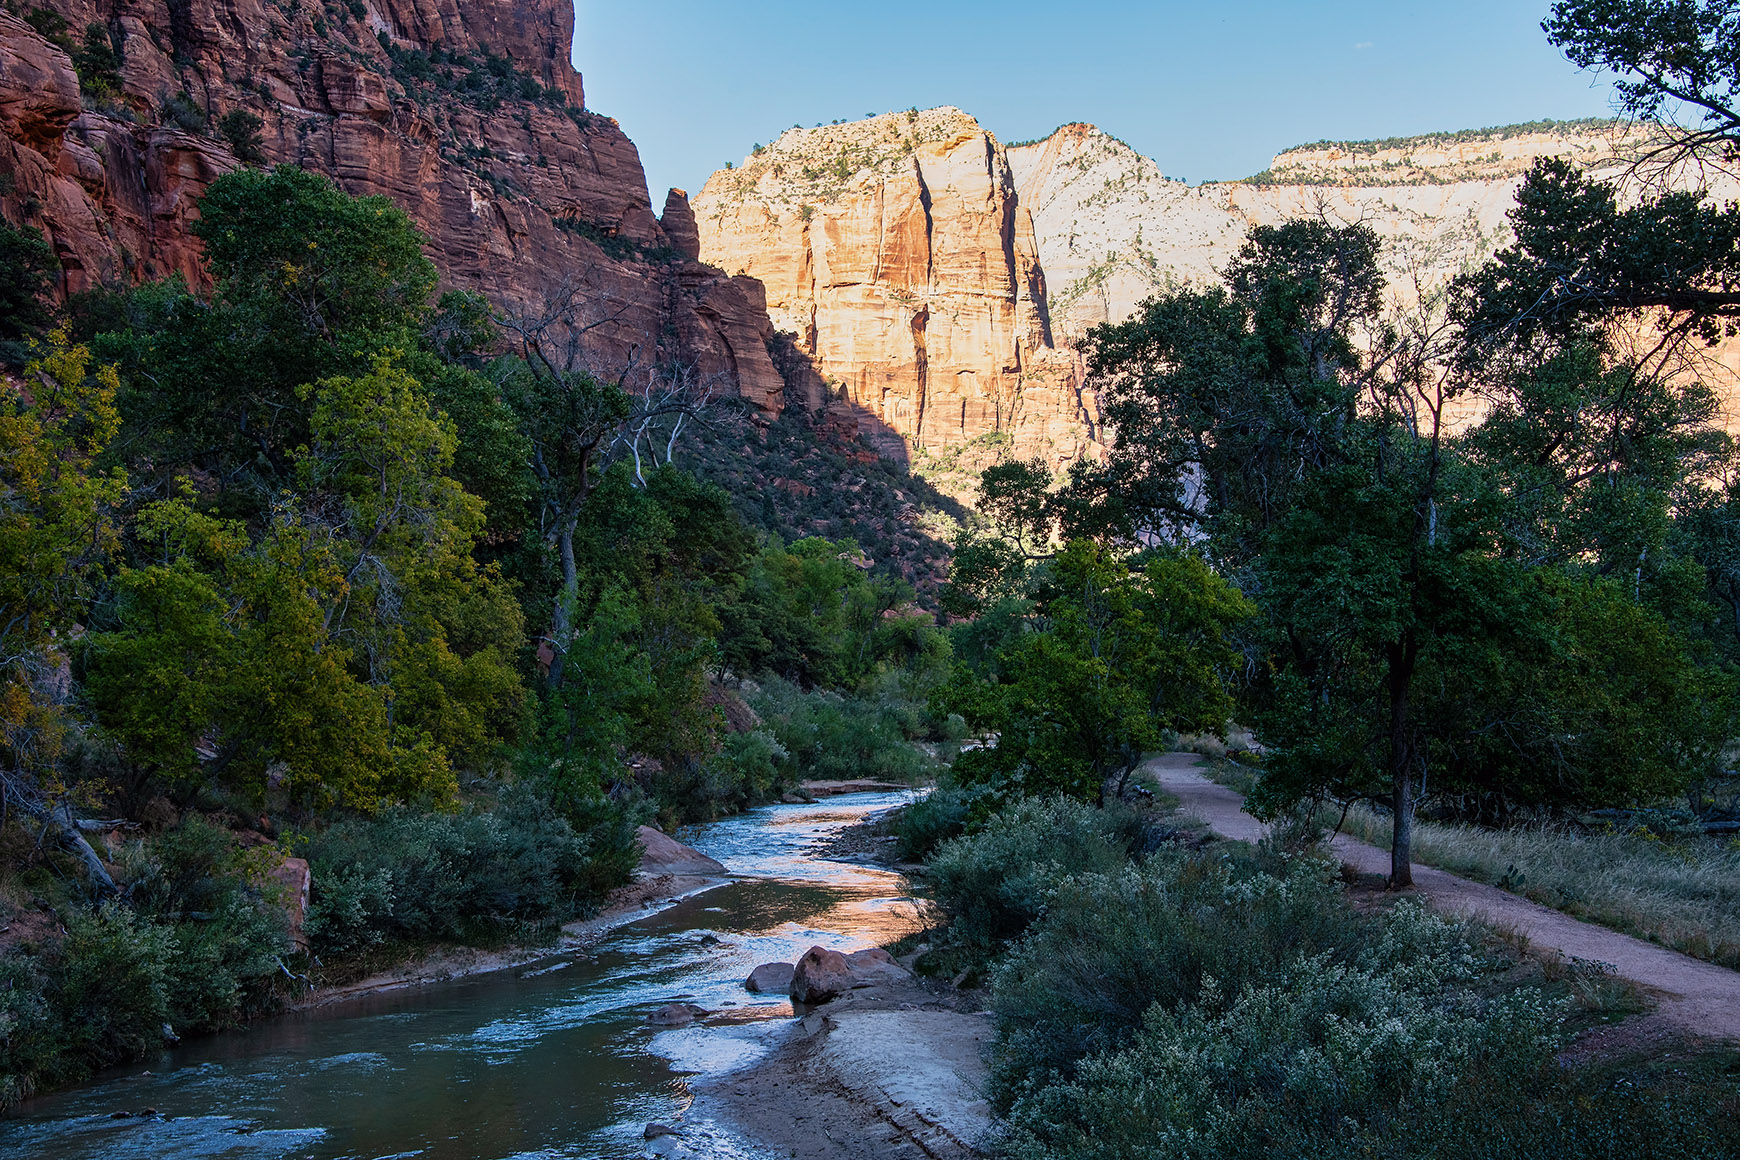
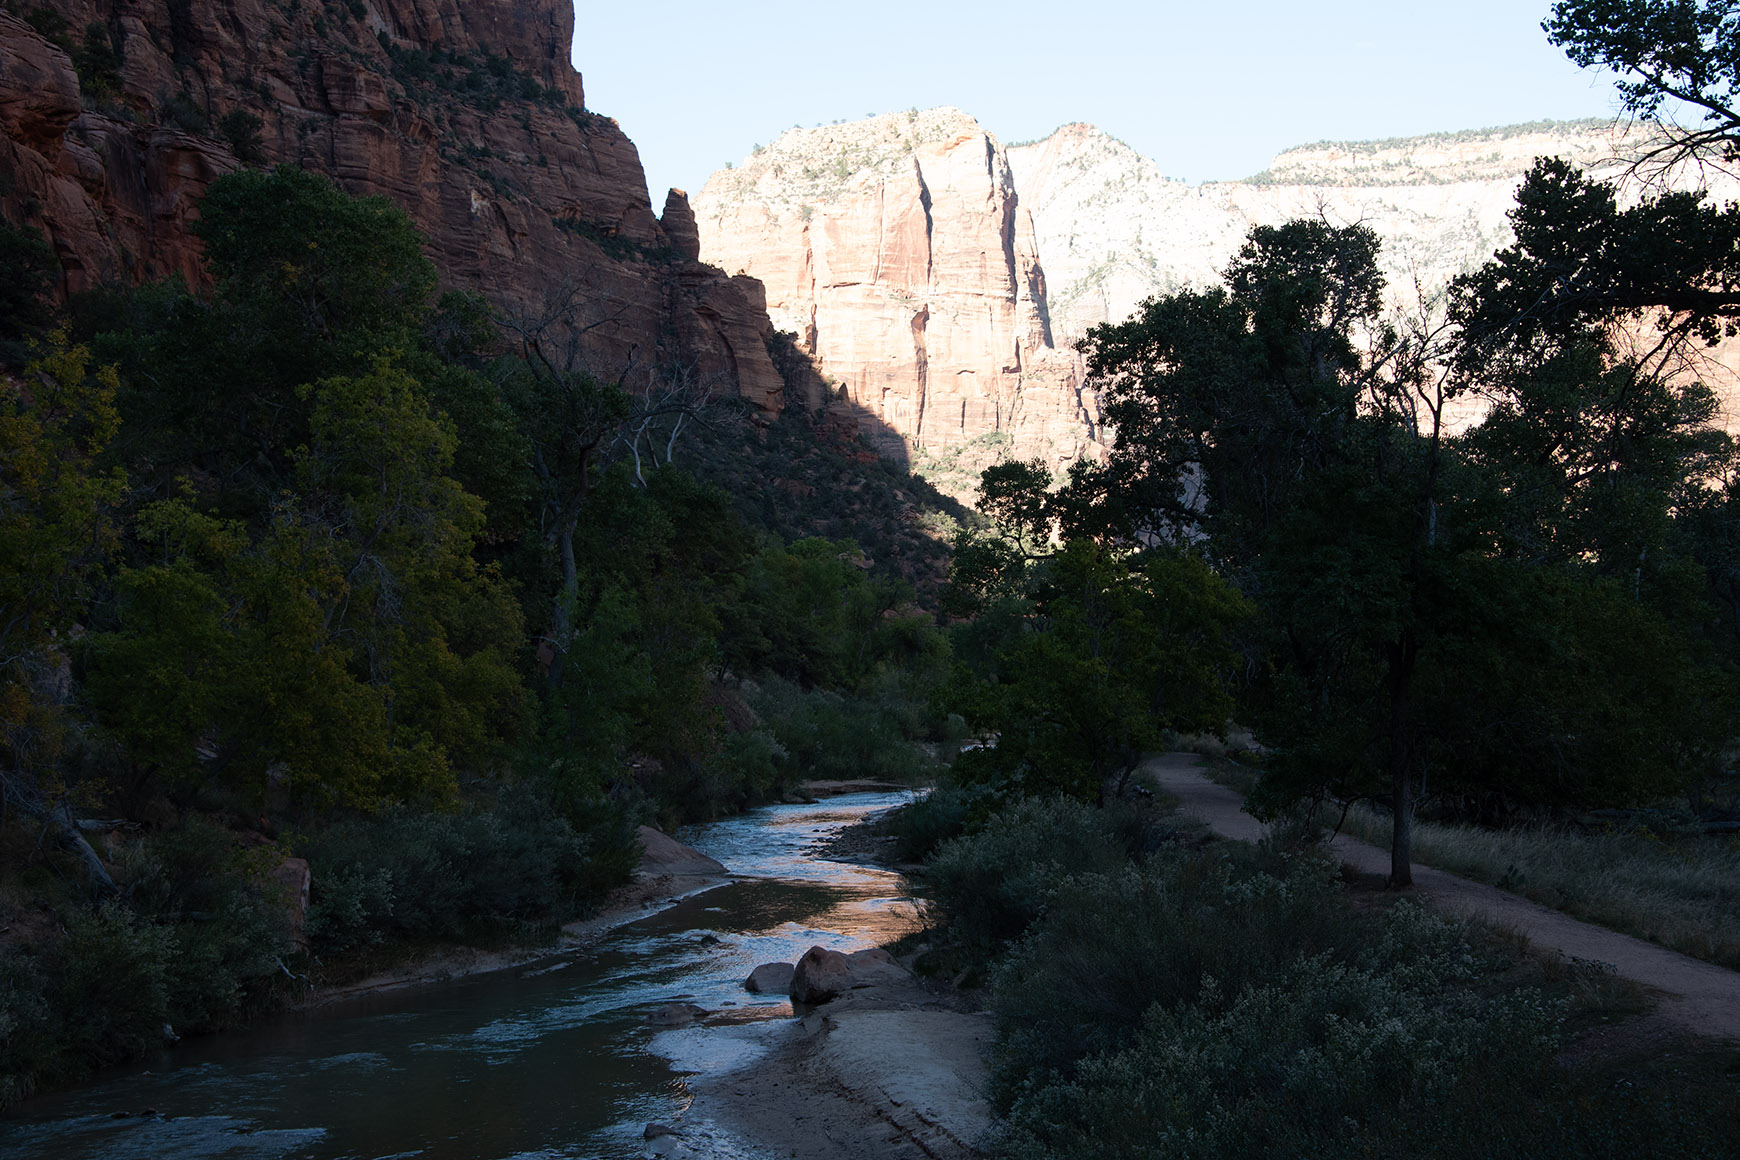
Virgin River in Zion Canyon, Utah, USA (Nikon D750, 28-300mm f/3.5-5.6 lens at 58mm, f/8, 1/250s, ISO 400, RAW) |
The above picture, was taken in Zion National Park in Utah at around 4:30 p.m. in early October. It was already getting dark, so the light conditions were challenging; this caused the foreground to be underexposed whereas the rock wall in the background is clearly overexposed. A JPEG file of this scene might have yielded slightly better results, but only marginally so. It would be impossible to obtain a result like this out of camera, that is, without post processing. But not all scenes are this difficult as the following image shows:
|
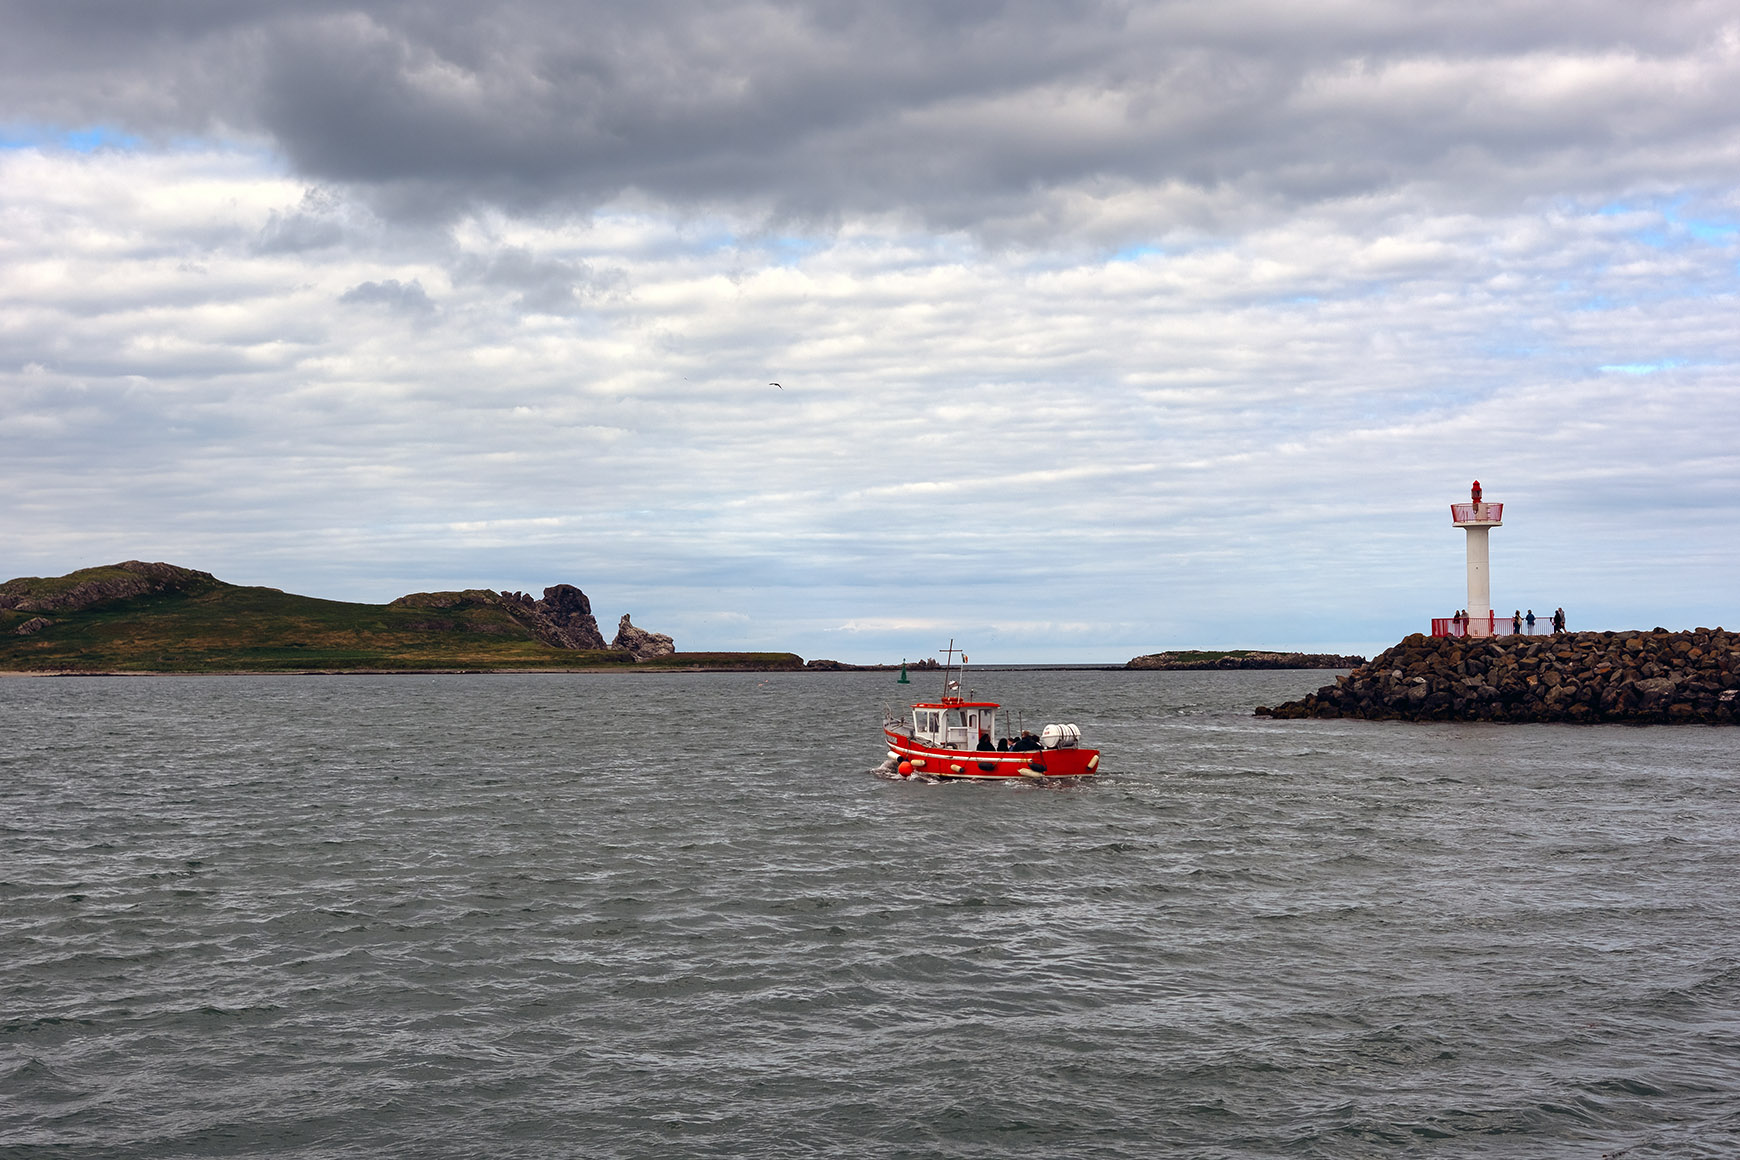
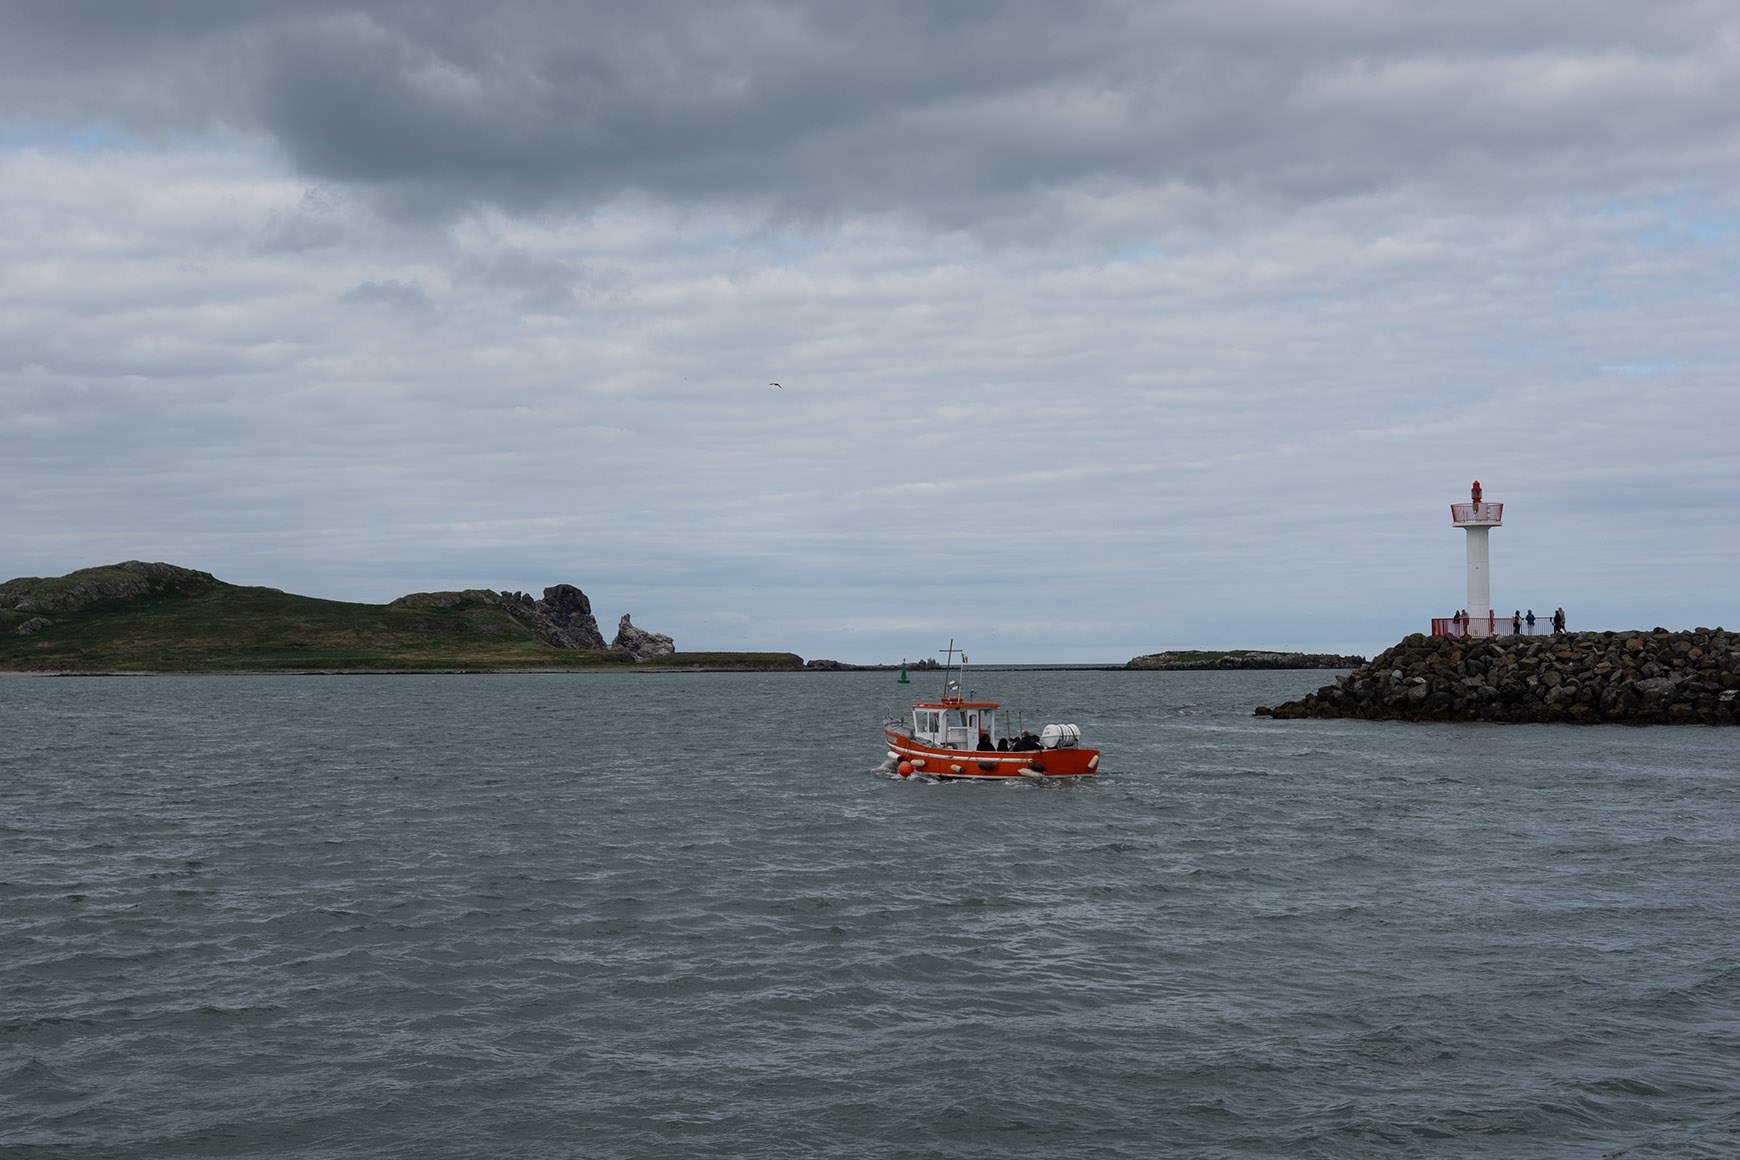
Dublin Harbor at Howth, Ireland (Fujifilm X-T5, XF27mm f/2.8 R WR lens at 41mm, f/8, 1/250, ISO 125, RAW) |
This photo shows a dull and low-contrast appearance that is typical of unprocessed raw images; processing it adds some pop and color. In this case, a JPEG would have yielded similar results without processing, and probably identical ones with a small amount of processing.
2. Creating a Mood
This type of post processing comes into play when we wish to tell a story, to create an impression that is different from what we can capture while photographing the scene. This can include converting a photo to black-and-white, adding grain, using vignettes (i.e., darkening corners and sides of an image), or enhancing, and even manipulating one or more colors. Here are two examples of this kind of post processing:
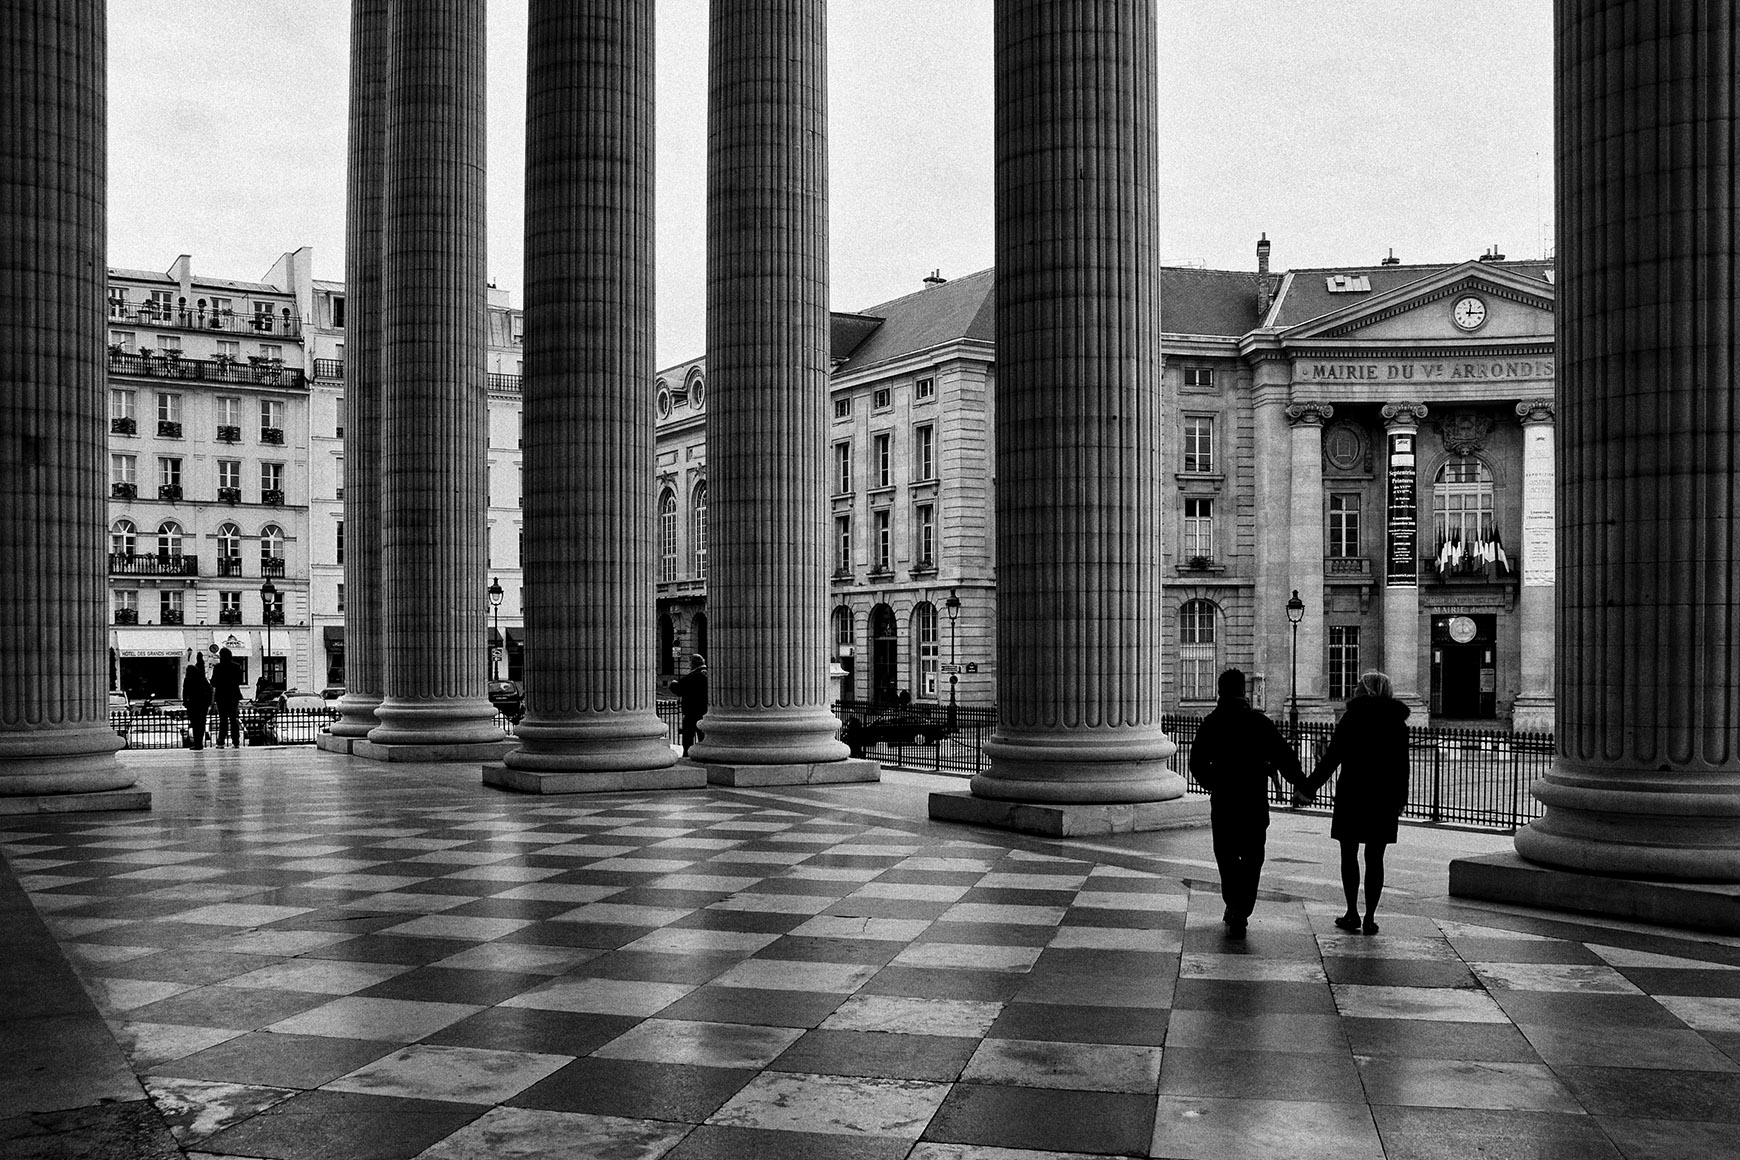
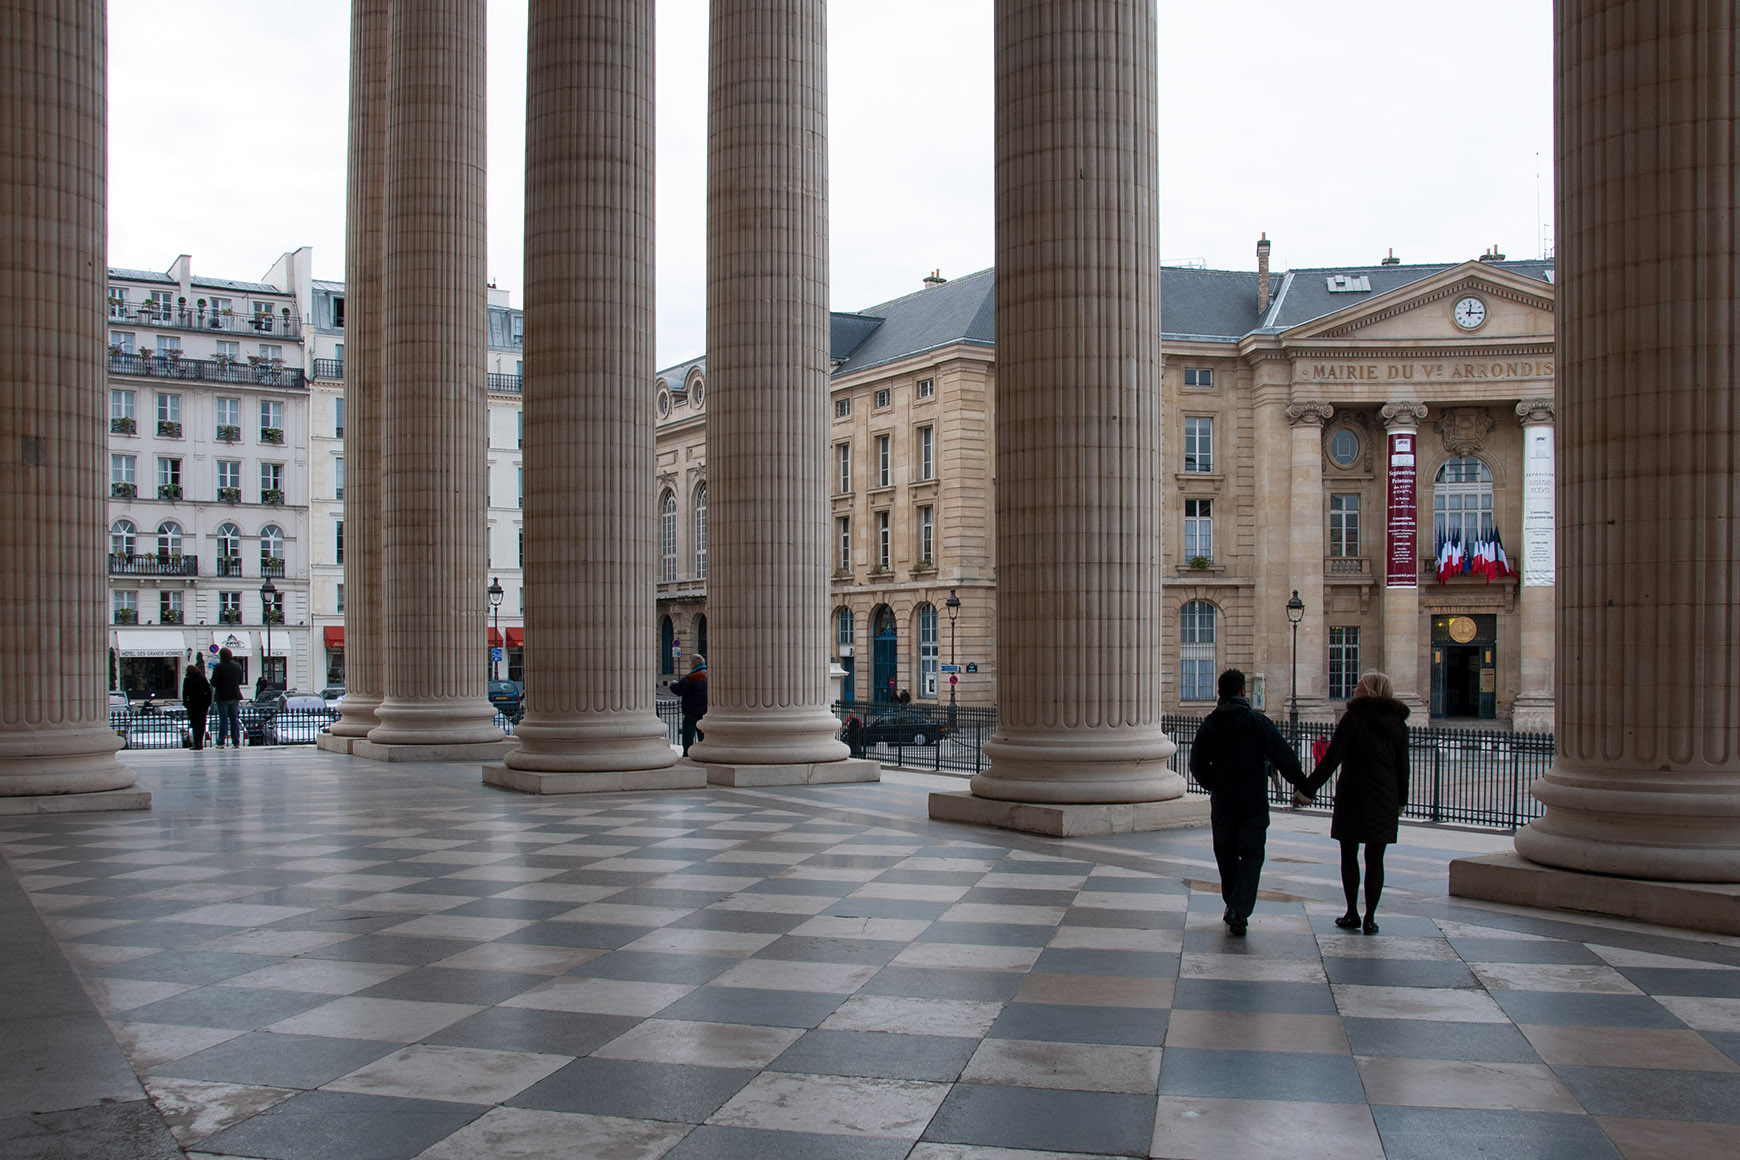
|
At the Panthéon in Paris, France (Nikon D300, 18-200 mm f/3.5-5.6 lens at 30 mm, f/8, 1/250s, ISO 200, RAW) |
This image was taken in November of 2009 as I was coming out of the Panthéon in Paris. The area around the columns, usually very crowded, was empty except for a young couple holding hands while walking in the direction of the mairie, city hall (such basic symbolism requires no explanation). I raised the camera and released the shutter in one motion—thank goodness for fast autoexposure and autofocus technologies!
While I was happy with the result because everything I needed was there, the photo did not begin to express the mood I wished to convey, a mood that flashed into my mind as soon as I saw the scene. The color is anemic and adds nothing to the image, the sky is completely washed out and does not reveal any detail, in short, without post processing, this image would not be usable. began by converting the photo to black-and-white, giving it the characteristics of a moderately grainy photo taken with Kodak Tri-X 400 film, adjusting the contrast, adding a bit of sharpening, and optimizing the final image for printing at 55 x 40 centimeters (roughly 22 x 16 inches).
Even though one would have to stand in front of the actual print to fully appreciate the effect, it should already be obvious that the mood of the photograph is not in the least the same as what came out of the camera. Is this cheating? I don't think so. I wanted to tell a story, to produce a mood, and the processed photo corresponds exactly to what I wished to impart. After being displayed in my office at work in France for several years, the framed print now hangs in my home office in Chapel Hill.
For another example, let's look at an image I took at the Sachsenhausen concentration camp near Berlin in February of 2008. I shot through the main gate with its infamous inscription:
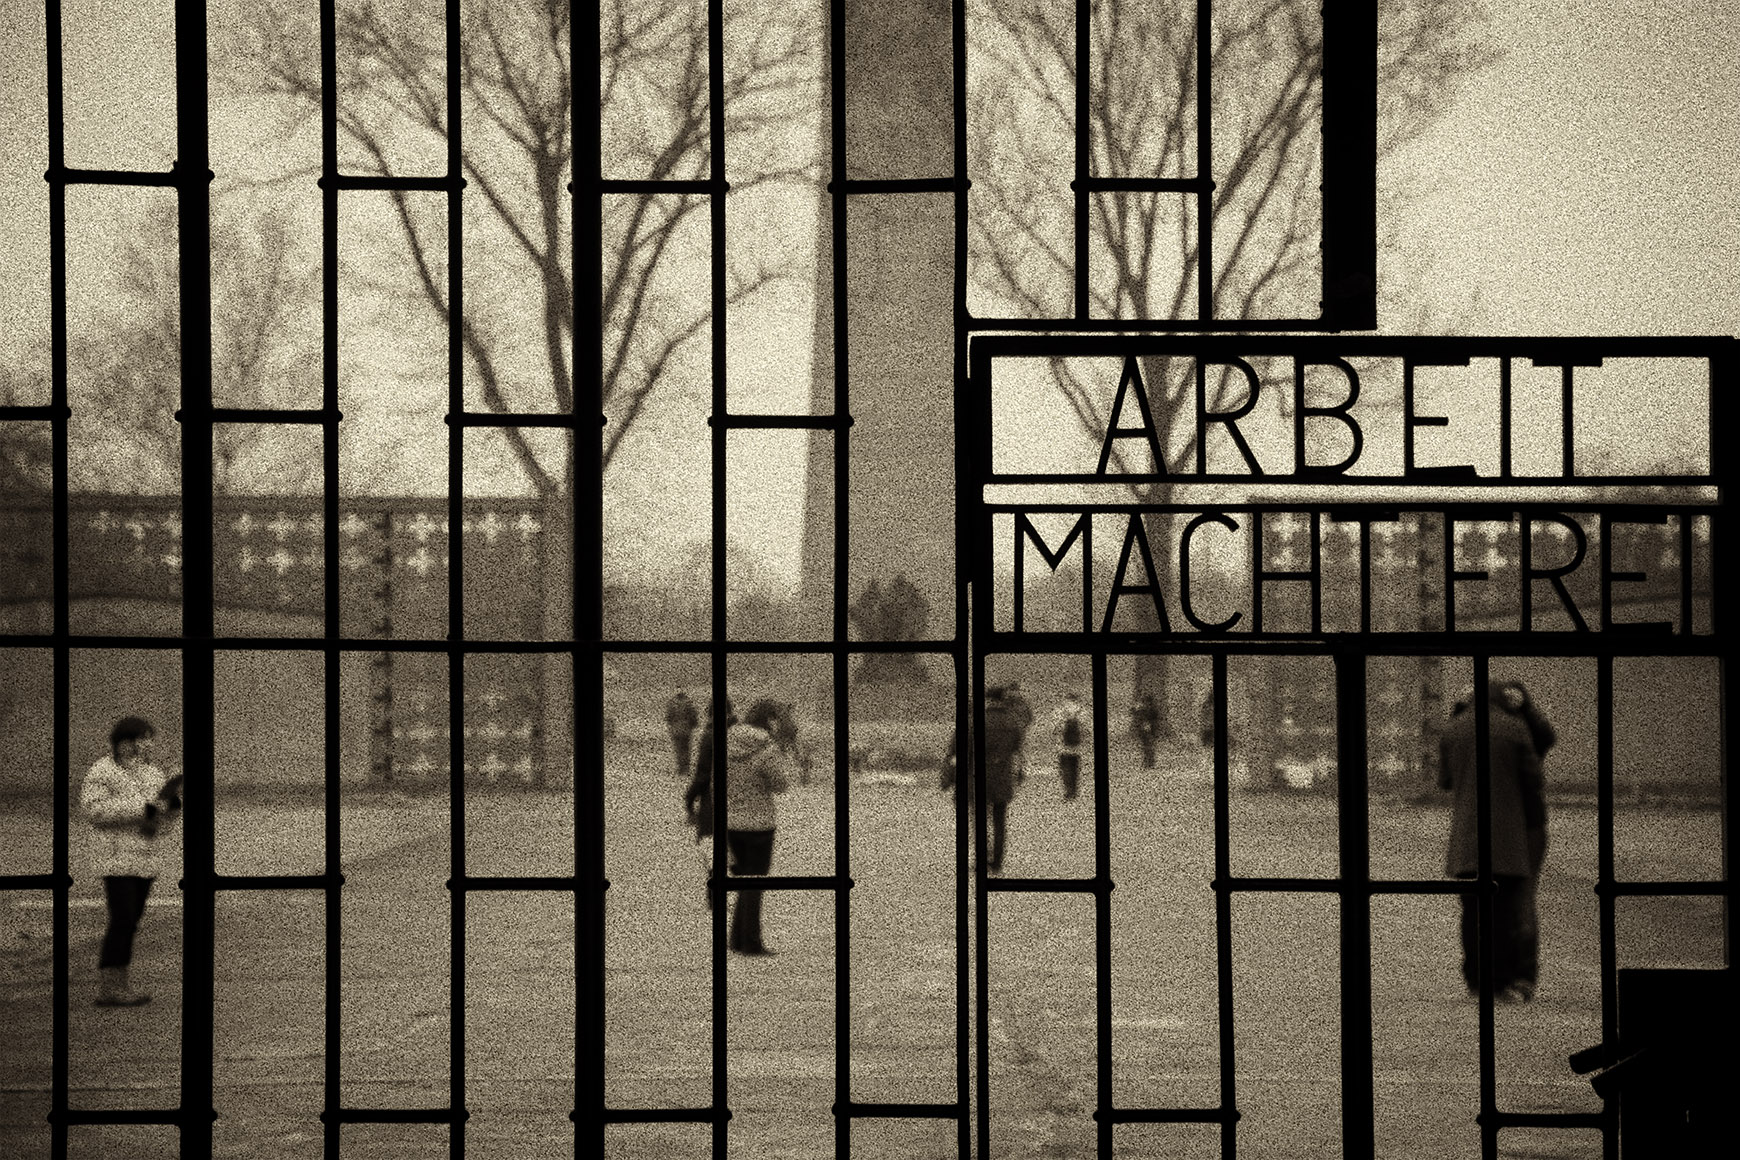
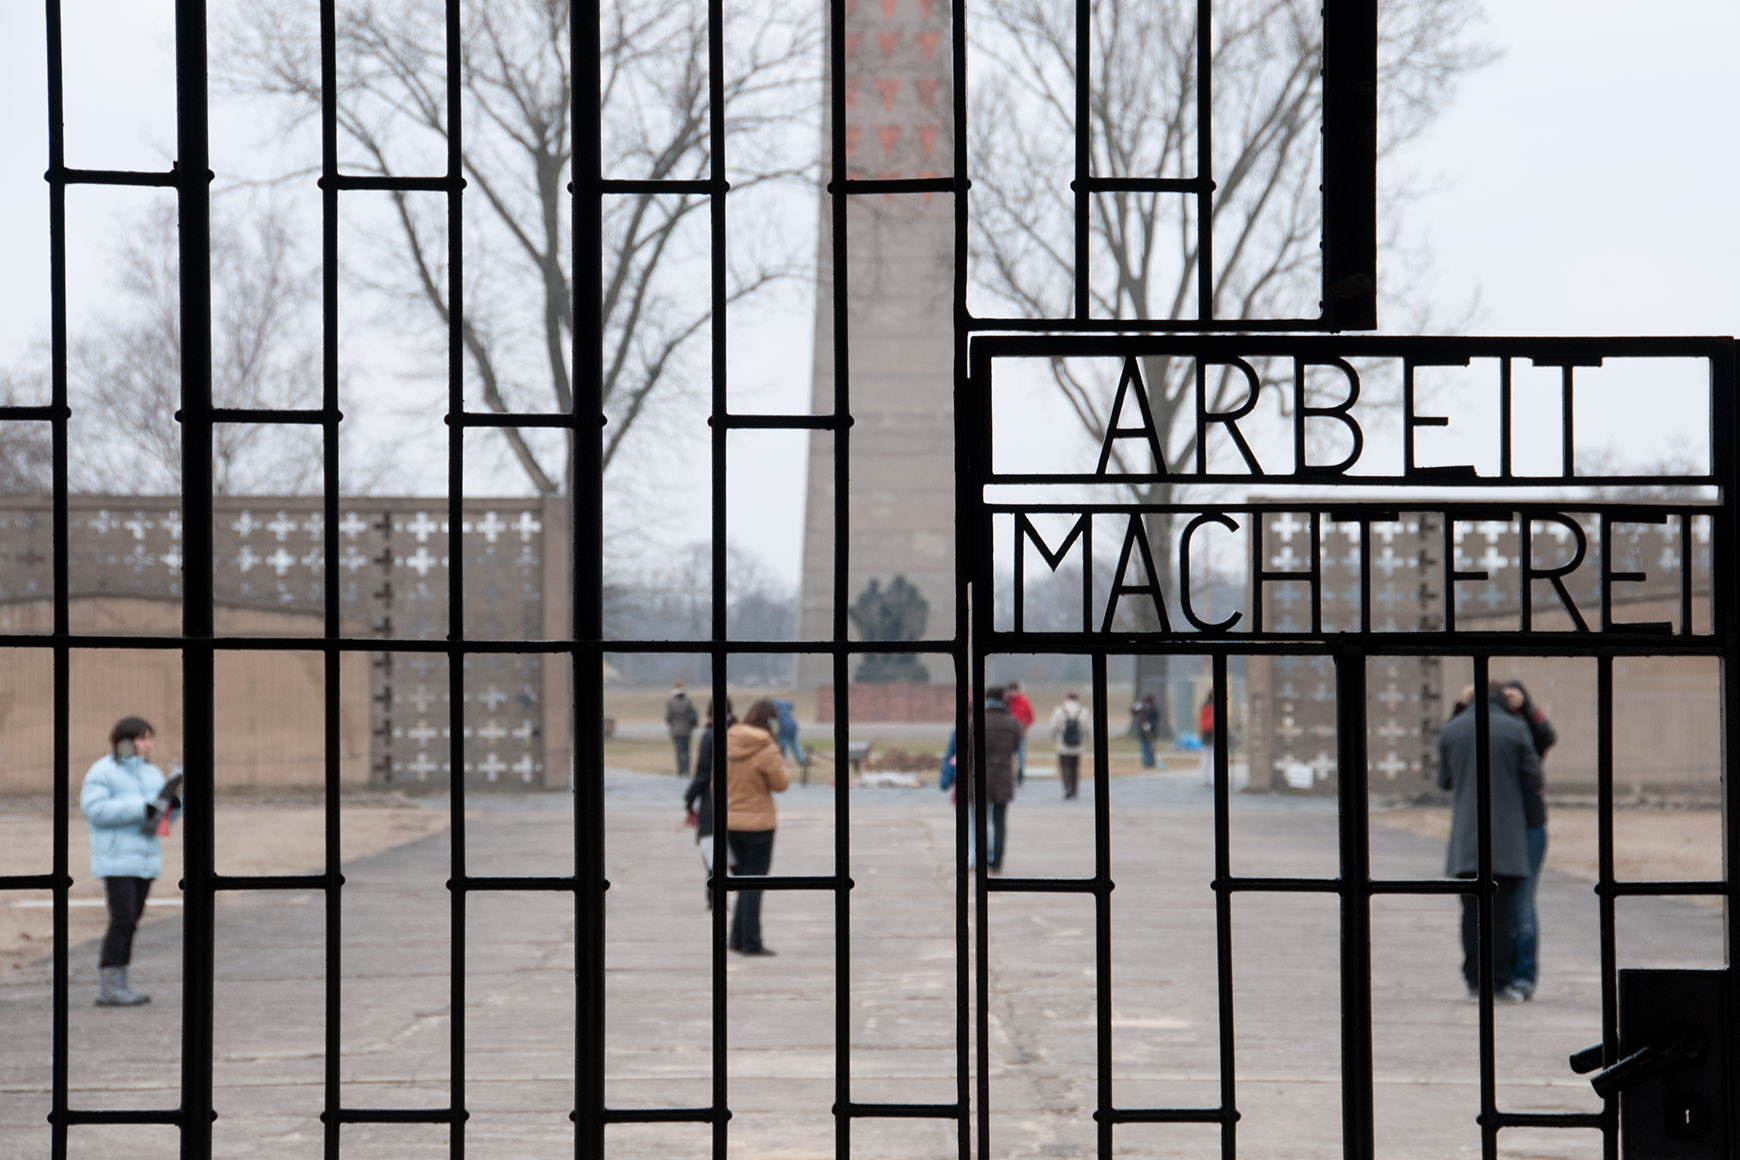
|
Sachsenhausen concentration camp, Oranienburg, Germany (Nikon D300, 18-200 mm f/3.5-5.6 lens at 142 mm, f/9, 1/100s, ISO 200, RAW) |
It would be wrong to say that when I took the picture, I had the post-processed photo in mind. I did, however, know what kind of mood and atmosphere I wanted to create. It had to be somewhat sinister, with grain so heavy that it would cause everything beyond the gate to become a bit fuzzy, and I wanted a sepia tint and a vignette to evoke age. The thing to remember here is that only post processing can do any of this. It would have been completely impossible to take this photo as it appears here in its processed state. You have to start with an idea and then see how the photo you can take may be adapted to tell the story you wish to relate.
The purpose is not to depict the world exactly as it is, but rather to create an image that will trigger a certain response. Photographers can, but do not have to be documentarians!
3. Altering reality
So far, we have seen post processing for the purpose of optimizing image parameters and creating different moods. Another category I wish to address is changing reality, most often by removing unwanted picture elements. This is by far the most controversial type of post processing; many people believe that for some reason, photographers must depict reality, and only reality. I disagree. In my view, photographers are not obliged to do anything in particular; they can use whatever technique they deem appropriate to show the viewer what they wish to present.
We've all seen photos with power cables obstructing a beautiful façade, or of a tree seemingly growing out of someone's head. These imperfections can and should be removed as the photograph will be better for it. For example, consider the following image of Angel Oak on Johns Island in South Carolina:
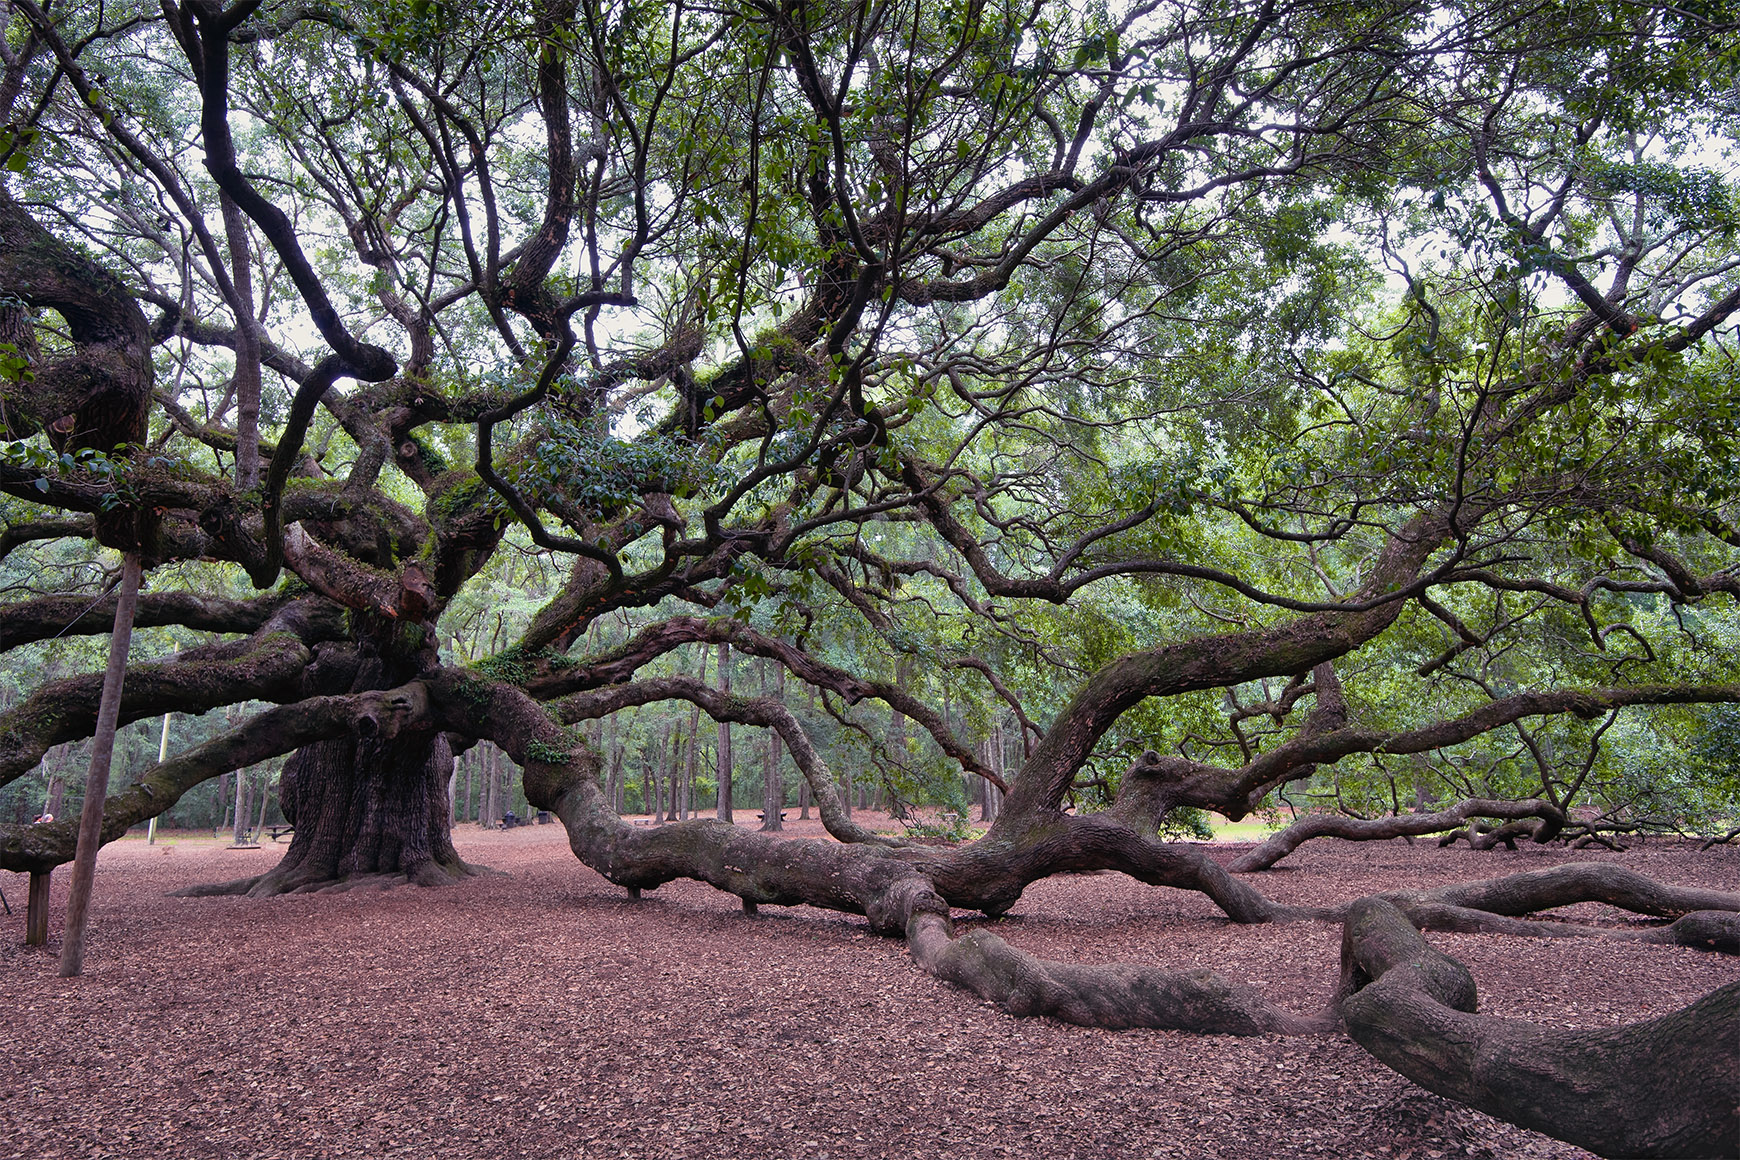
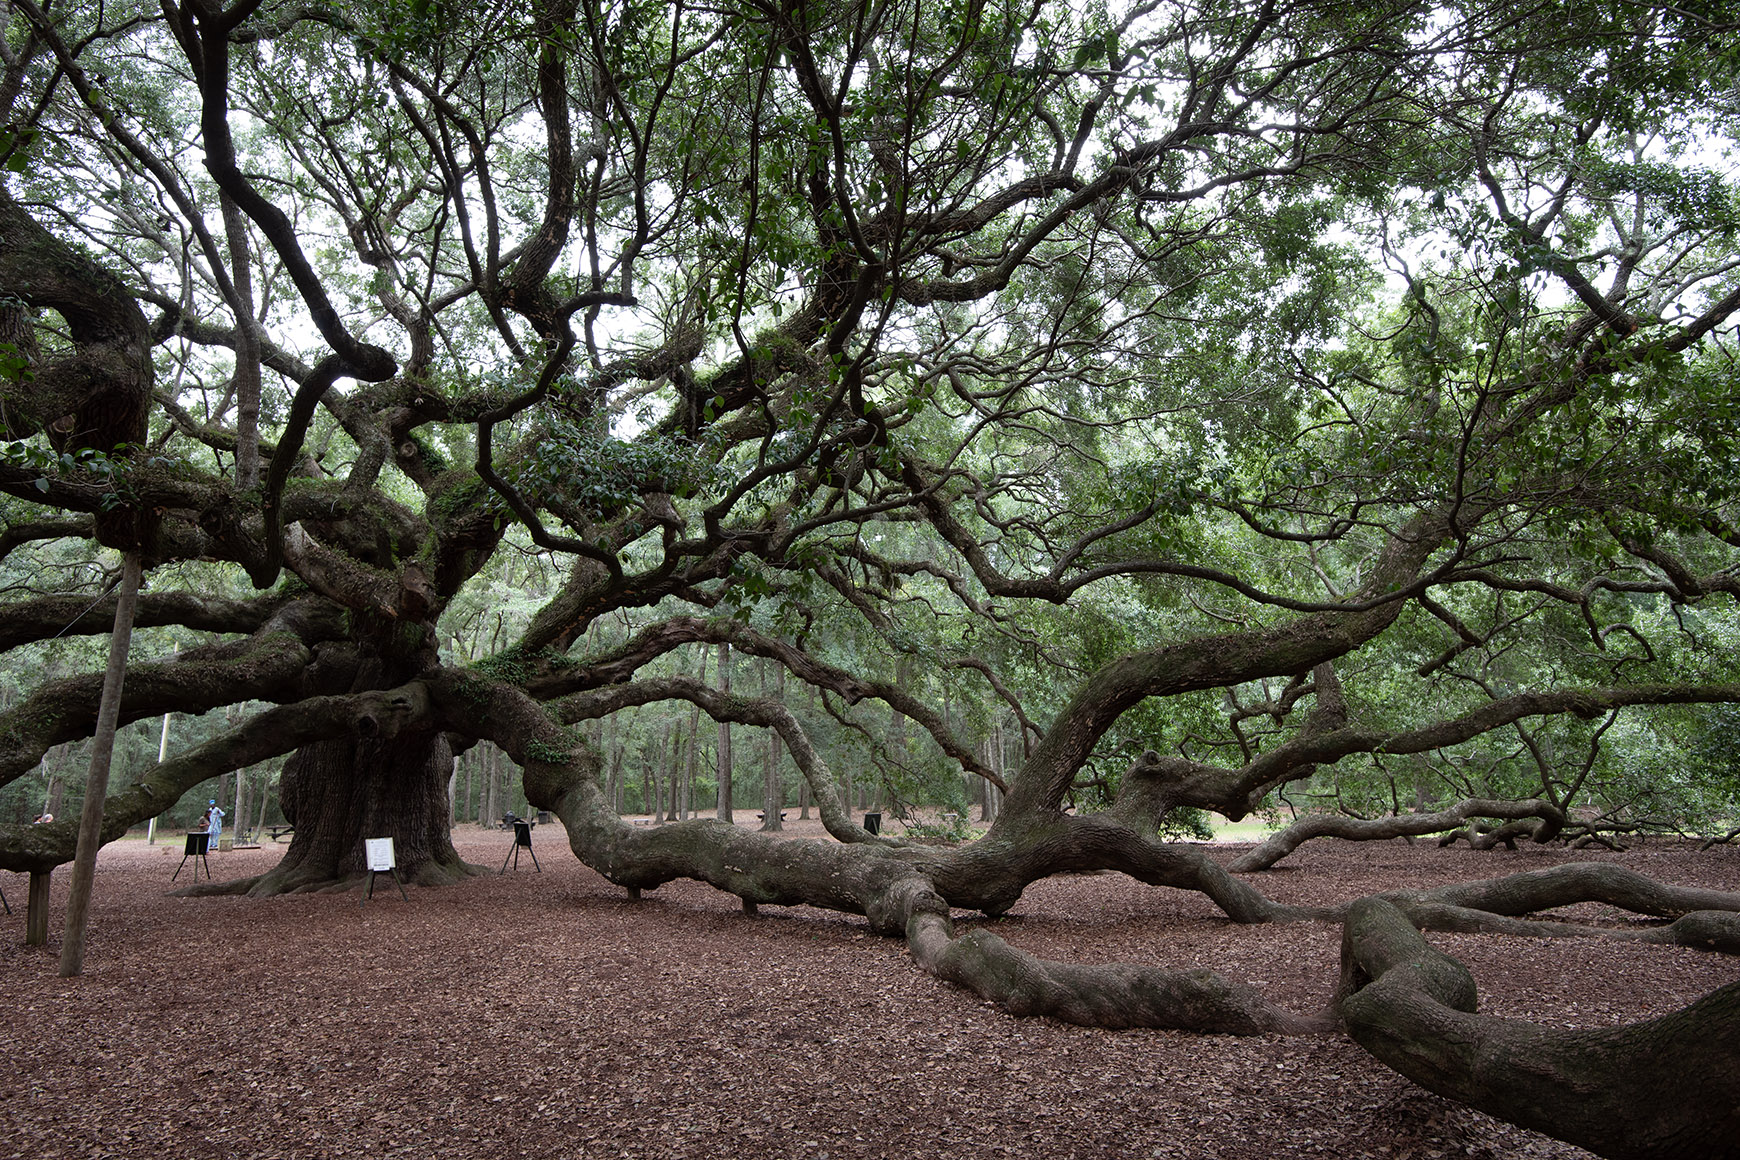
|
Angel Oak, Johns Island, South Carolina, USA (Nikon D750,16.0-35.0 mm f/4.0 lens at 19 mm, f/8, 1/50s, ISO 400, RAW) |
This is the image the way it came out of the camera. Note the bright white sign in front and the signs on either side of the trunk. In addition, there is a person wearing pale blue in the background. All these details take away from the main subject. Removing them allows the viewer to focus on what this photograph is about, i.e., Angel Oak. In addition to removing unwanted elements, post processing allowed adjusting color and exposure.
The following example shows the Old Post Office Building in Ghent, Belgium. Not only can the exposure be adjusted (the group of people in the lower right are too dark and the whole scene could stand a brightness adjustment); in addition the overhead power lines for the electric street cars are a huge distraction that takes away from the architecture.
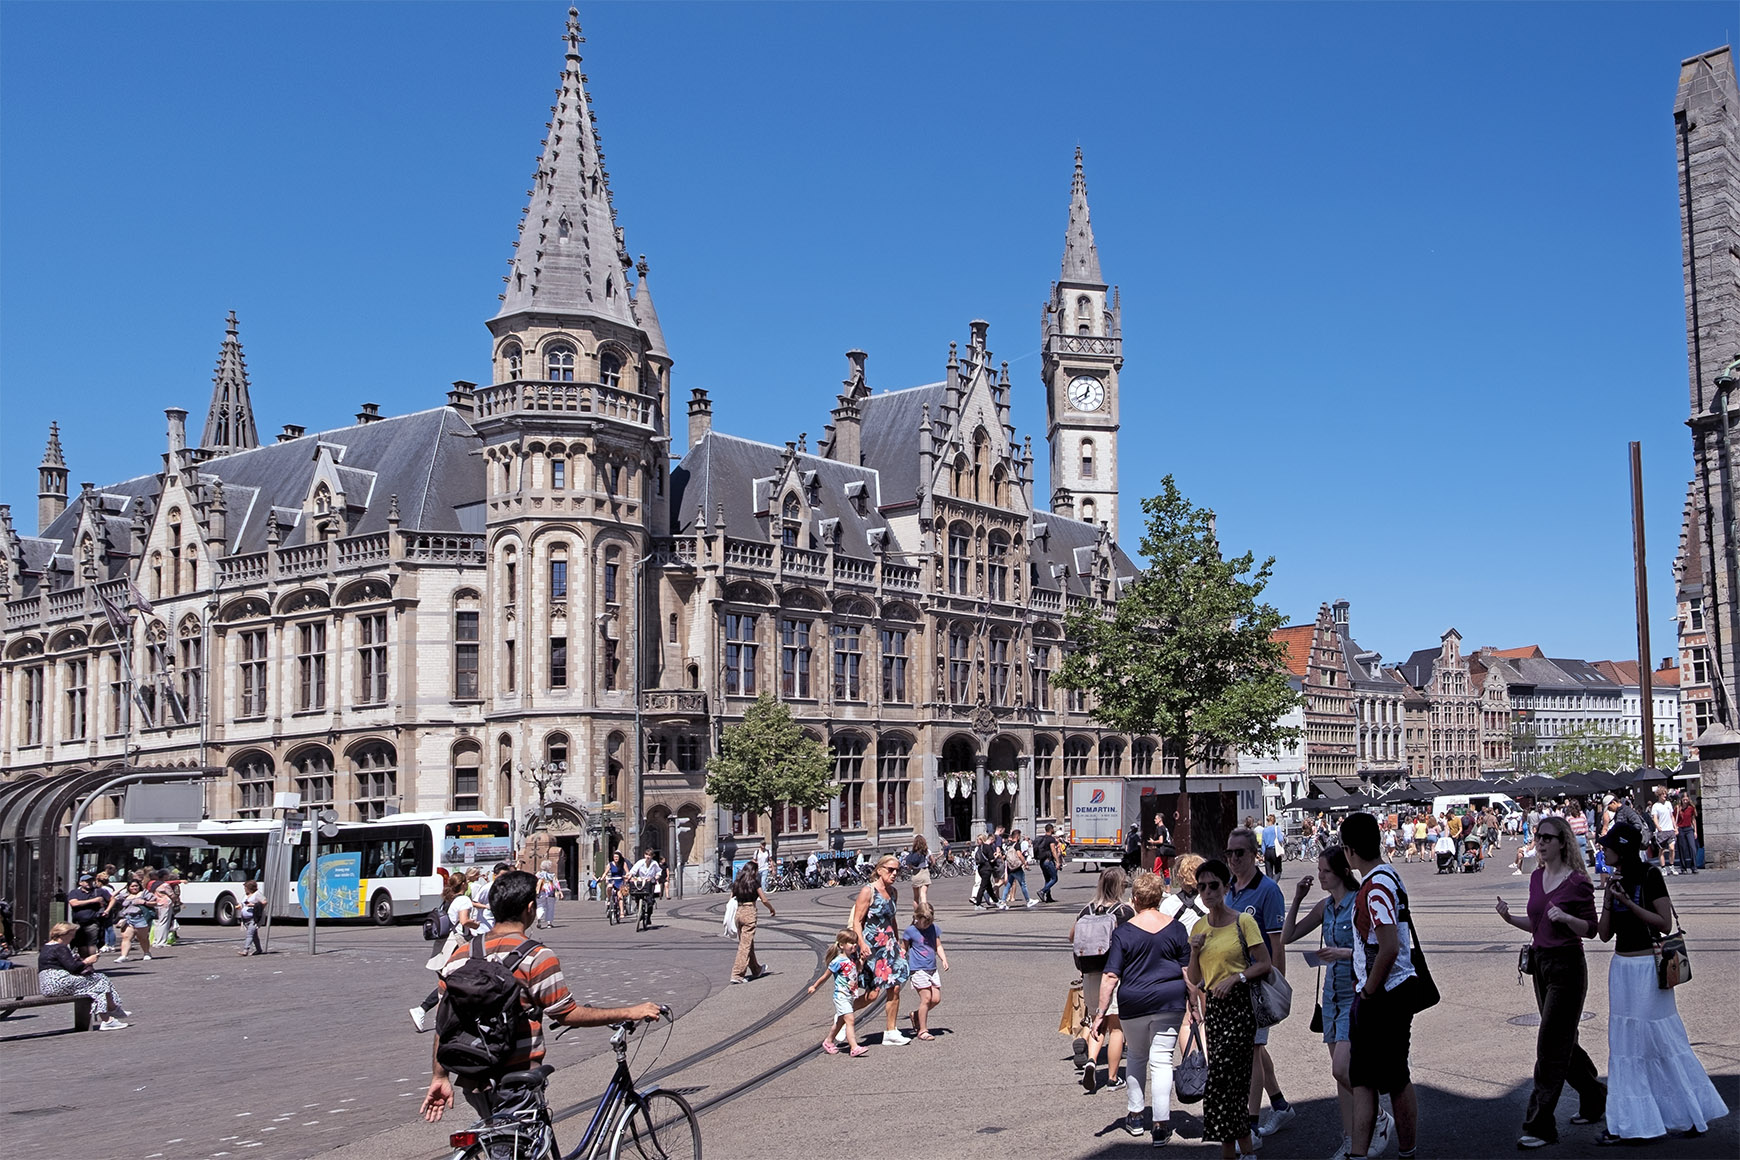
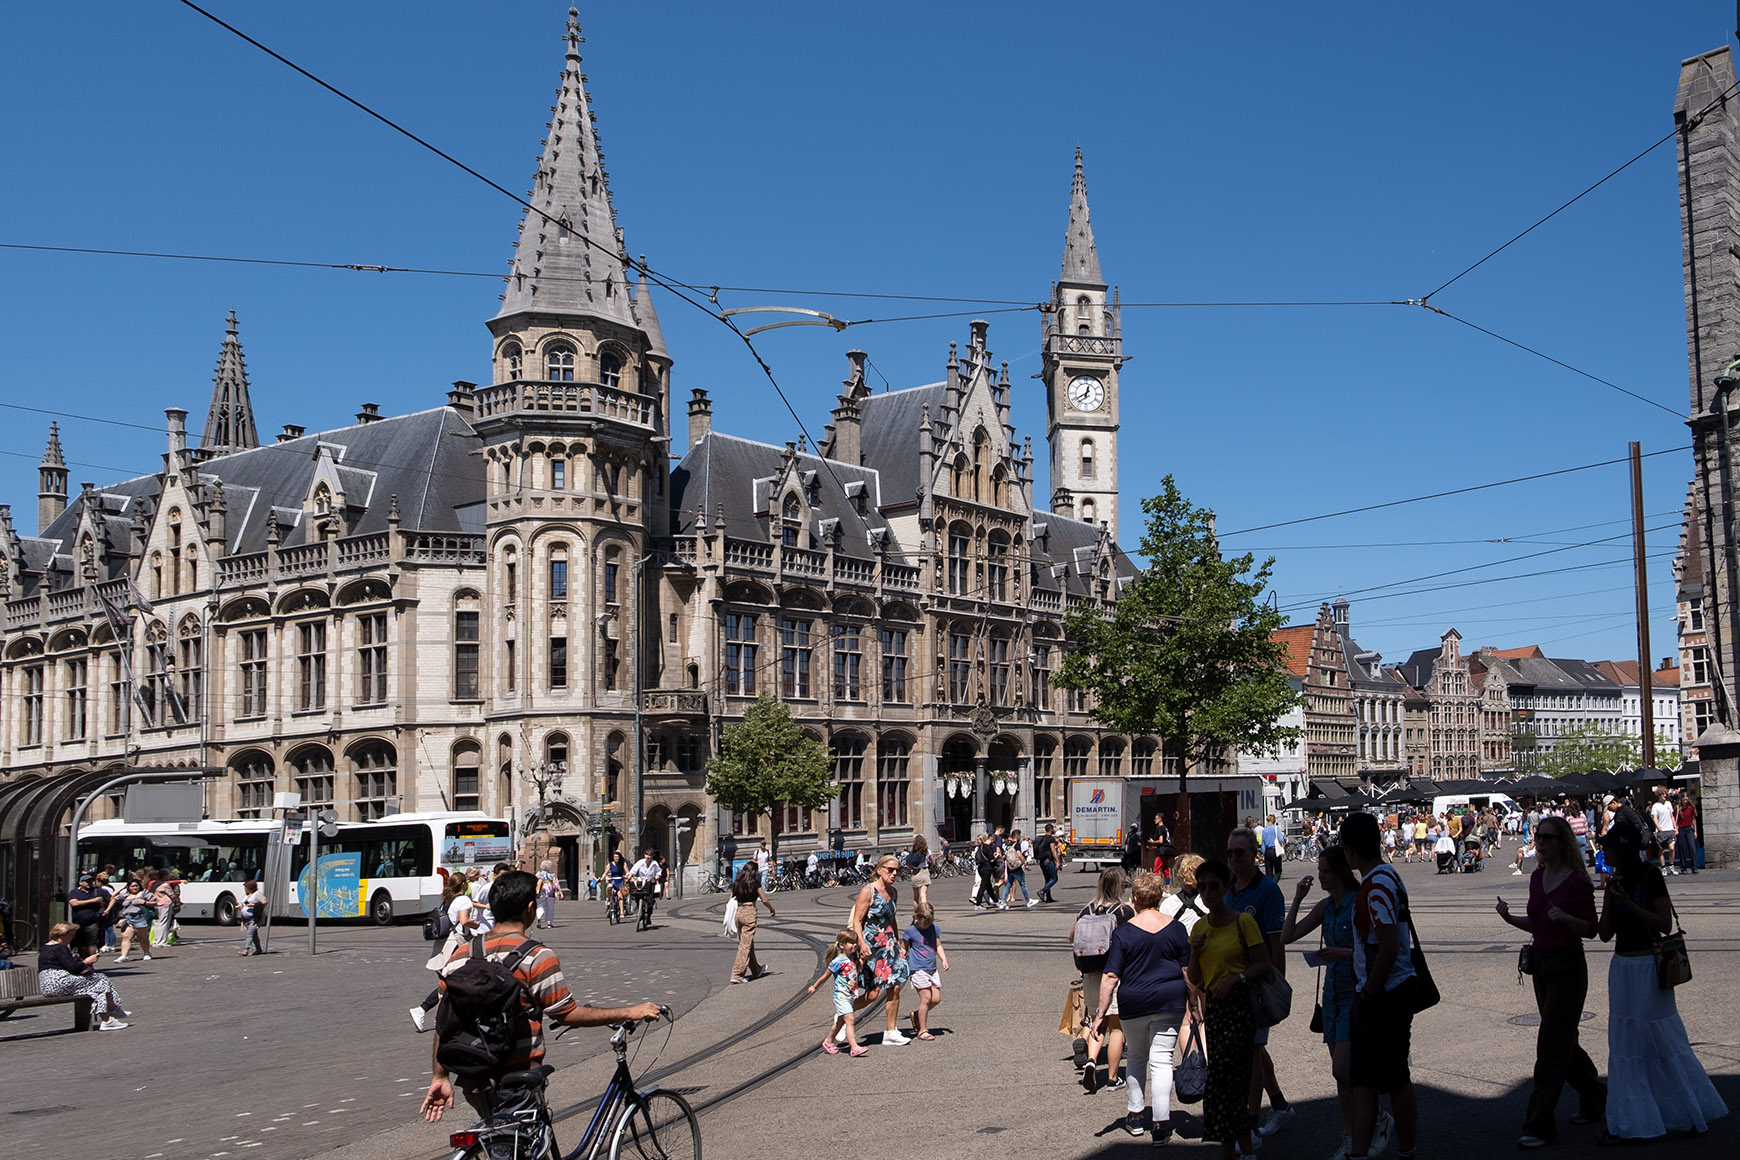
|
Old Post Office Building, Ghent, Belgium (Fujifilm X-T30, XF18-55mm f/2.8-4 R LM OIS lens at 27 mm, f/7.1, 1/480s, ISO 160, RAW) |
The processed image corrects all these things. Exactly how the correction is applied is obviously a matter of taste, and there is no absolute right or wrong. When I'm the photographer, I make all the decisions. When you process your own images, your taste is the only thing that counts.
4. Was the sea really that color?
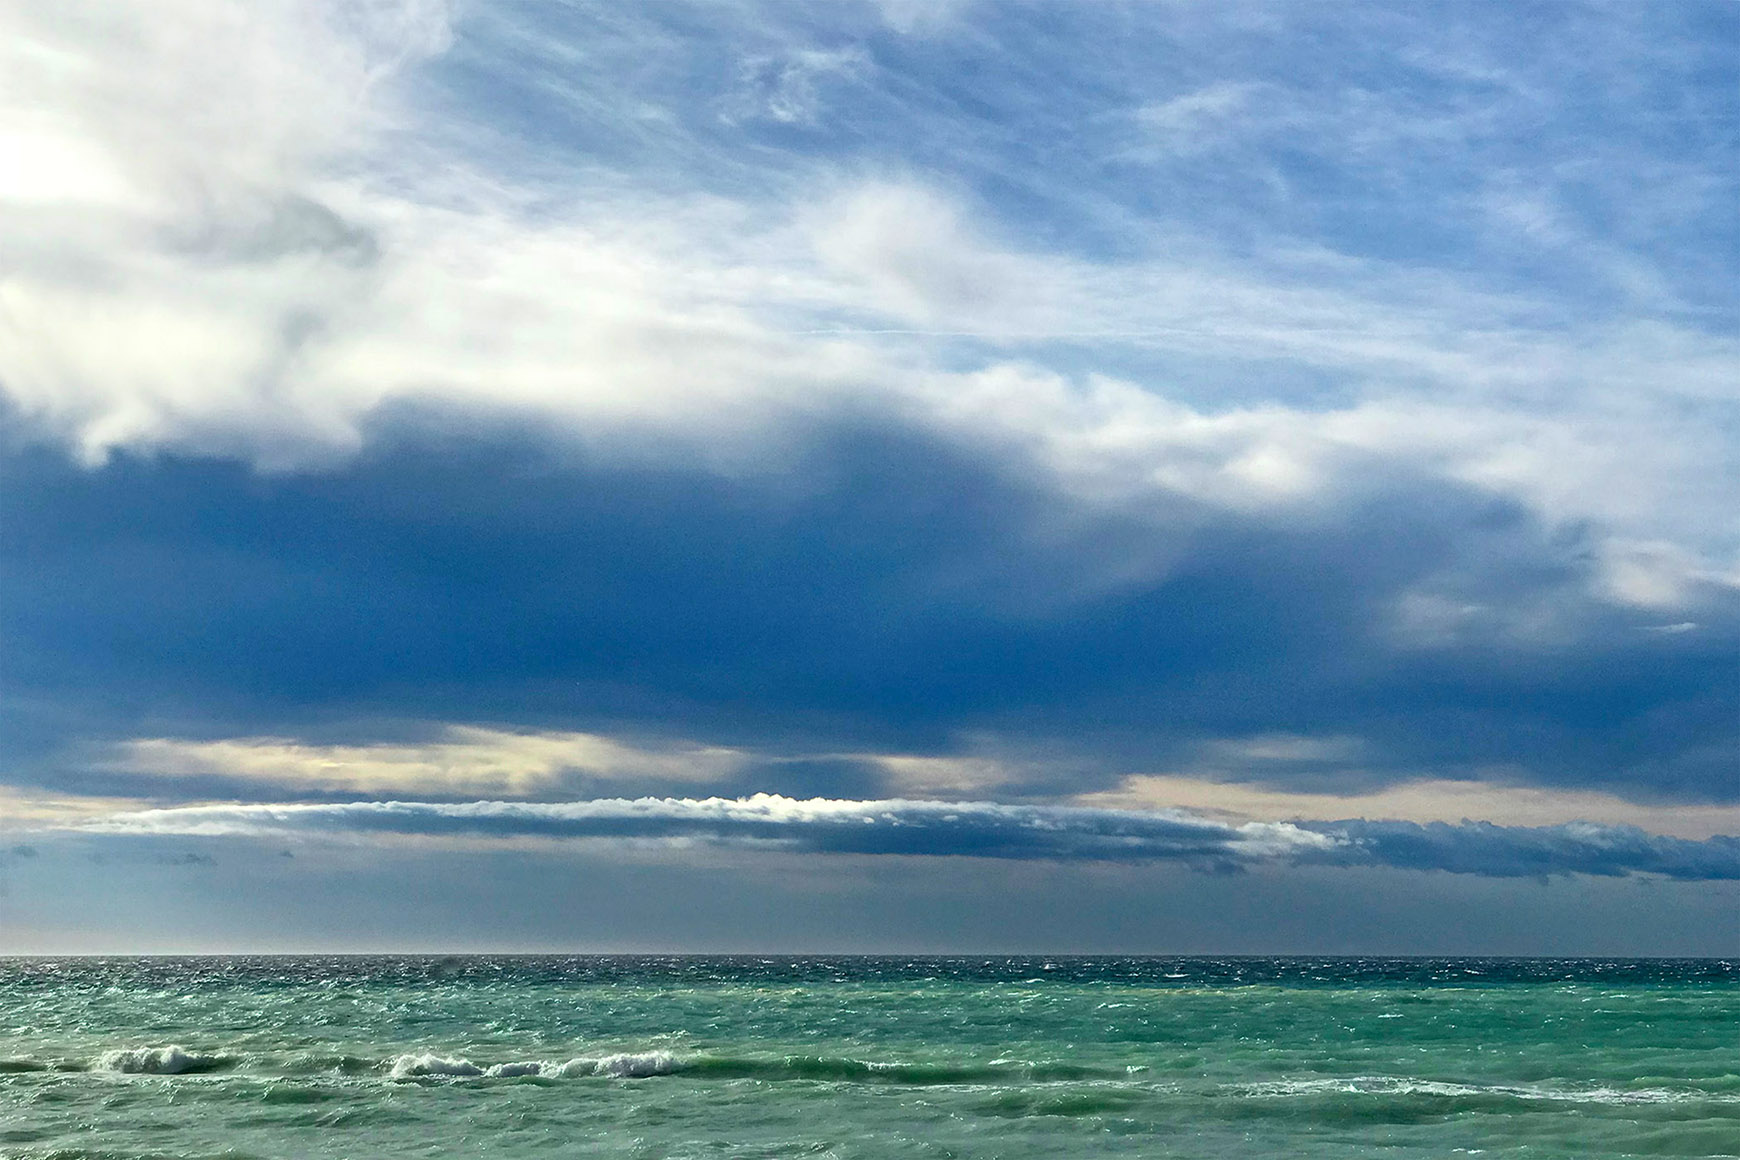
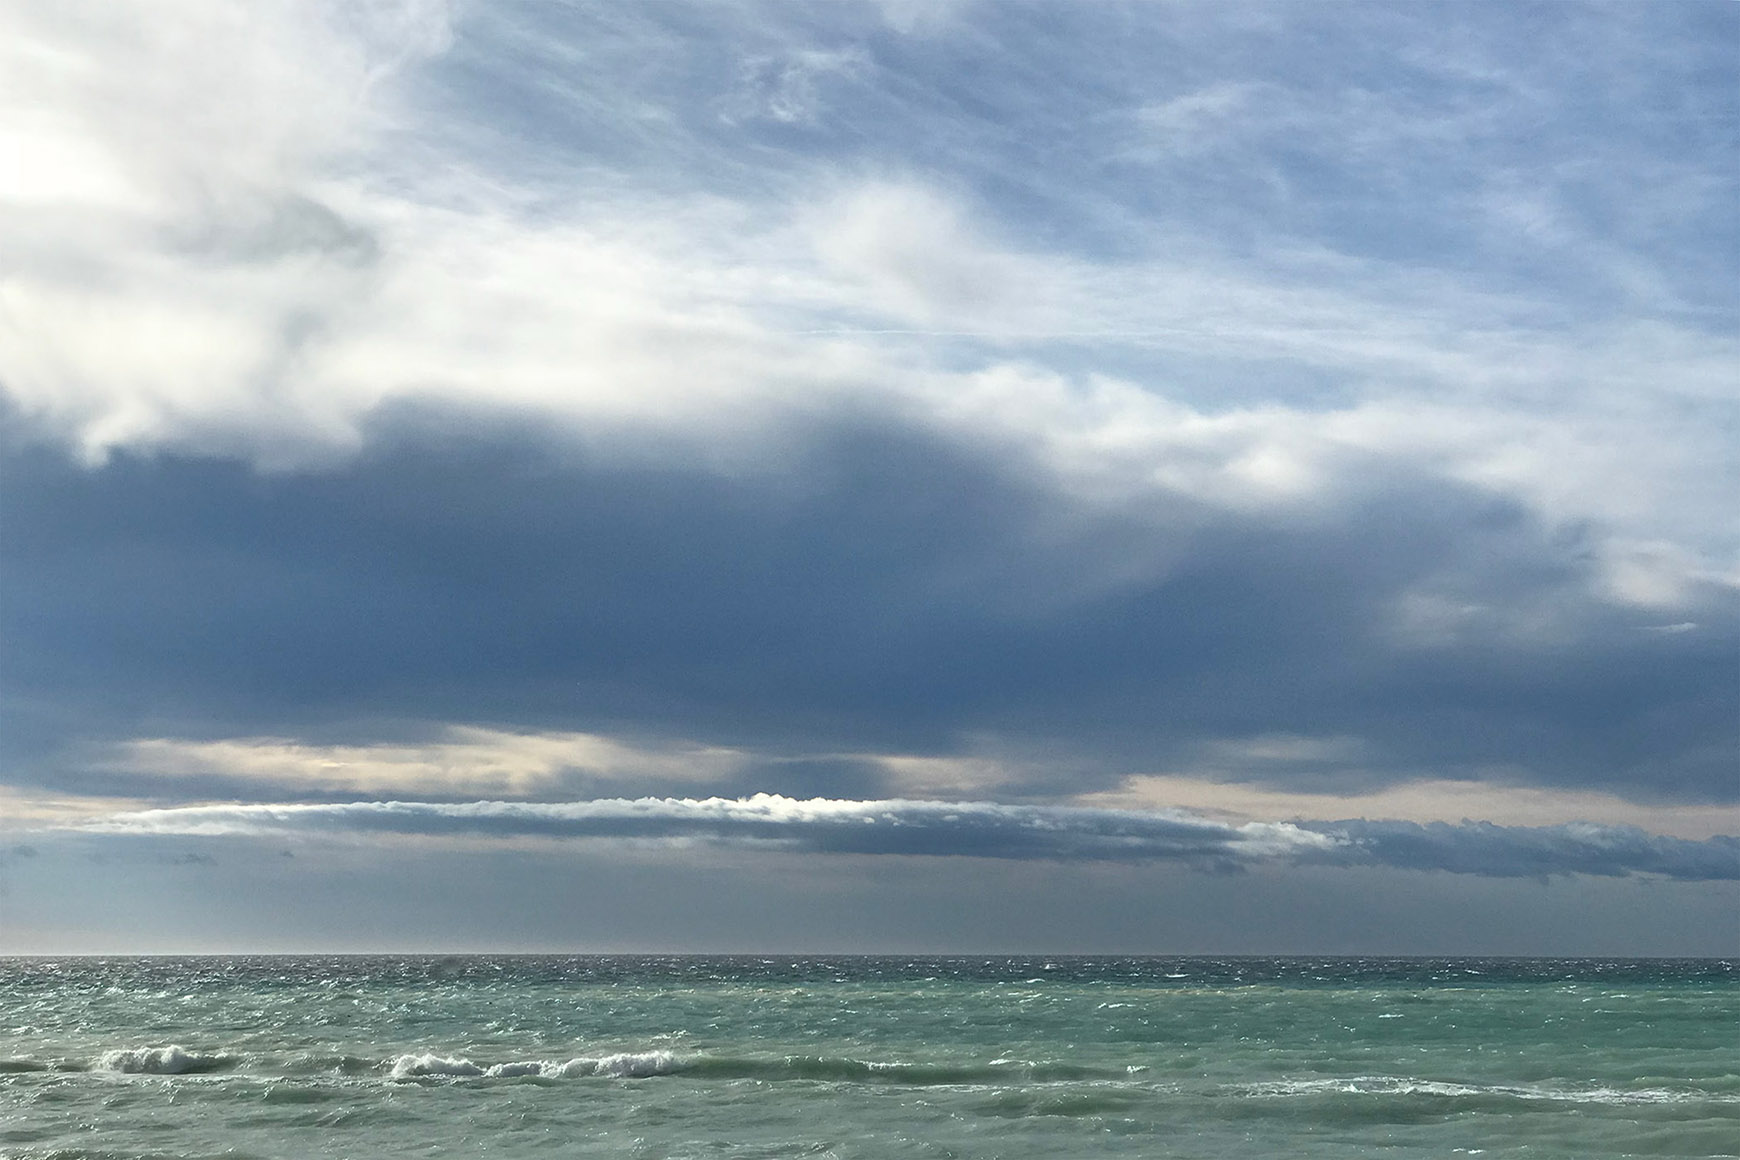
I get this a lot in different variations. Was the sky this blue? Were these poppies that red? The foliage so lush? In a way, it's a variant of the altering reality kind of post processing, but one that changes color, hue, and brightness levels instead of altering physical picture elements. As an example, I shall use a JPEG photo taken in Cannes with an iPhone. There was a great deal of wind, and the Mediterranean looked more like an ocean than a sea. I was struck by the green hues in the water and the interesting sky, so I grabbed my iPhone and took the picture.
|
The Mediterranean at Cannes, France (iPhone 7 Plus at 57 mm, f/2.8, 1/2500s, ISO 20, JPG) |
The raw converter in the iPhone did a credible job rendering the scene; nevertheless, I was disappointed when I looked at this image because it lacked the drama I thought I had seen and wanted to get across. I adjusted the colors, increased saturation and contrast, and obtained the result shown after dragging the slider to the left. So, was this the color of the sea? I honestly don't know, but it's the way I remember it. How can several people perceive the colors in a scene the same way, let alone remember them identically? Because I am not photographing items for sale in a catalog, in which case there would be a contractual obligation to get the color exactly right, I reserve the right to represent the colors as I see fit—and you should, too!
Here is another example of an out-of-camera JPEG:
|
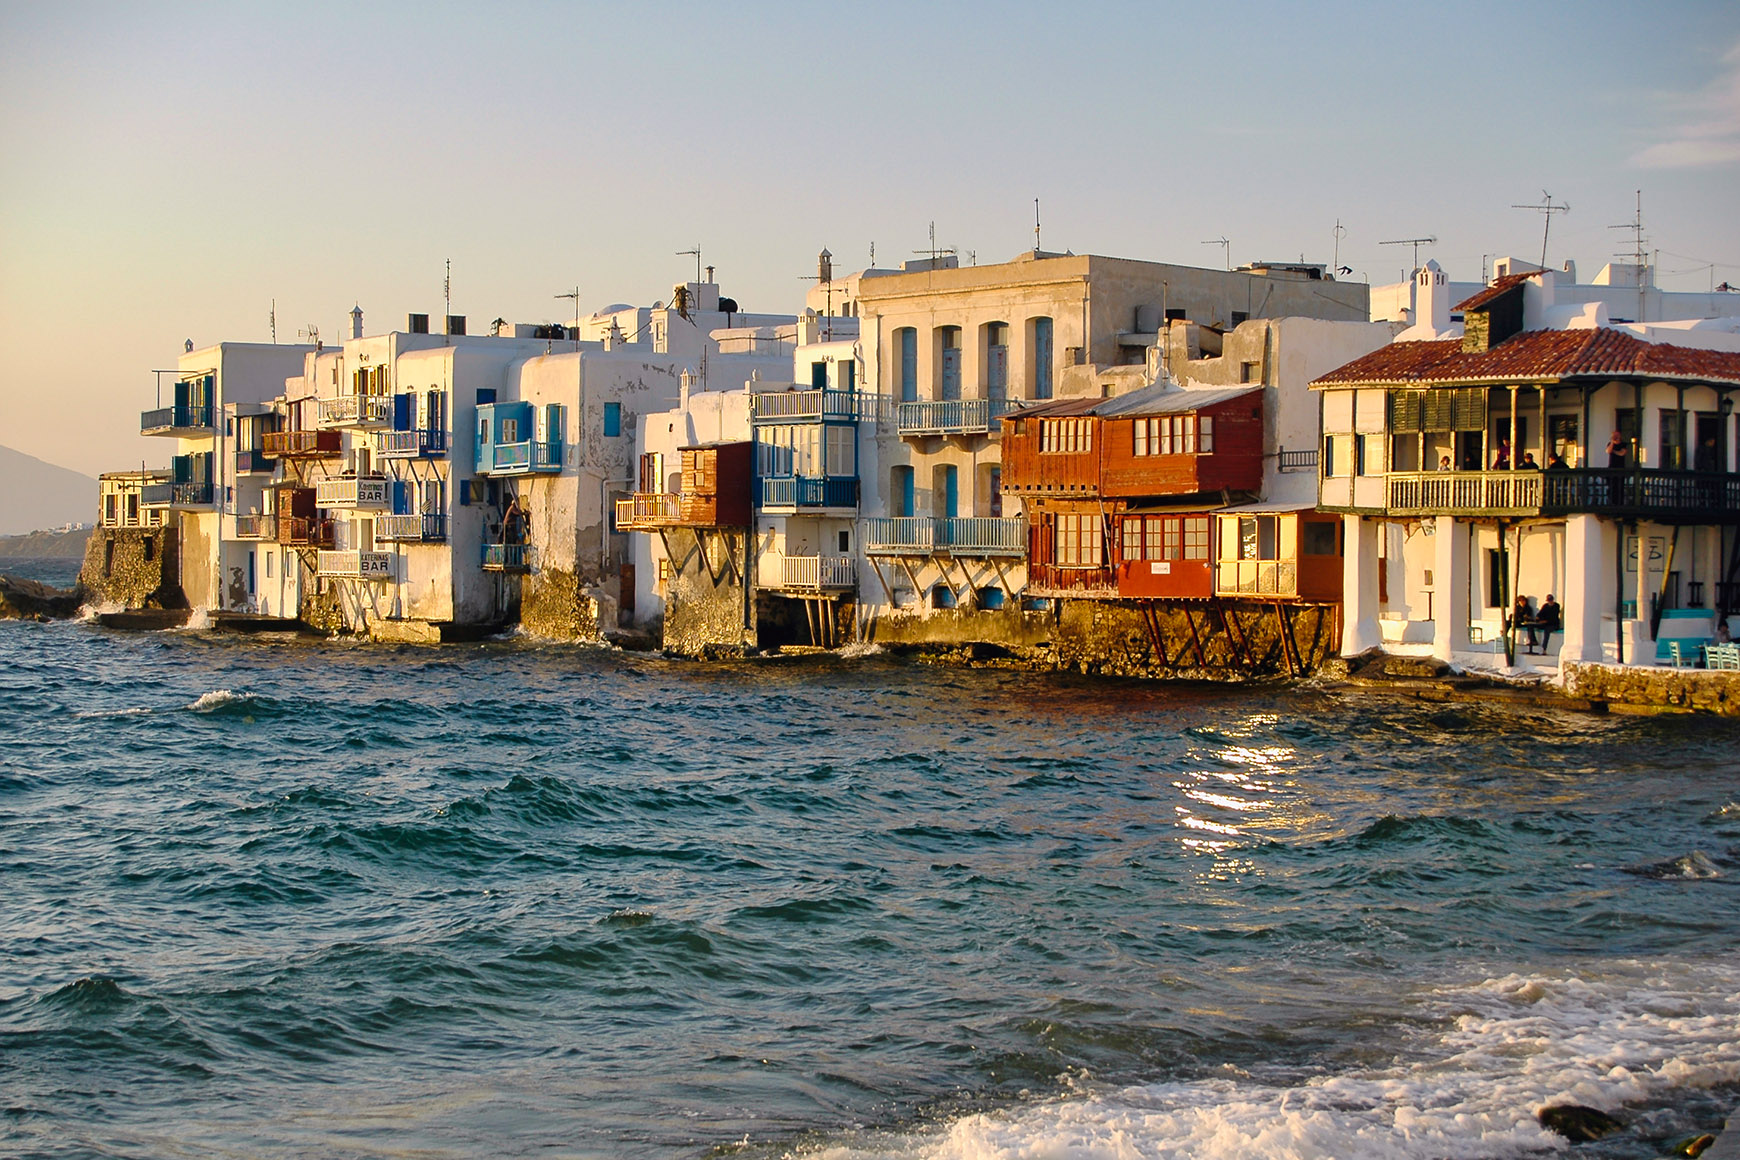
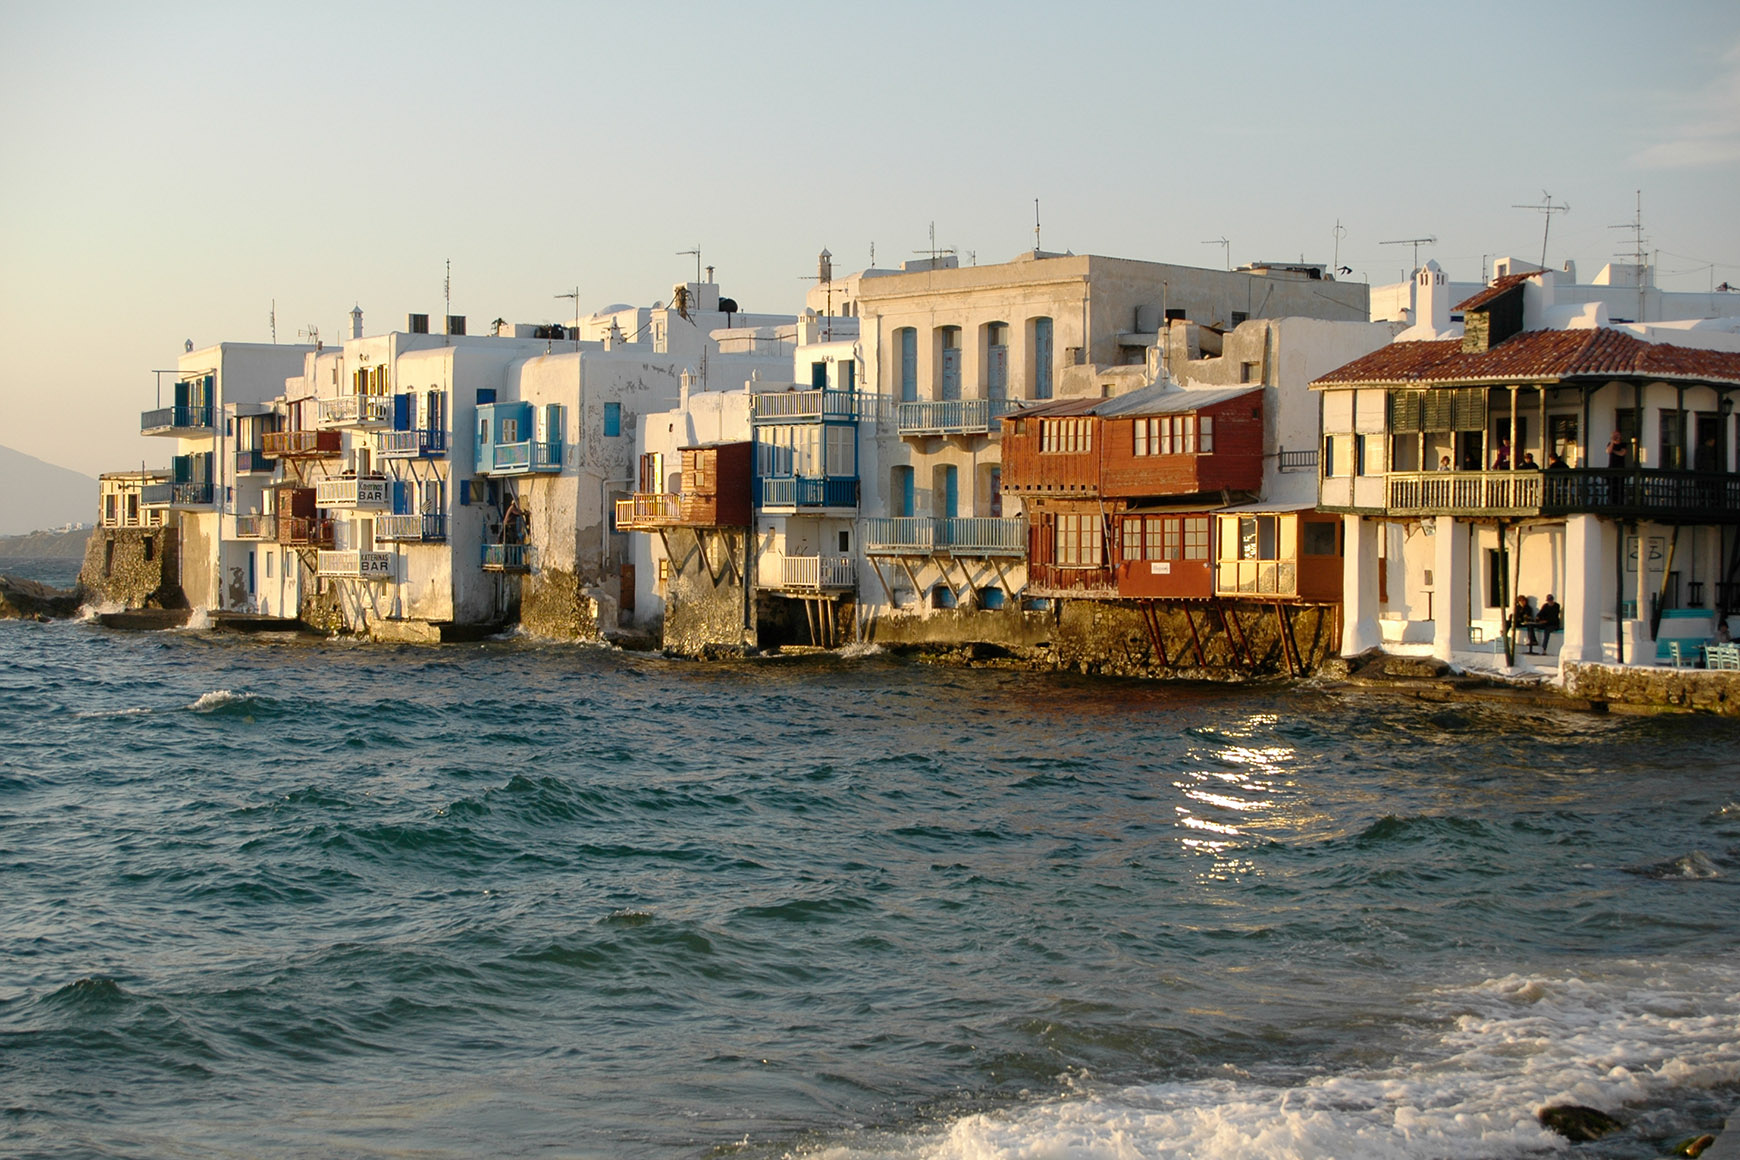
Mykonos, Greece (Nikon D70, Sigma 18-50 mm f/3.5-5.6 at 63 mm, f/7.1, 1/200, ISO 200, JPG) |
The above photograph was taken in the harbor of Mykonos at about 6:30 p.m. in late April. Again, as you can see, the raw converter in the D70 did a pretty good job of giving us a usable photo out of camera. In this case, post processing served to slightly adjust hue and crispness, purely a matter of taste. In my opinion, the out-of-camera image, while certainly usable, did not adequately capture the warm evening light I remembered. A couple of very quick adjustments fixed that.
5. Solving problems
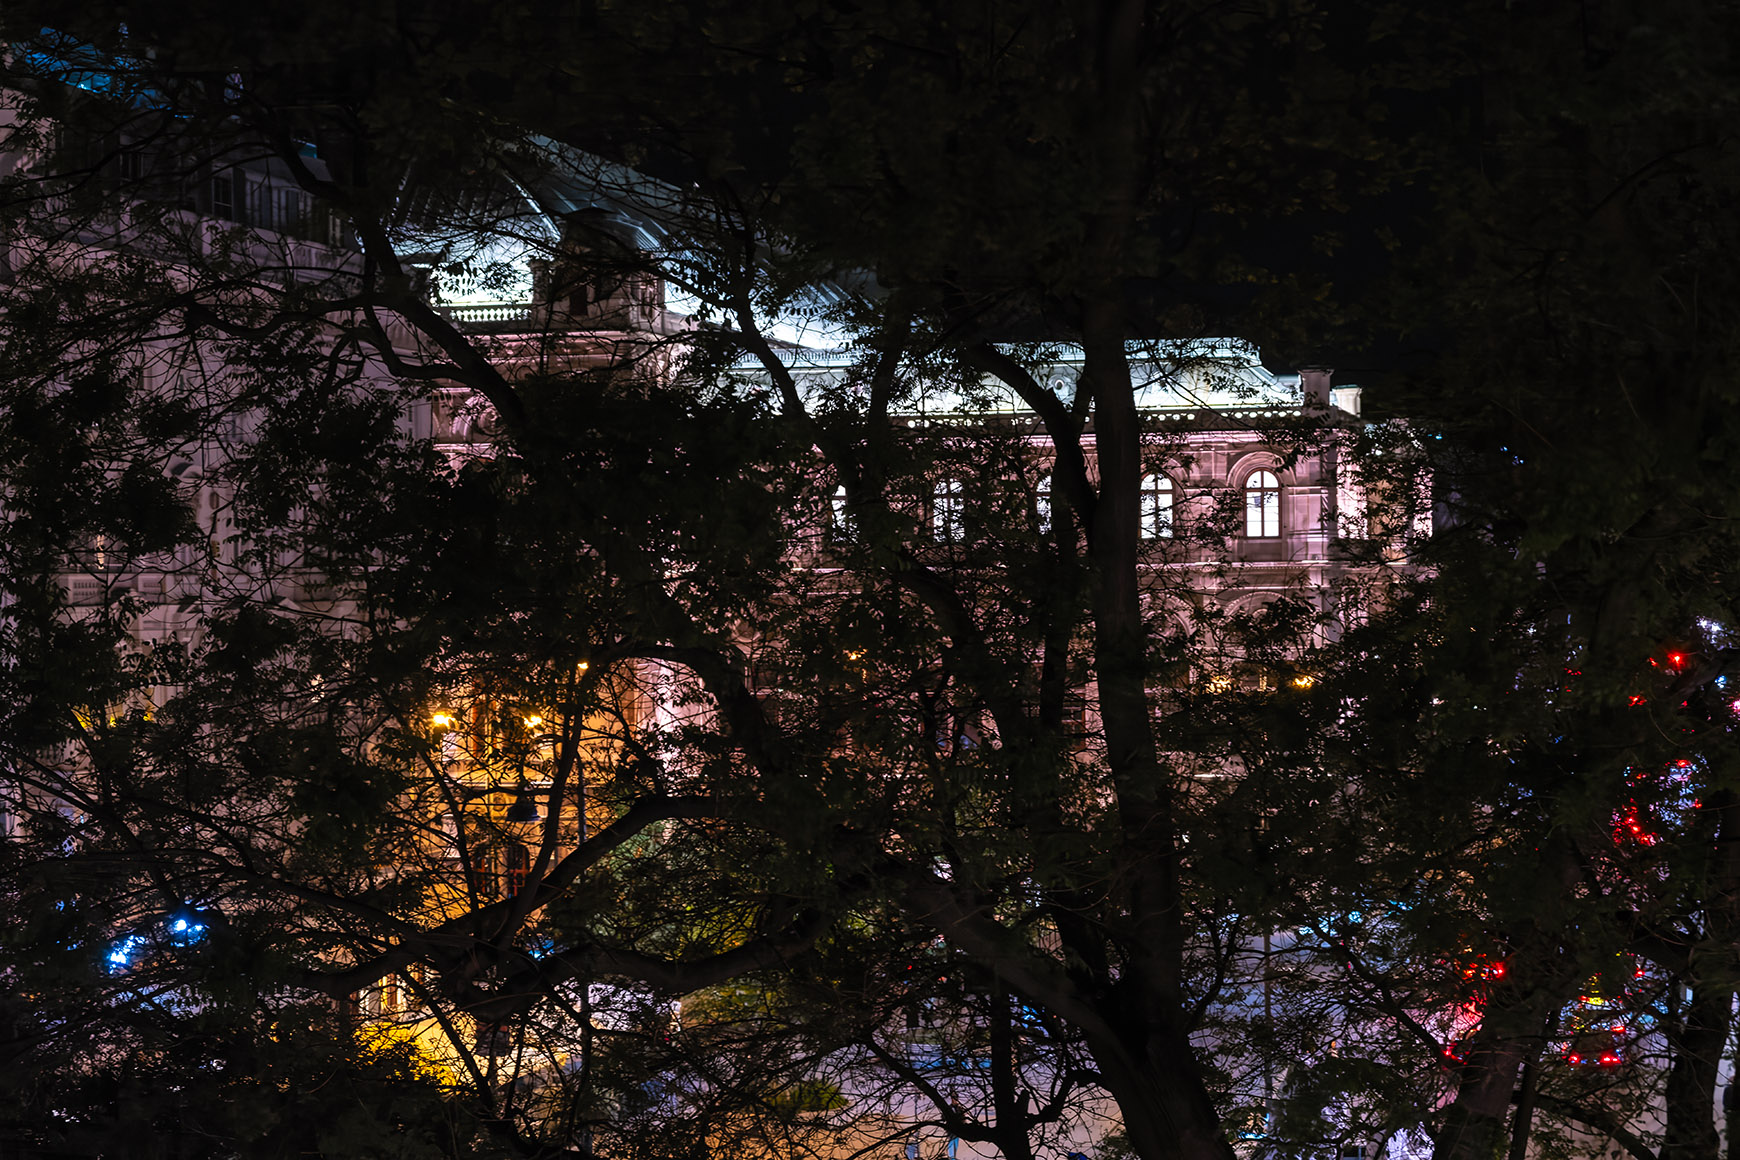
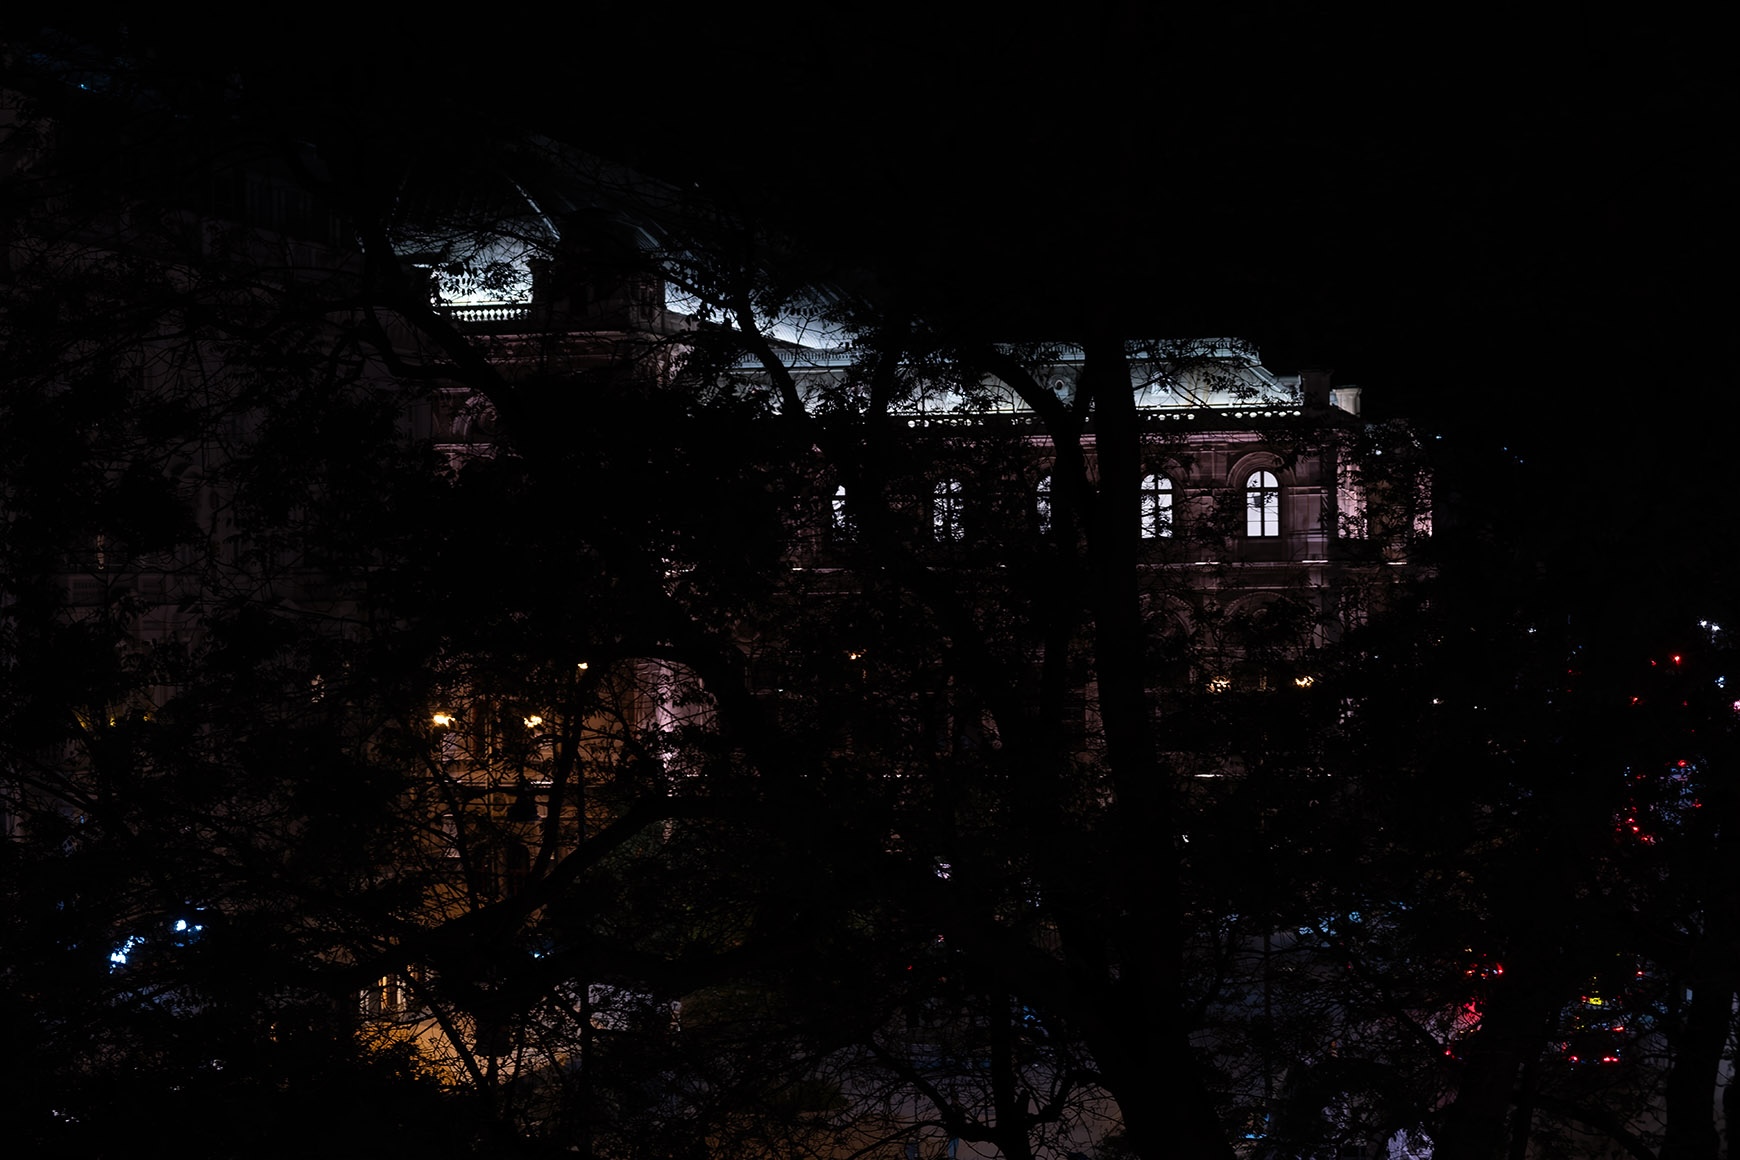
One of the issues that often arises is when the dynamic range, i.e., the difference between the brightest and darkest parts of an image, becomes very important. The human eye copes with this kind of thing amazingly well; it can handle up to 30 stops (with full dark adaptation), whereas a good camera can only handle 13 to 16 stops in a single exposure. The following photo was taken from a hotel room in Vienna after 10 p.m. on a May evening. As you can see, the raw file has plenty of dark parts that can and should be recovered.
|
View onto the State Opera, Vienna, Austria (Fujifilm X-T5, XF18-55mm F2.8-4 R LM OIS lens at 64 mm, f/5.6, 1/30s, ISO 3200, RAW) |
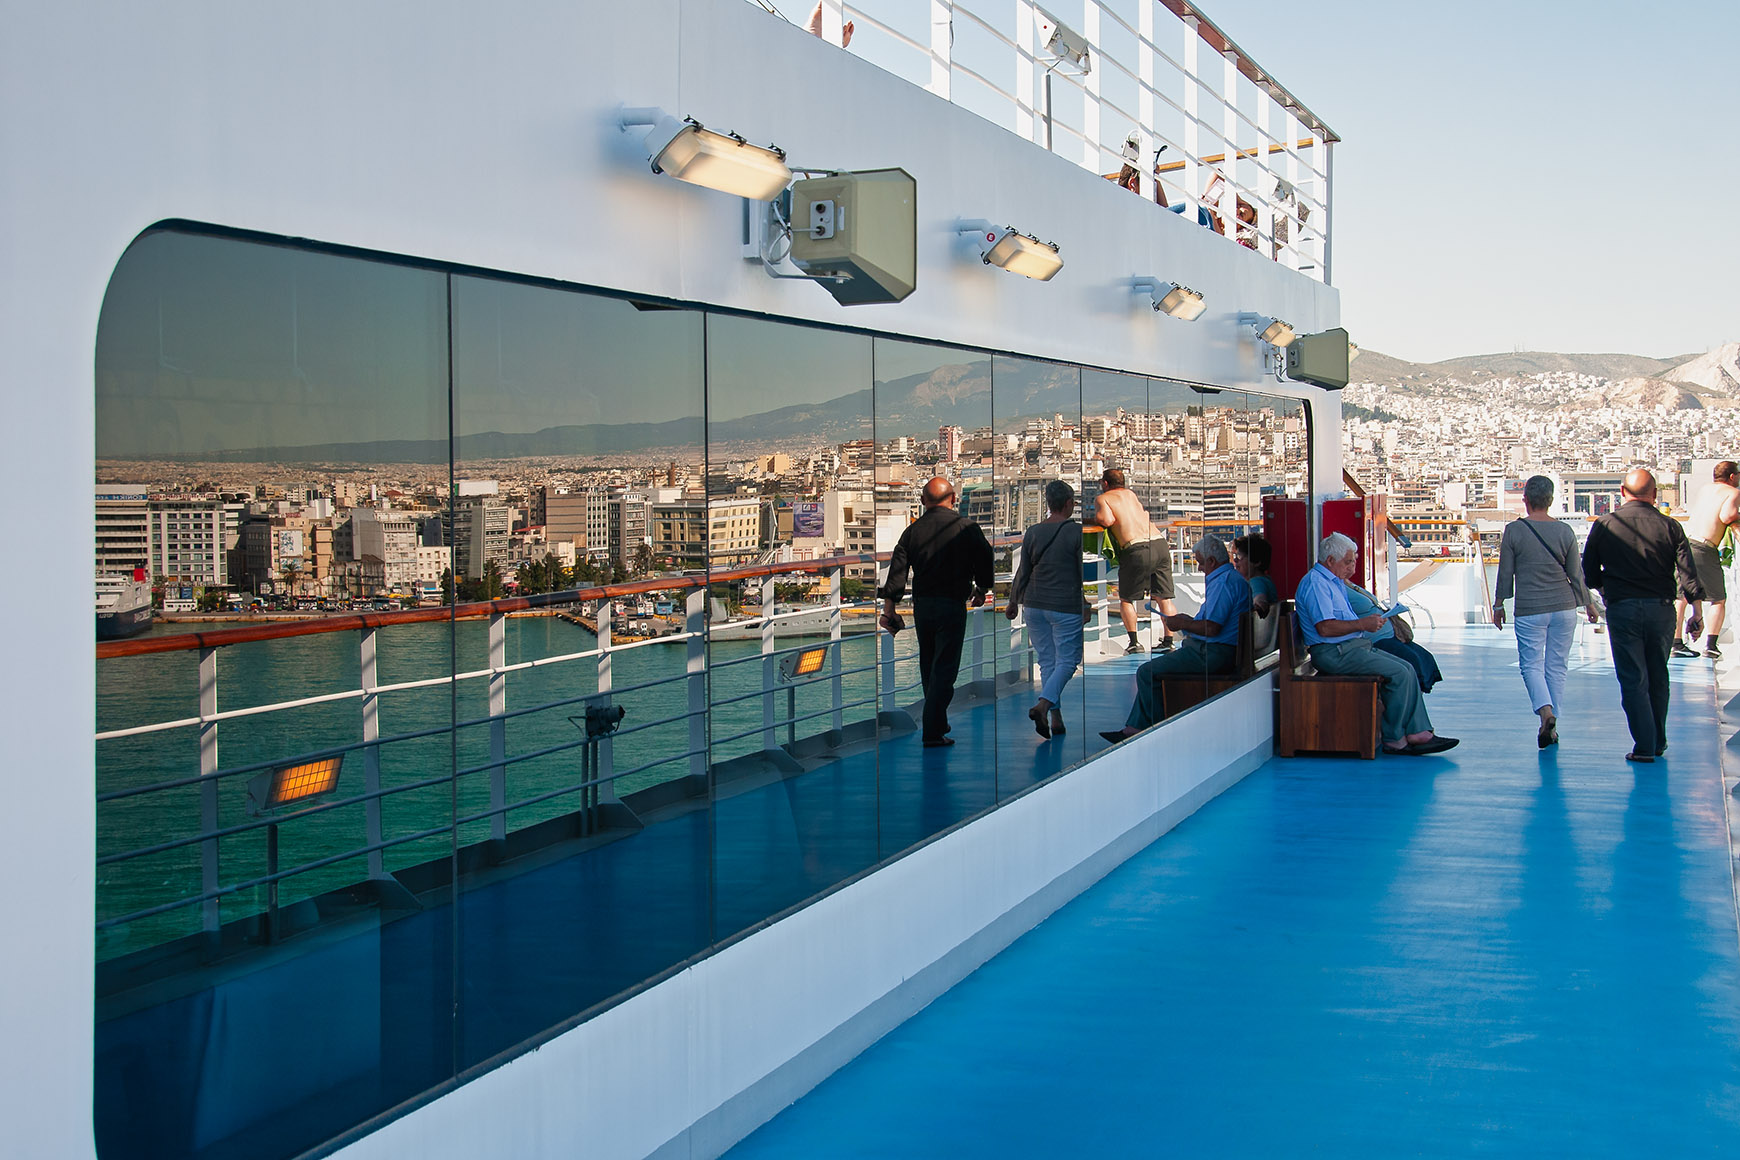
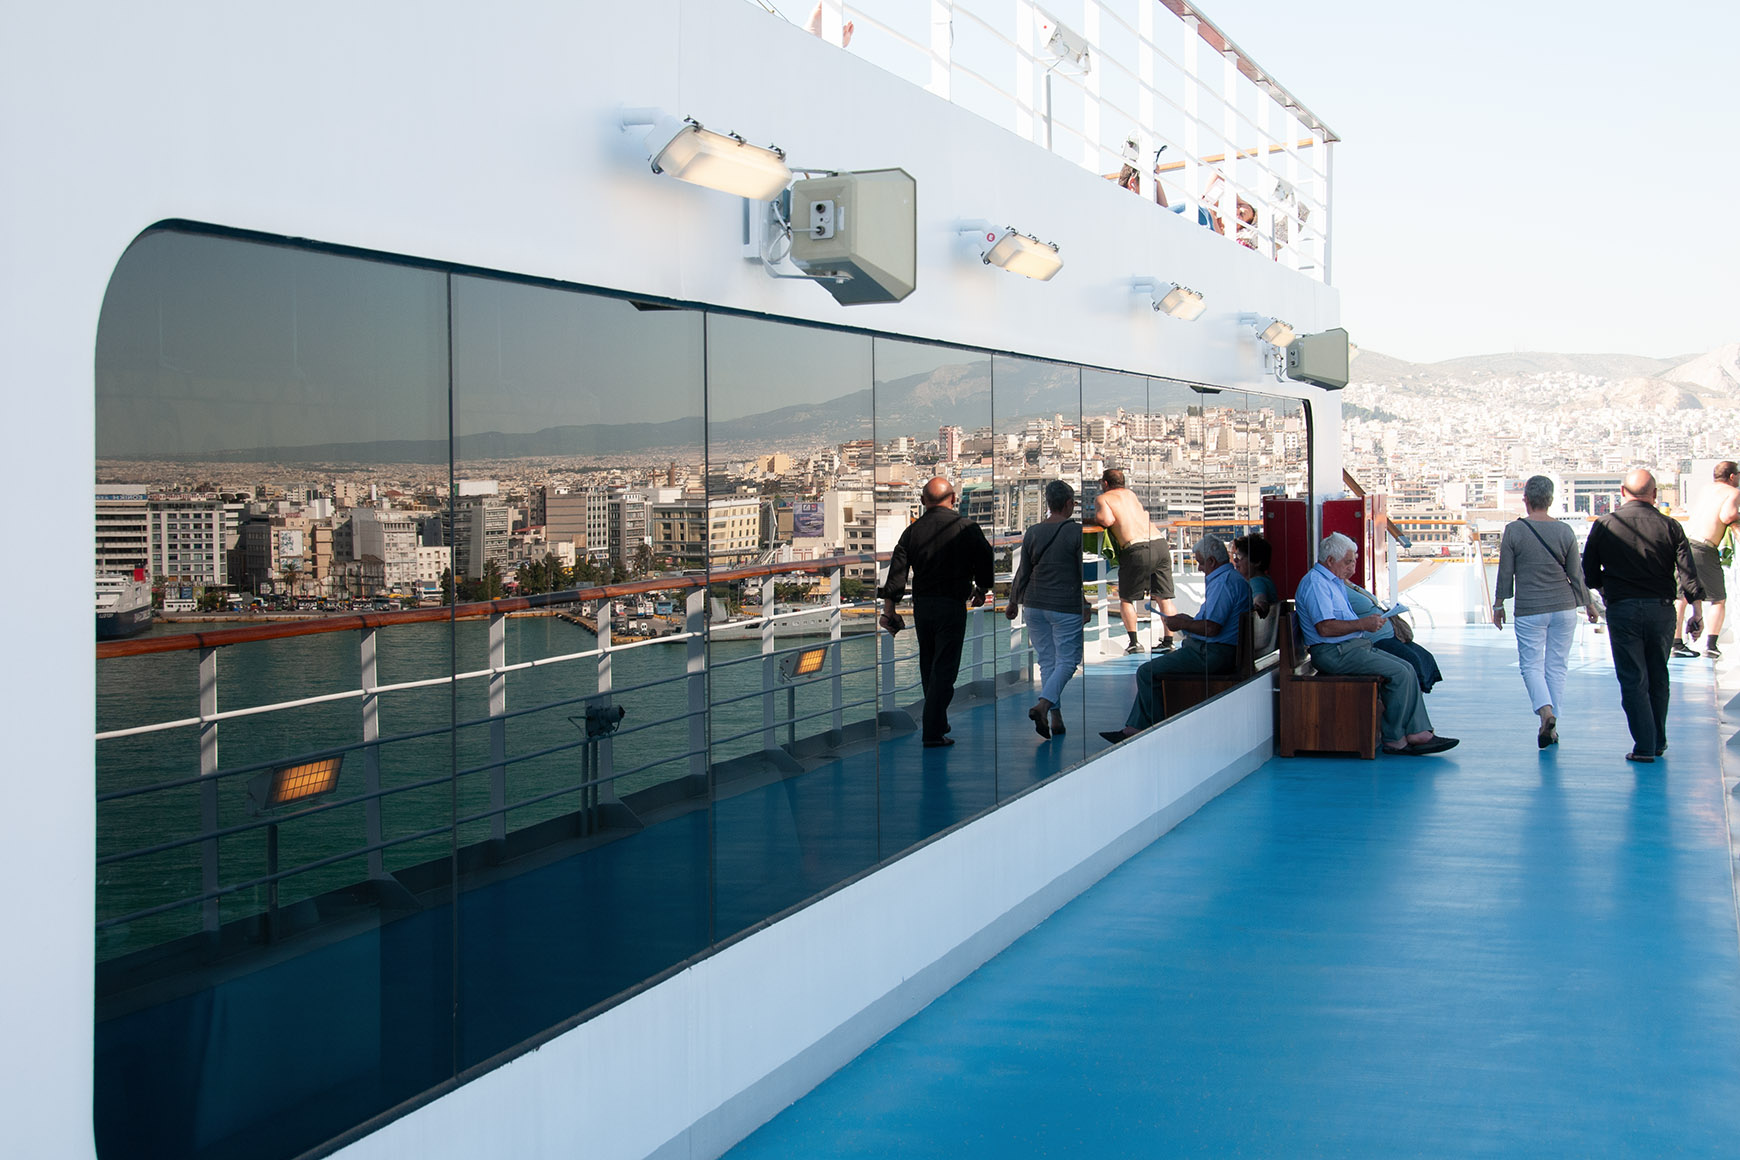
In a way, the next image has the opposite problem. It was taken from the deck of a cruise ship. The camera was probably fooled by the dark reflection on the window and overexposed the hill in the background and the deck above. Because the highlights were not blown out, they could be recuperated rather easily. At the same time, other adjustments were made to saturation and contrast (for example, take a look at the sea in the reflection).
|
View from our cruise ship in Piraeus Port, Greece (Nikon D300, 18-200 mm f/3.5-5.6 lens at 51 mm, f/8, 1/250, ISO 200, RAW) |
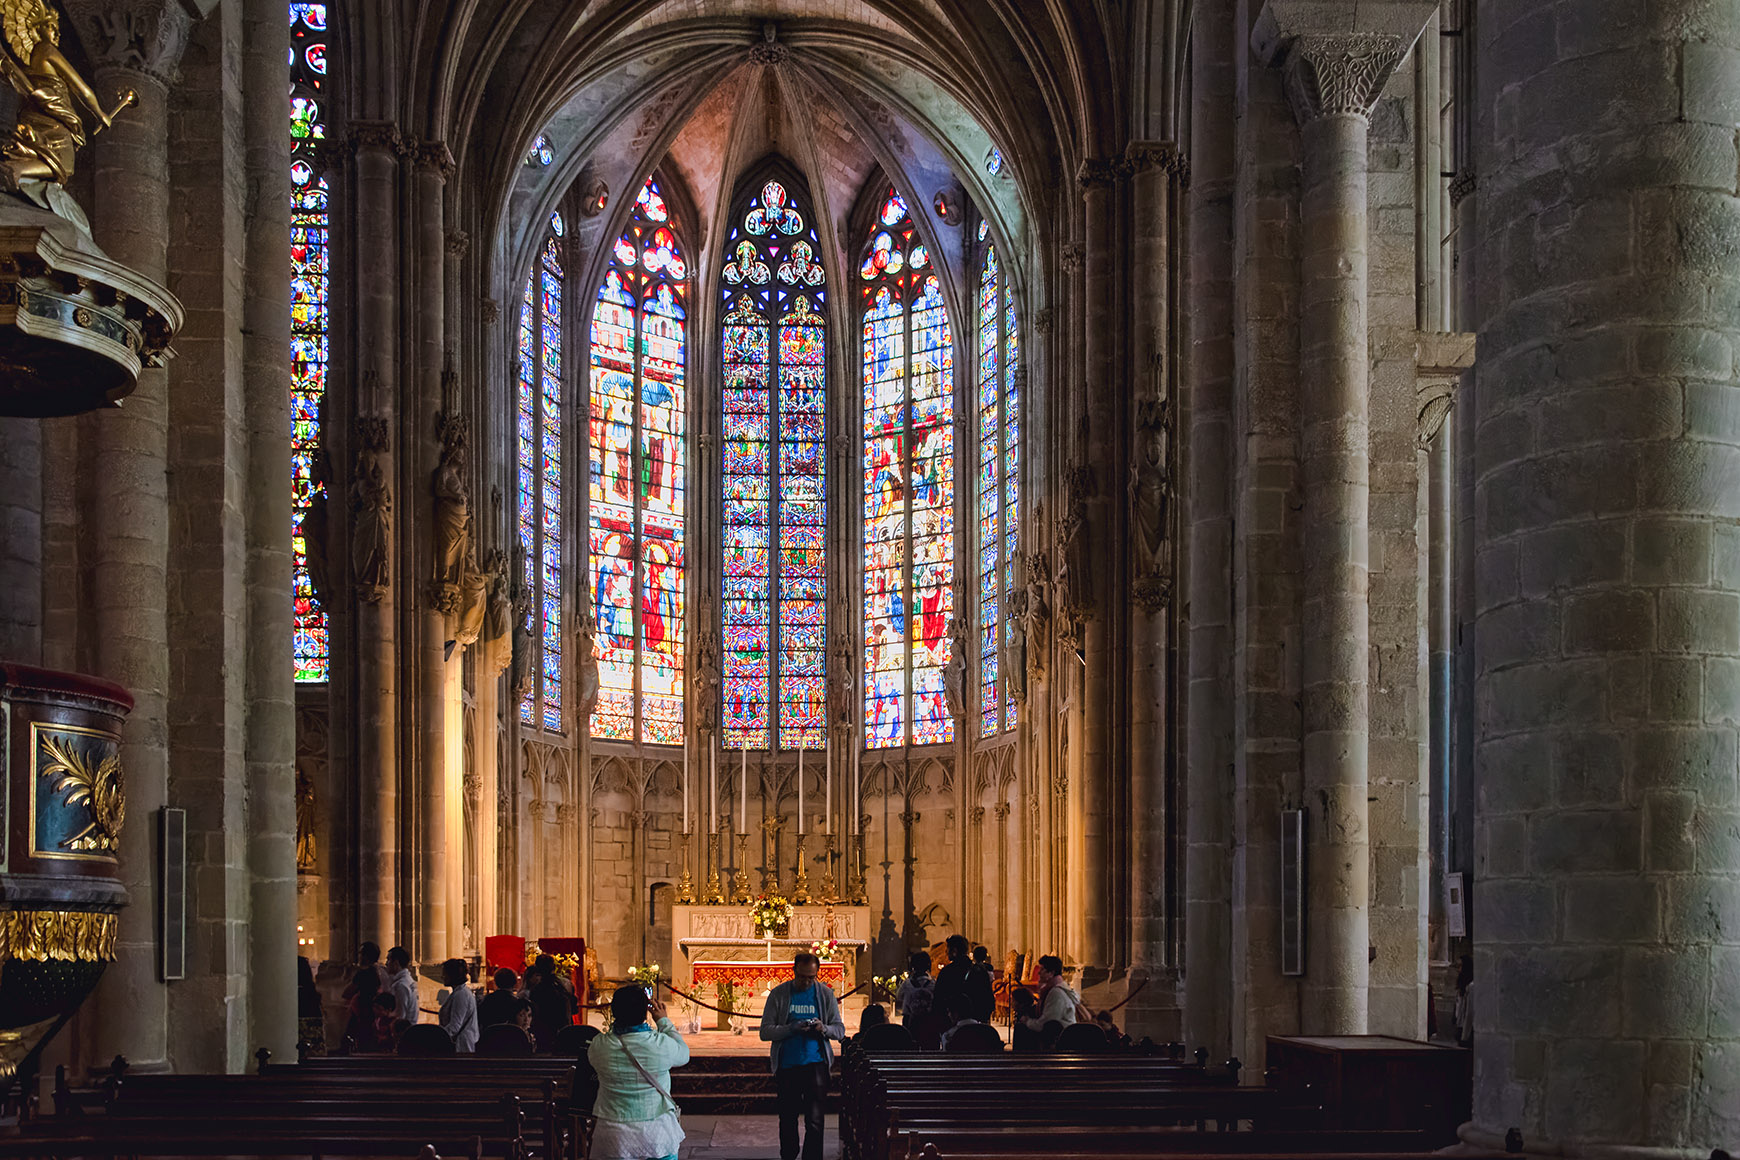
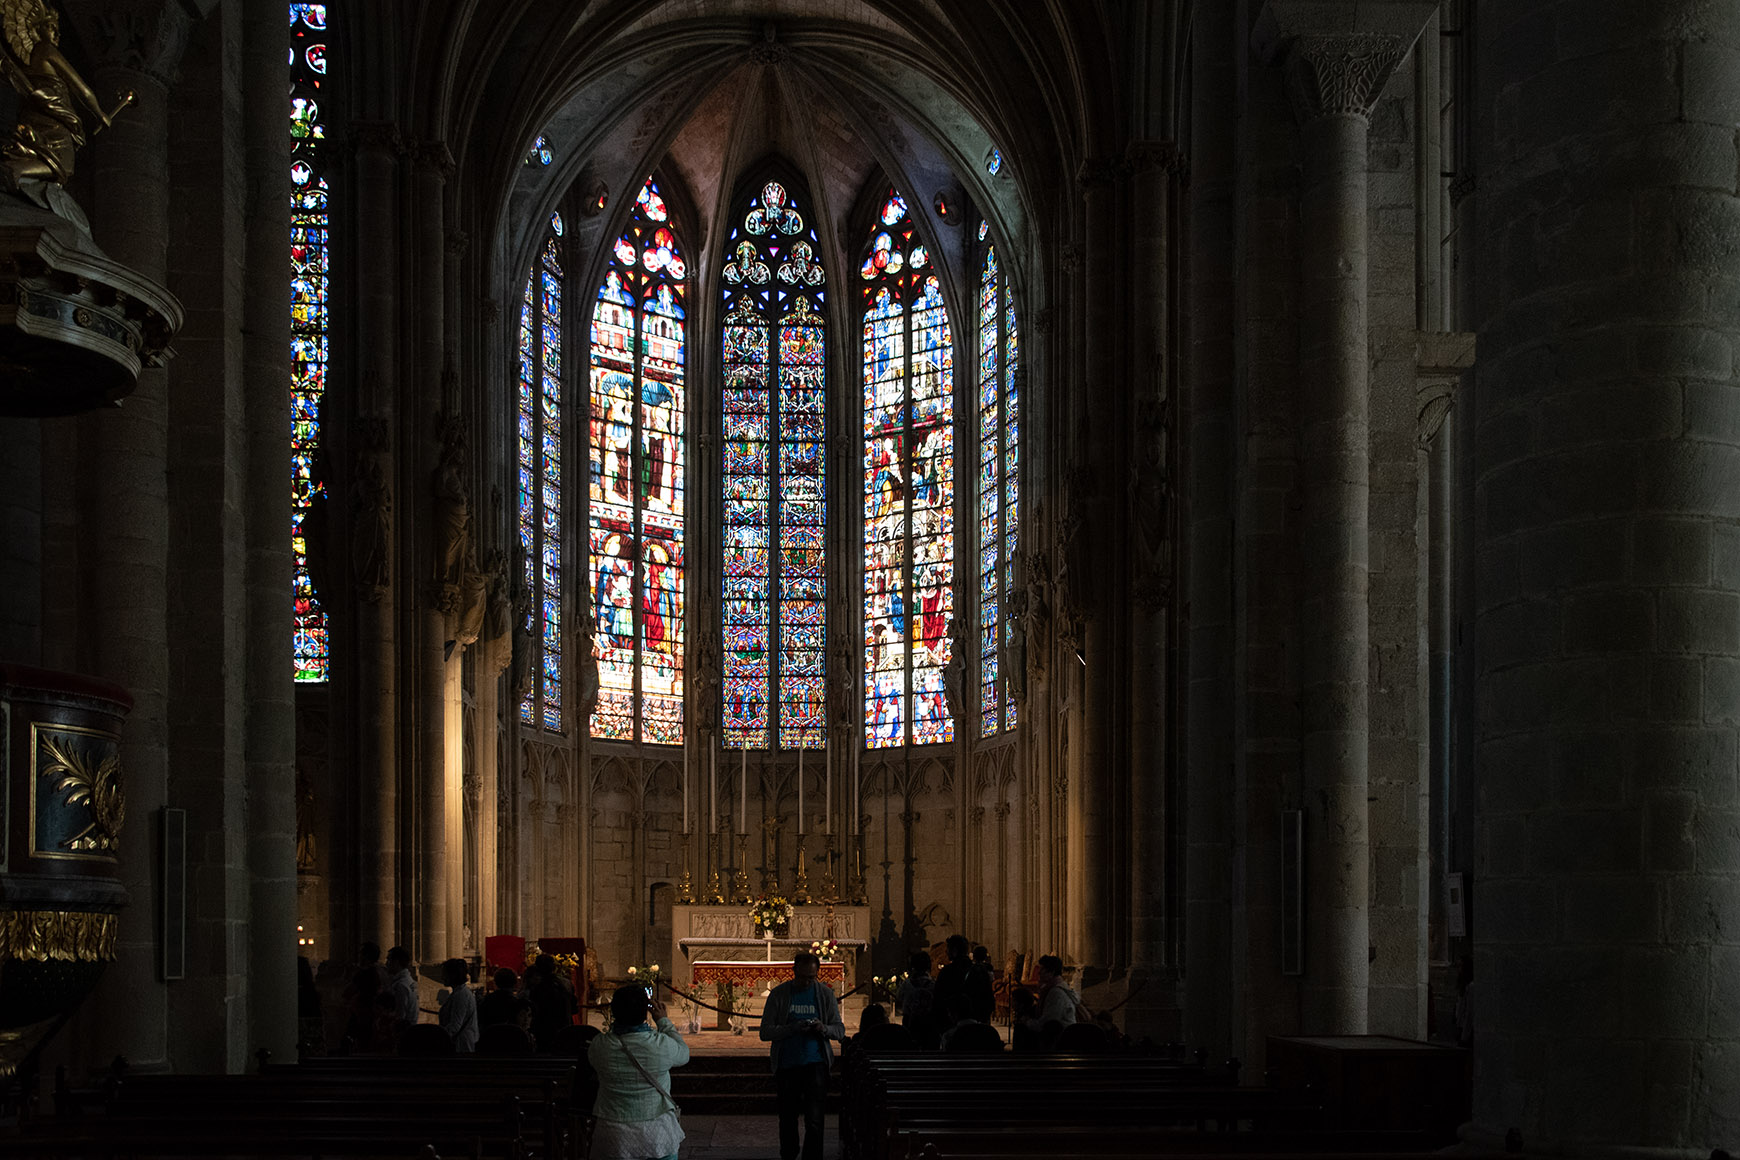
Photographing the interior of churches with stained glass windows is always tricky, because the camera tries to balance the exposure by making the dark portions of the image brighter, thereby blowing out the highlights, i.e., the windows, which are then rendered as solid white. Unfortunately, blown out highlights cannot be recovered, whereas it is easy to bring back details in the dark portions of the image. One way around this is to underexpose the image and then lighten up the shadows. In my example, the majority of the image is dark, and I further underexposed by two thirds of a stop.
|
Inside Basilique Saint-Nazaire, Carcassonne, France (Nikon D750, 28-300 mmm f/3.5-5.6 lens at 35 mm, f/5, 1/80s, ISO 4000, RAW) |
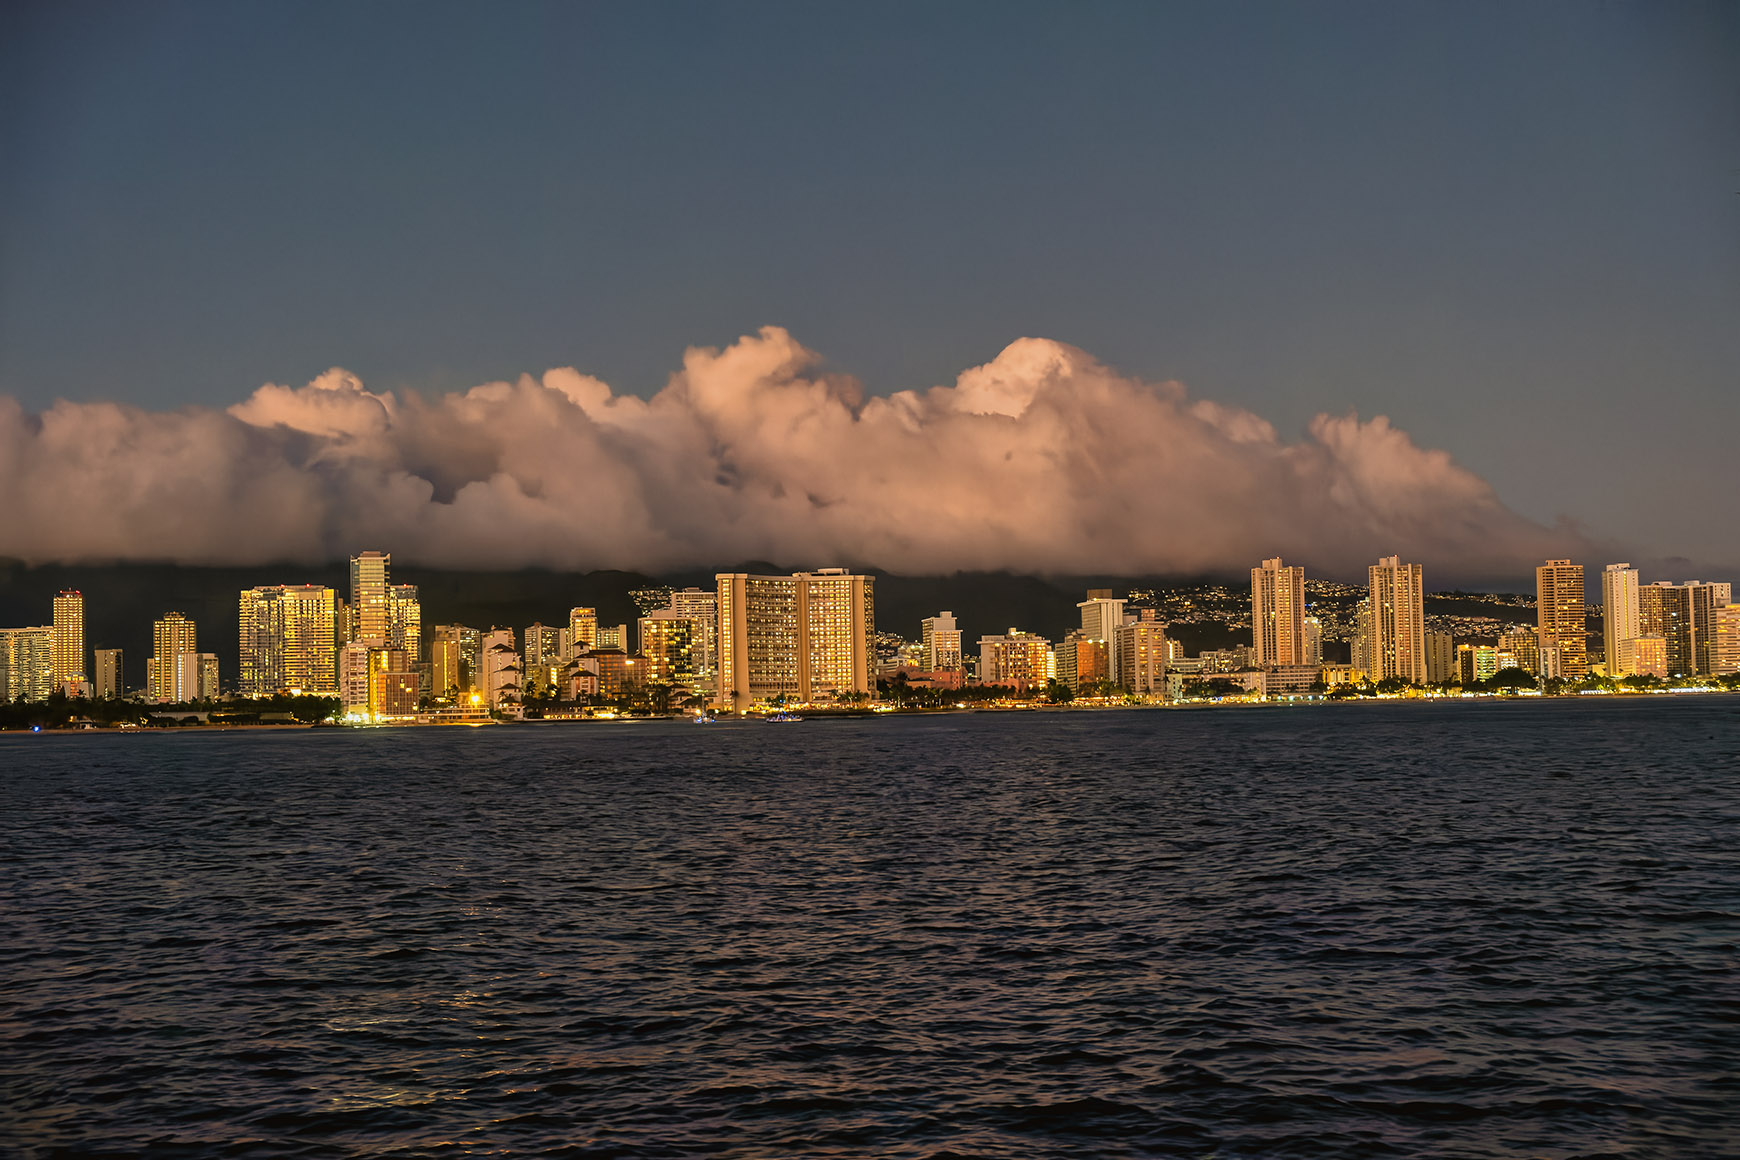
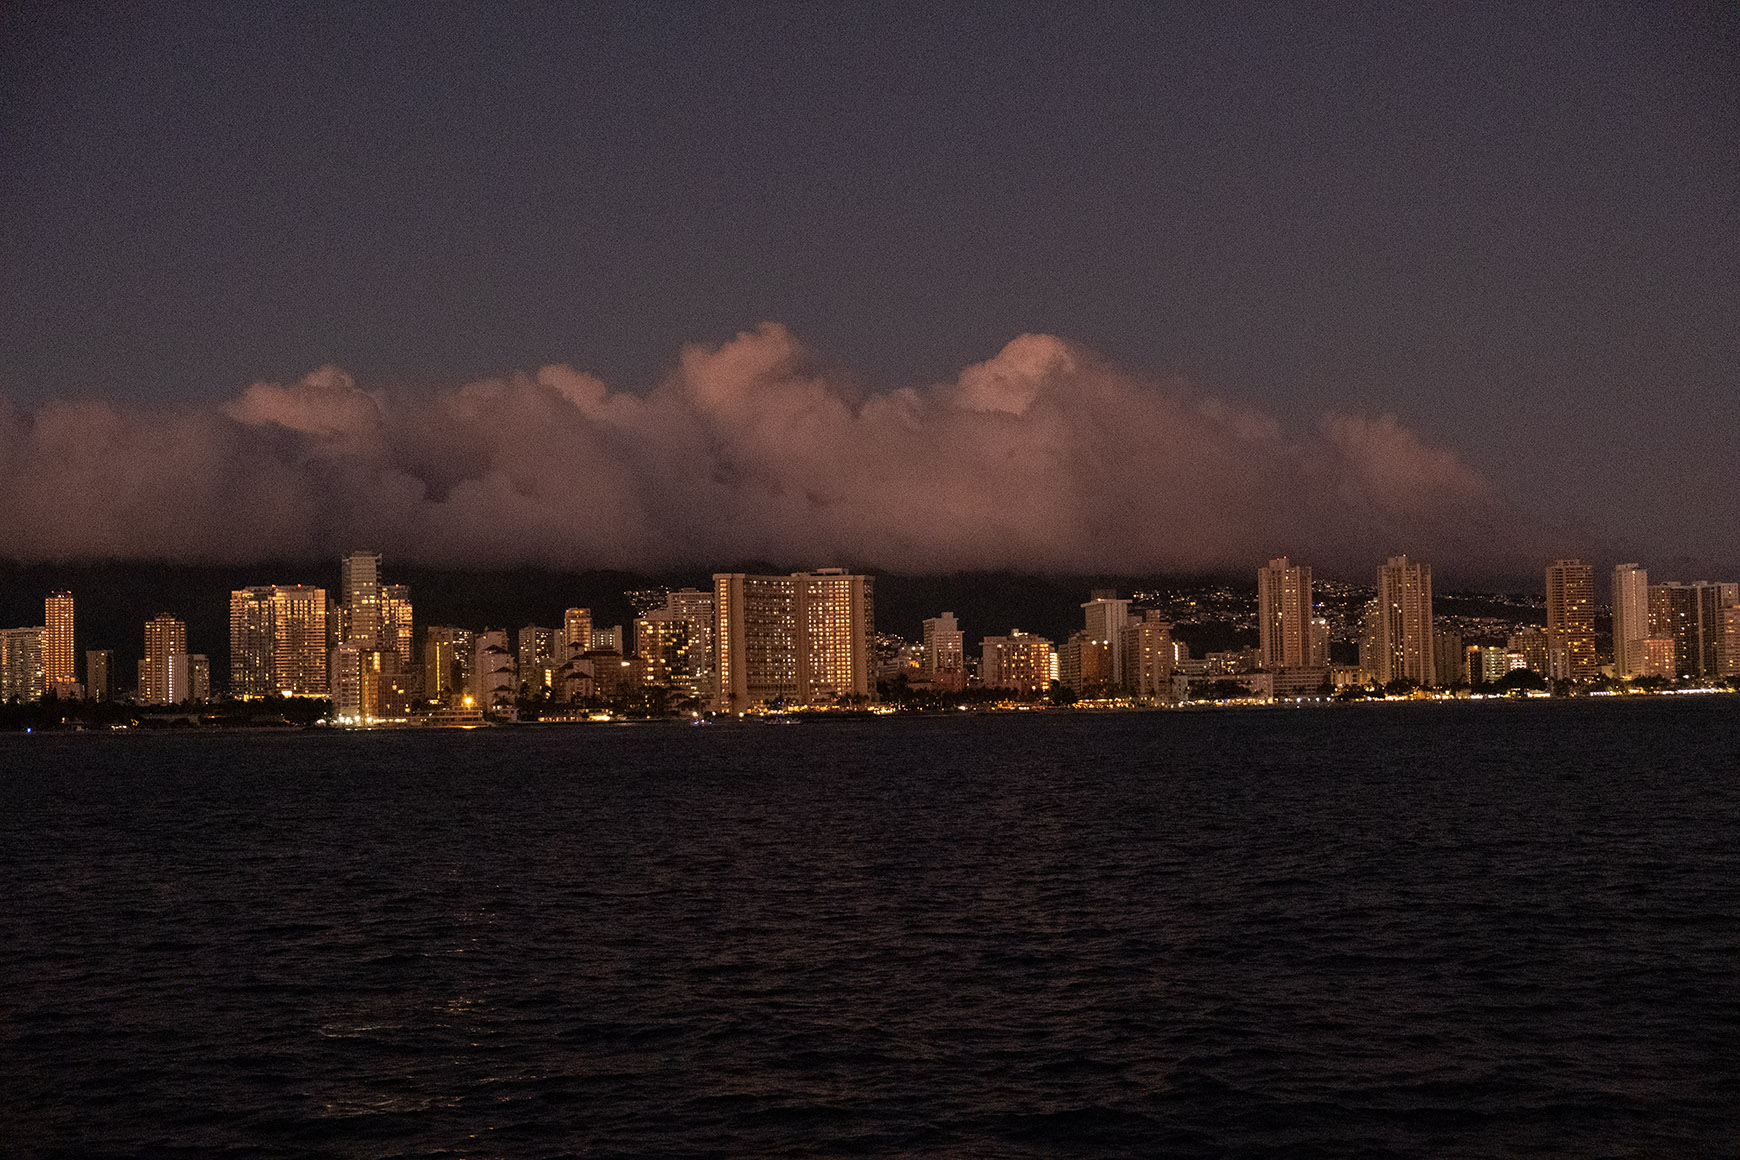
The last example deals with photographs taken well after sunset. They are usually shot at high ISO and require noise reduction, a bit of sharpening, and some light adjustment to bring out some details in the dark parts of the image (see, for example, the detail in the water before and after processing). Our last example was taken in 2021 with my Fujifilm X-T30. I underexposed by two thirds of a stop and shot at ISO 12800, probably the highest I have ever shot at. It shows how far camera sensors have come since the early days of digital photography.
|
View of Honolulu during a sunset cruise, Hawaii, USA (Fujifilm X-T30, XF18-55mmF2.8-4 R LM OIS lens at 47 mm, f/3.6, 1/80s, ISO 12800, RAW) |
Did I brighten the image too much? Whether or not you like my versions of any of these images better than what came out of the camera is absolutely irrelevant. The final image should be the expression of the photographer's vision, and not the result of some preset one-size-fits-all algorithm cooked up by some technician. When you process your photographs, the only opinion that counts is yours. Or perhaps you do not like spending time at the computer working on your photos? That's perfectly fine, but in that case, you might be better off shooting in JPEG rather than RAW. Most of today's cameras can produce excellent out of camera images, and some even allow you to create "recipes" to control the final output (look here or here for examples).
What you can take away from the admittedly simplified information presented on this page is this: anyone engaging in digital photography and intent on avoiding post processing completely should rely on their camera's raw converter to produce usable JPEG images. As shown above, out of camera JPEGs can be excellent. Shooting in raw without post processing is, as Rowan Atkinson famously said in the wonderful Blackadder series, like a broken pencil: pointless.
Home | Site Info | Family | The Area | Trips | France | Work | Rants | Photography | Odds & Ends
This page was last modified on October 1, 2026
Send feedback about this page to feedback@kiechle.com
https://www.kiechle.com/photography/postprocessing/index.htm
(optimized for Retina display)
All contents © 1999-2026 The Kiechles